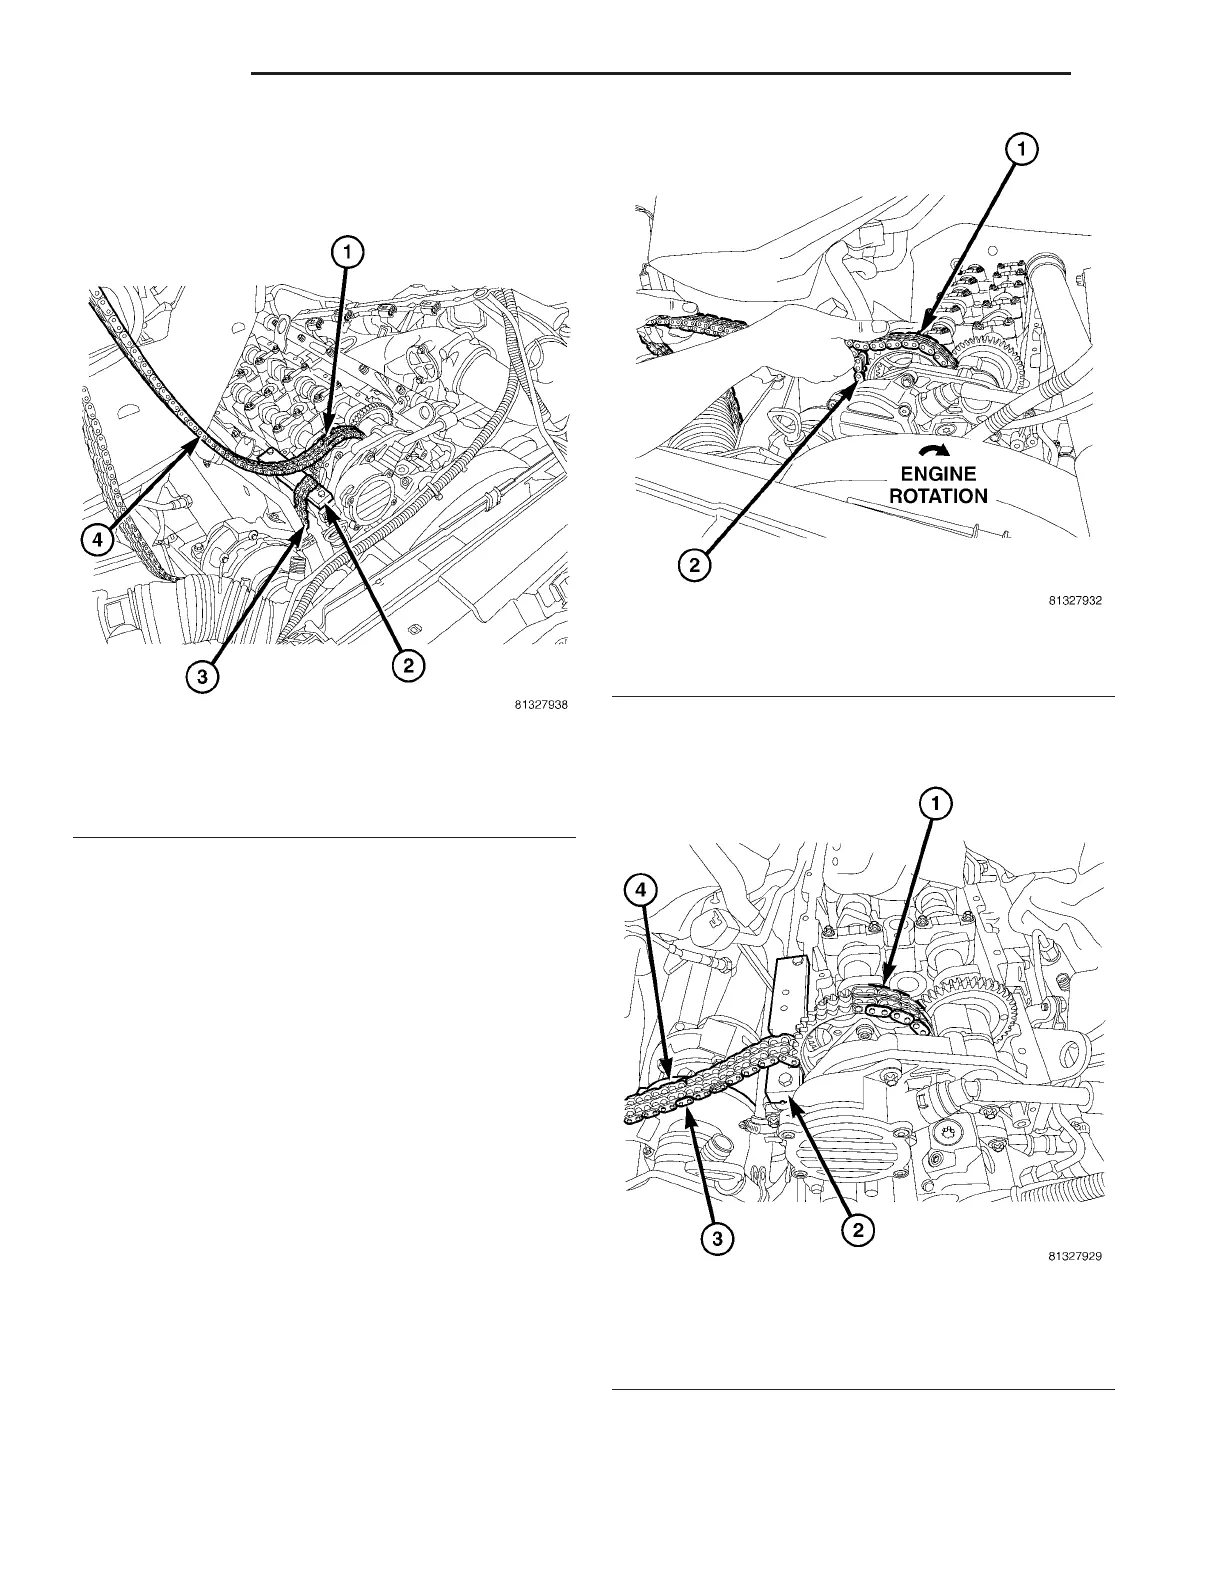
(1) Connect new timing chain, oil hole side up and
old timing chain with th e assembly lin k, the assem-
bly plat e and t he a ssem bly locking elemen t, a nd
secure (Fig. 82).
CAUTION: Always install the new timing chain with
the oil holes pointing up. Failure to do so will result
in severe engine damage.
NOTE: Always keep new timing chain meshed with
camshaft sprocket.
CAUTION: DO NOT CRANK ENGINE and DO NOT
ROTATE ENGINE BACKWARD. Engine rotation is
clockwise, as you are looking at the engine. Rotate
engine at crankshaft only.
NOTE: Draw out the end of old timing chain evenly
as it becomes free, to the same extent that new tim-
ing chain is drawn in.
(2) Draw in new tim ing cha in wit h the oil holes
facin g u p, by rotating th e cra nksh aft slowly in direc-
tion of r otation of engine. (Fig. 83).
(3) Rotate the engine unt il the ends of th e new
timing chain meet a nd can be con nected (Fig. 84).
NOTE: Assembly link is only an assembly aid and
NOT designed for engine running.
Fig. 82 OLD AND NEW TIMING CHAIN UNION
1 - TEMPORARY TIMING CHAIN LINK
2 - SPECIAL TOOL 9525
3 - OLD TIMING CHAIN
4 - NEW TIMING CHAIN
Fig. 83 TIMING CHAIN INSTALLATION
1 - NEW TIMING CHAIN
2 - OLD TIMING CHAIN
Fig. 84 TIMING CHAIN ROTATION COMPLETE
1 - NEW TIMING CHAIN
2 - SPECIAL TOOL #9525
3 - TEMPORARY LINK
4 - OLD TIMING CHAIN
9 - 78 ENGINE VA