The Z-Drive Assembly
DSX™ System Service Manual 7-27
7.4.6 Replacing the Z Motor
To remove the Z motor assembly, unscrew the four M3 x 30 Flat head screws (Figure 7-29)
and disconnect the wires.
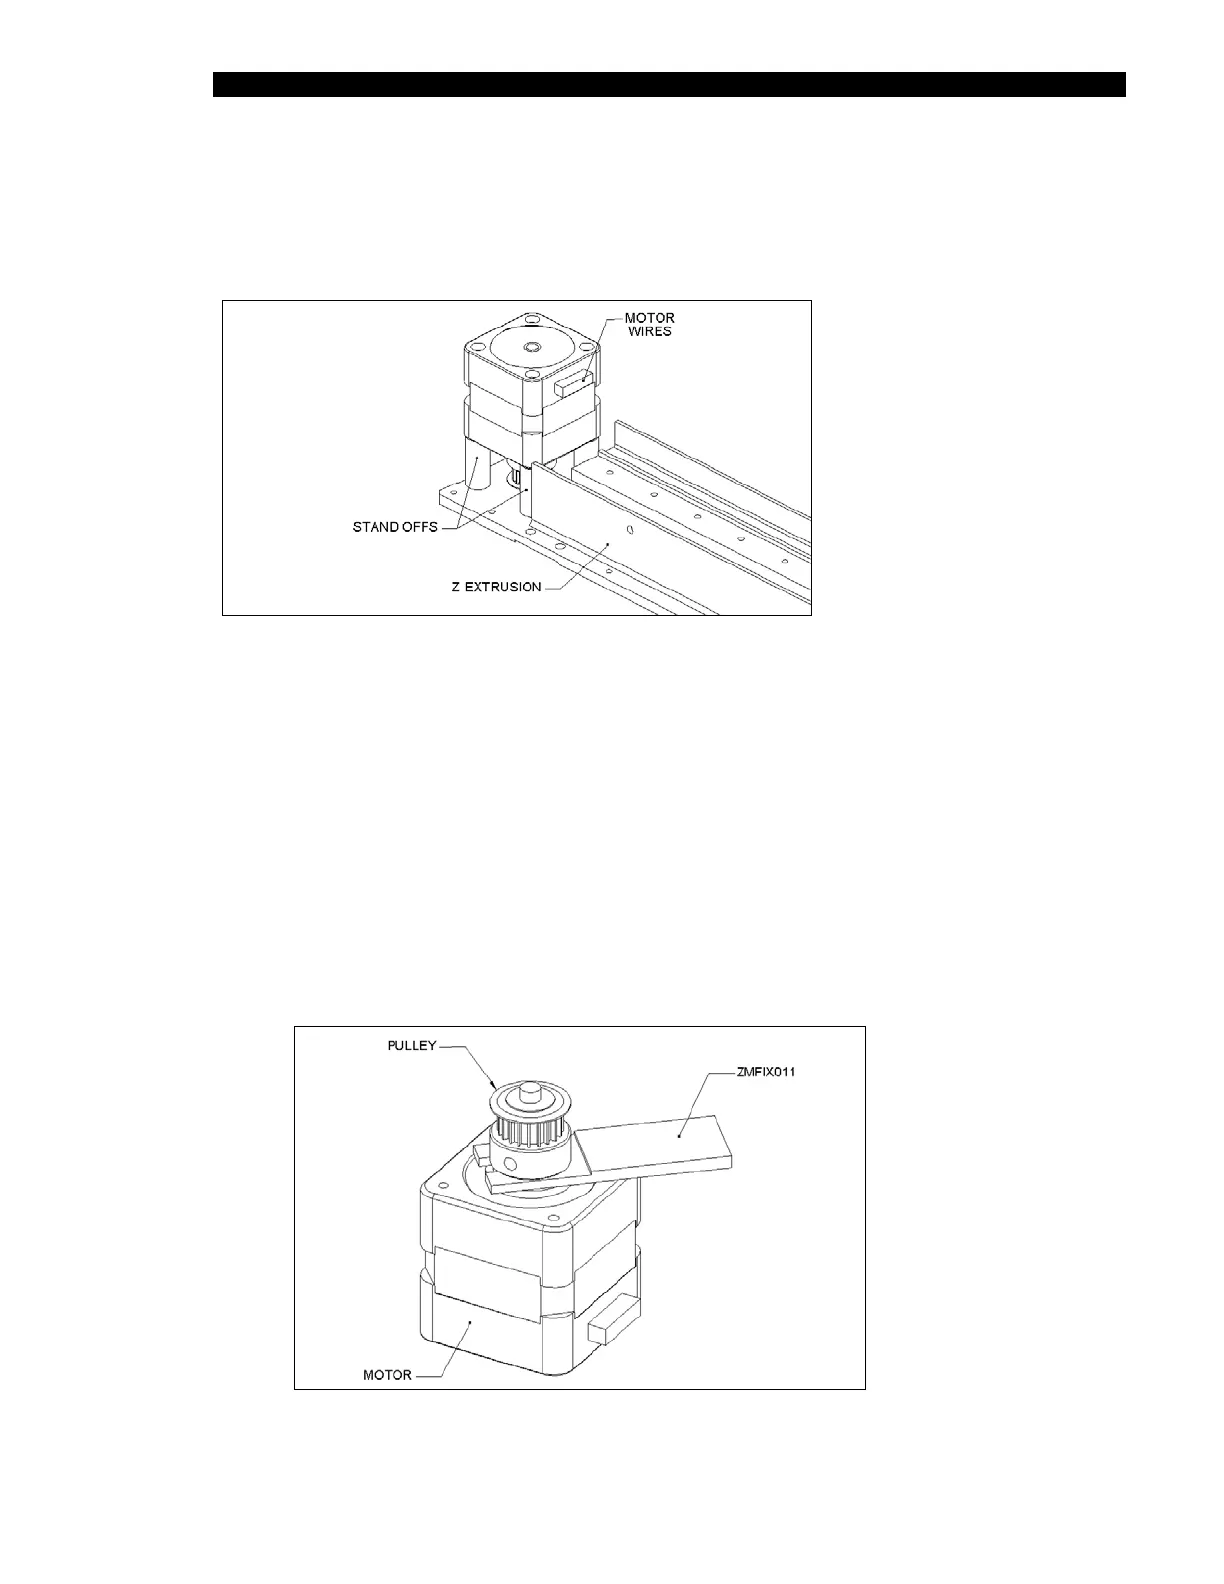
Figure 7-29 Replacing the Motor Assembly
To Replace the Motor:
1 Remove the Z-Motor Pulley from the old motor and place it on the new motor
2 Using the Z Motor Pulley Height Setting Jig (ZMFIX011), fit the pulley (Part No.
320101000) to Z Motor (Part No. 528300900) using one M4X6 Cone Point Set
Screw Part No. 307400406) and Loctite 222 (Figure 7-30). Discard the setscrew
supplied with the pulley. If the jig is not available, set the distance between the
pulley and the motor base to 2.2 mm.
3 When reattaching the motor, use Loctite 222 on the screws and ensure that the
wires are facing the Idler Assembly.
Figure 7-30 Affixing the Pulley to the Motor