Repairing/Replacing Internal Components
DSX™ System Service Manual 13-21
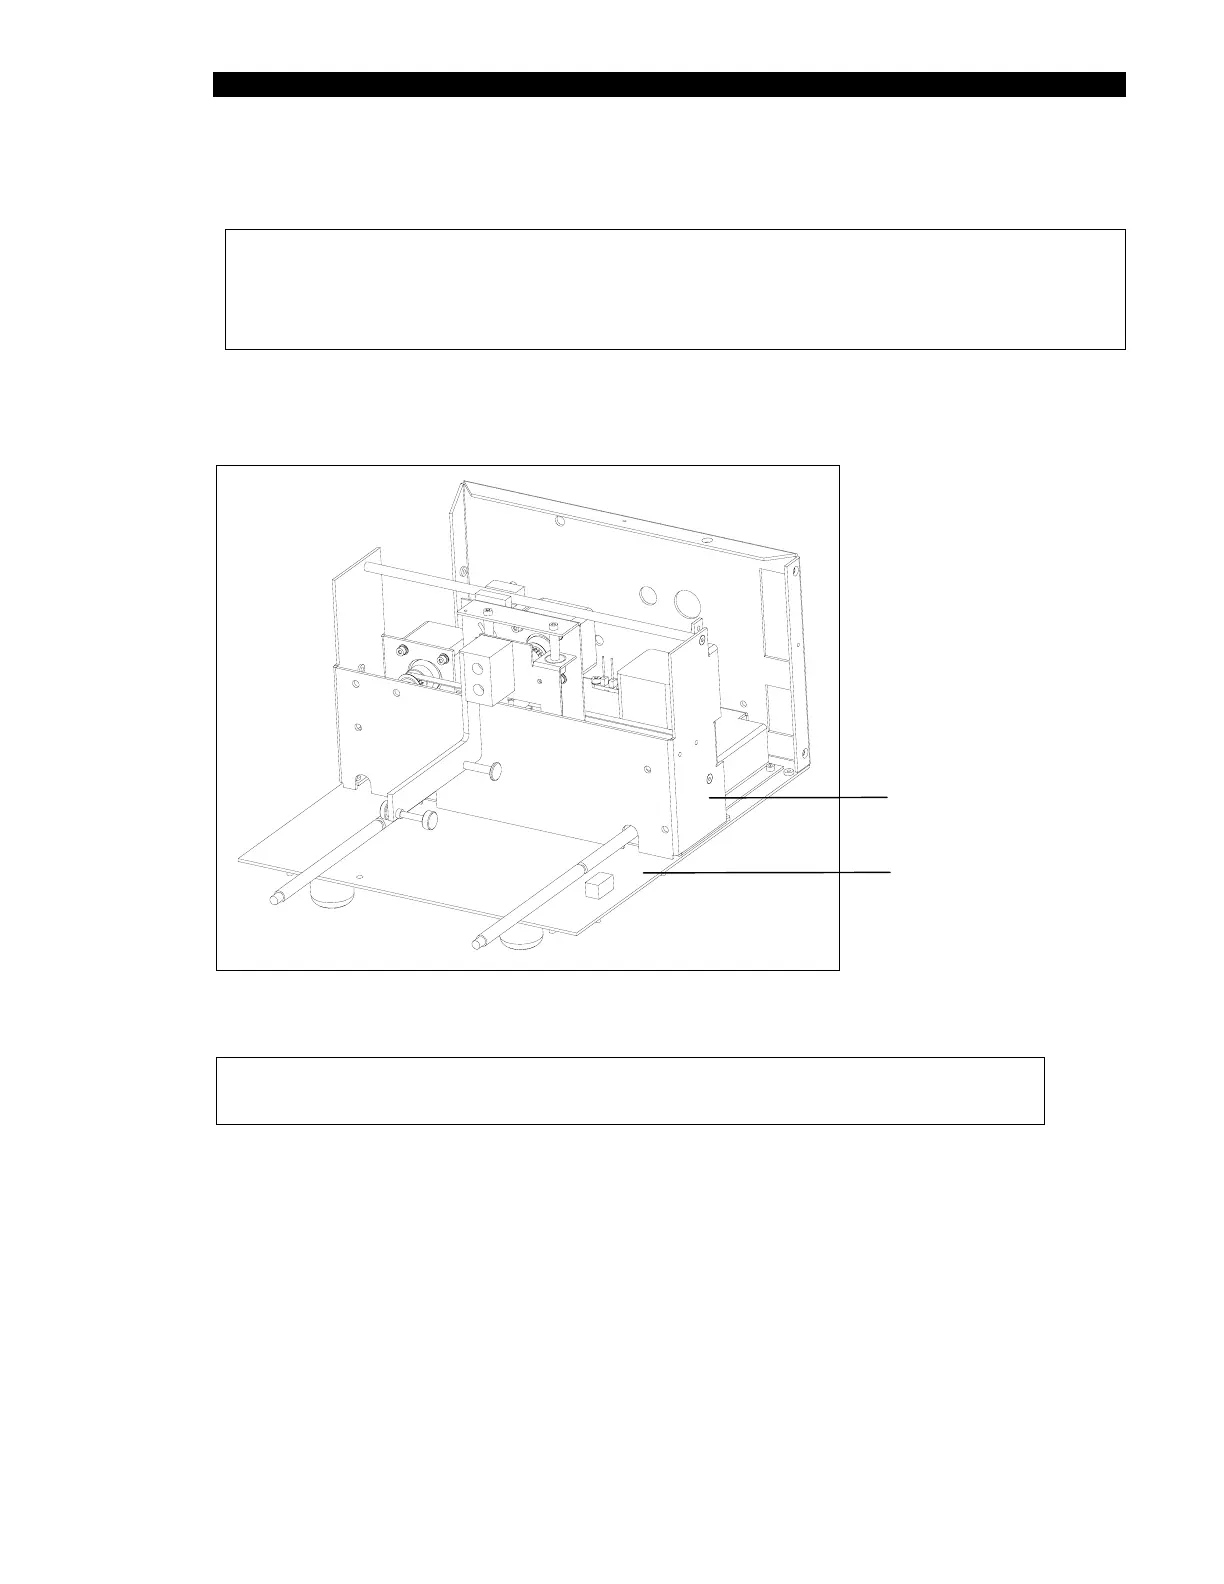
13.4.4 Mounting the X/Z Subassembly
Note: The X/Z Subassembly can be replaced as a unit or various components can
be replaced by the service engineer. In this section, we describe the removal and
re-installation of the entire sub-assembly, to replace individual components, refer
to page 13-22.
The X/Z subassembly is removed from the baseplate by removing the four M3 x 10 Caphead
Screws (Figure 13-13)
Baseplate
Assembly
X/Z Drive
Assembly
Figure 13-13 Mounting the Wash X-Z Subassembly
Note: When replacing the screws, secure them with Loctite 222.