Servicing Internal Components
15-8 DSX™ System Service Manual
15.4.2 Replacing the Motor
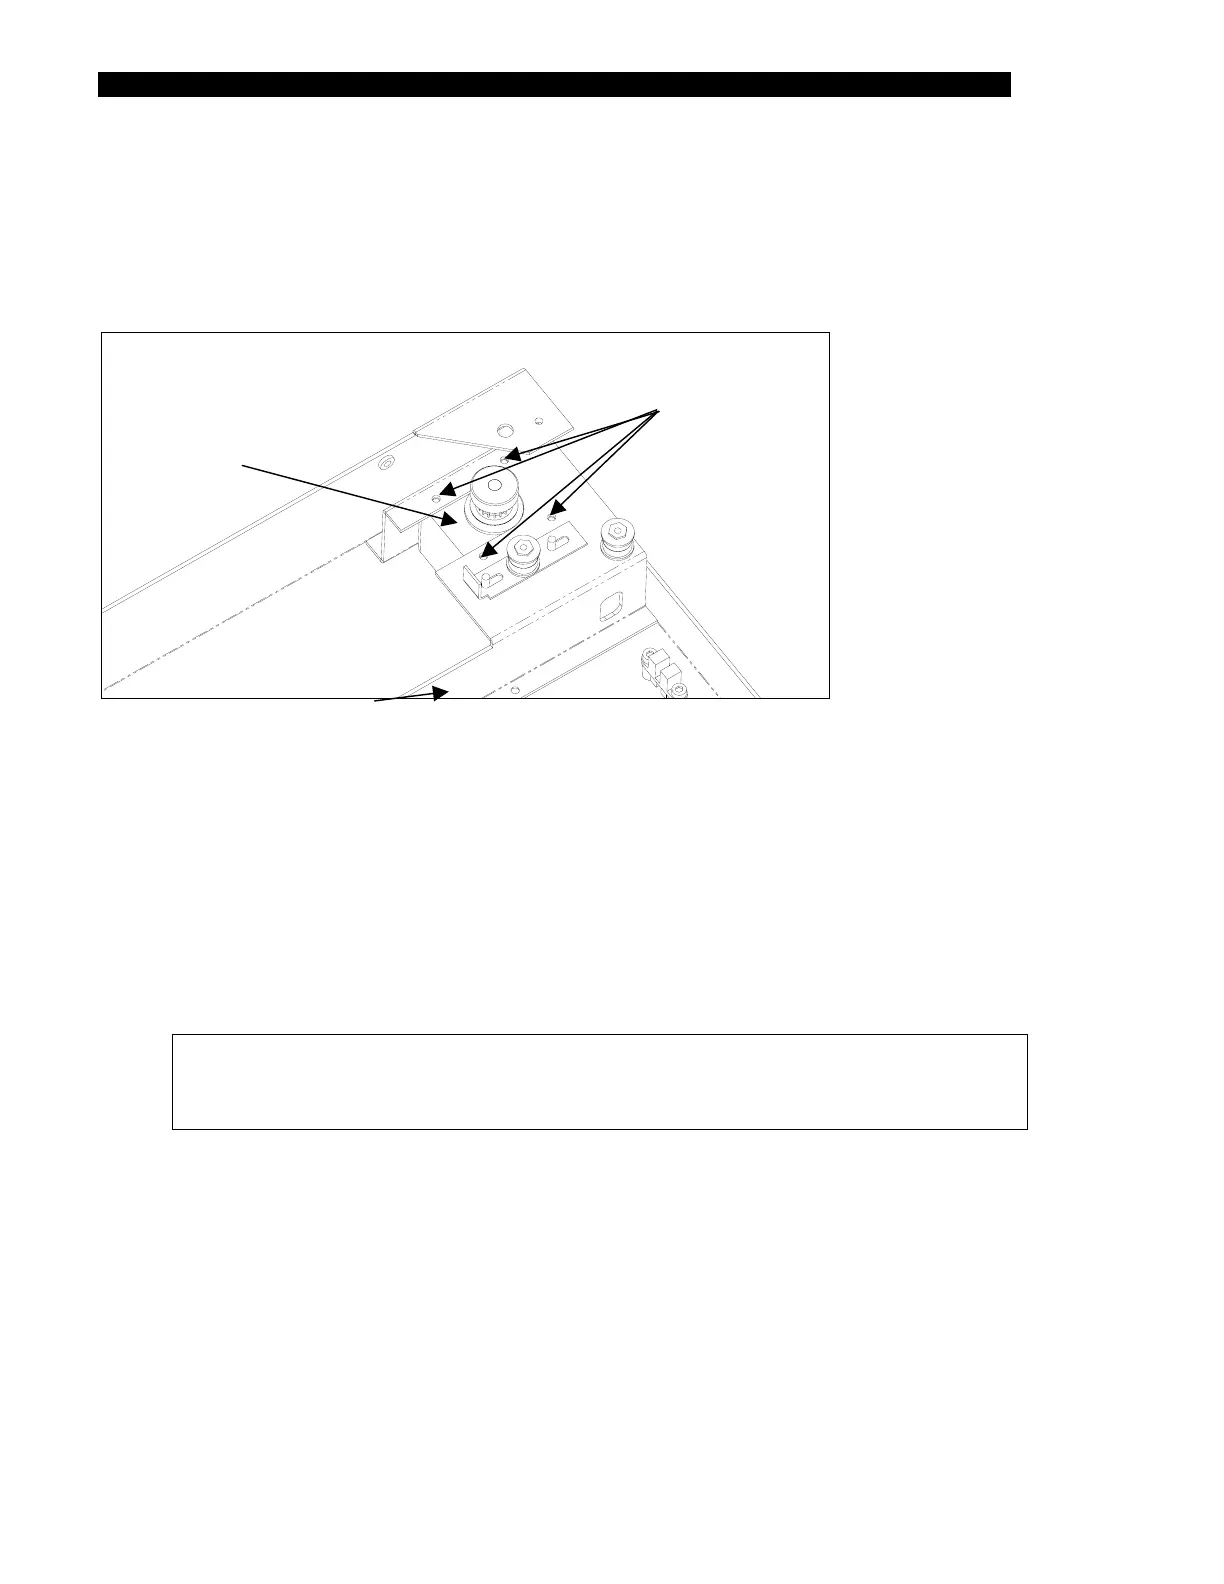
The Drive Motor is mounted directly onto the lower enclosure using four M3x6 button head
screws. The screws are secured with Loctite 222.
Four Screws
Motor
Subassembly
Figure 15-7 Motor Subassembly
To Replace the Drive Motor:
1 Loosen the belt and remove it from the motor pulley.
2 Remove the four mounting screws (Figure 15-7).
3 Disconnect the motor cables from the ambient drawer main circuit board. Free the
cables from the cable clamp.
4 Lift out the motor subassembly.
Note: If necessary, transfer the motor pulley from the old motor assembly to
the new one. The pulley is mounted on the motor using a M3 x 4mm setscrew
and Loctite 222. The pulley should be flush with the end of the motor shaft.
5 Place the new motor in position. Secure the motor using the mounting screws
removed in Step 1.
6 Route the motor cables to the ambient drawer main circuit board. Connect the
motor cables to the J6 connector on the circuit board.
7 Secure the motor cables to the wire clamp using a tie wrap.