Repairing/Replacing Internal Components
DSX™ System Service Manual 11-39
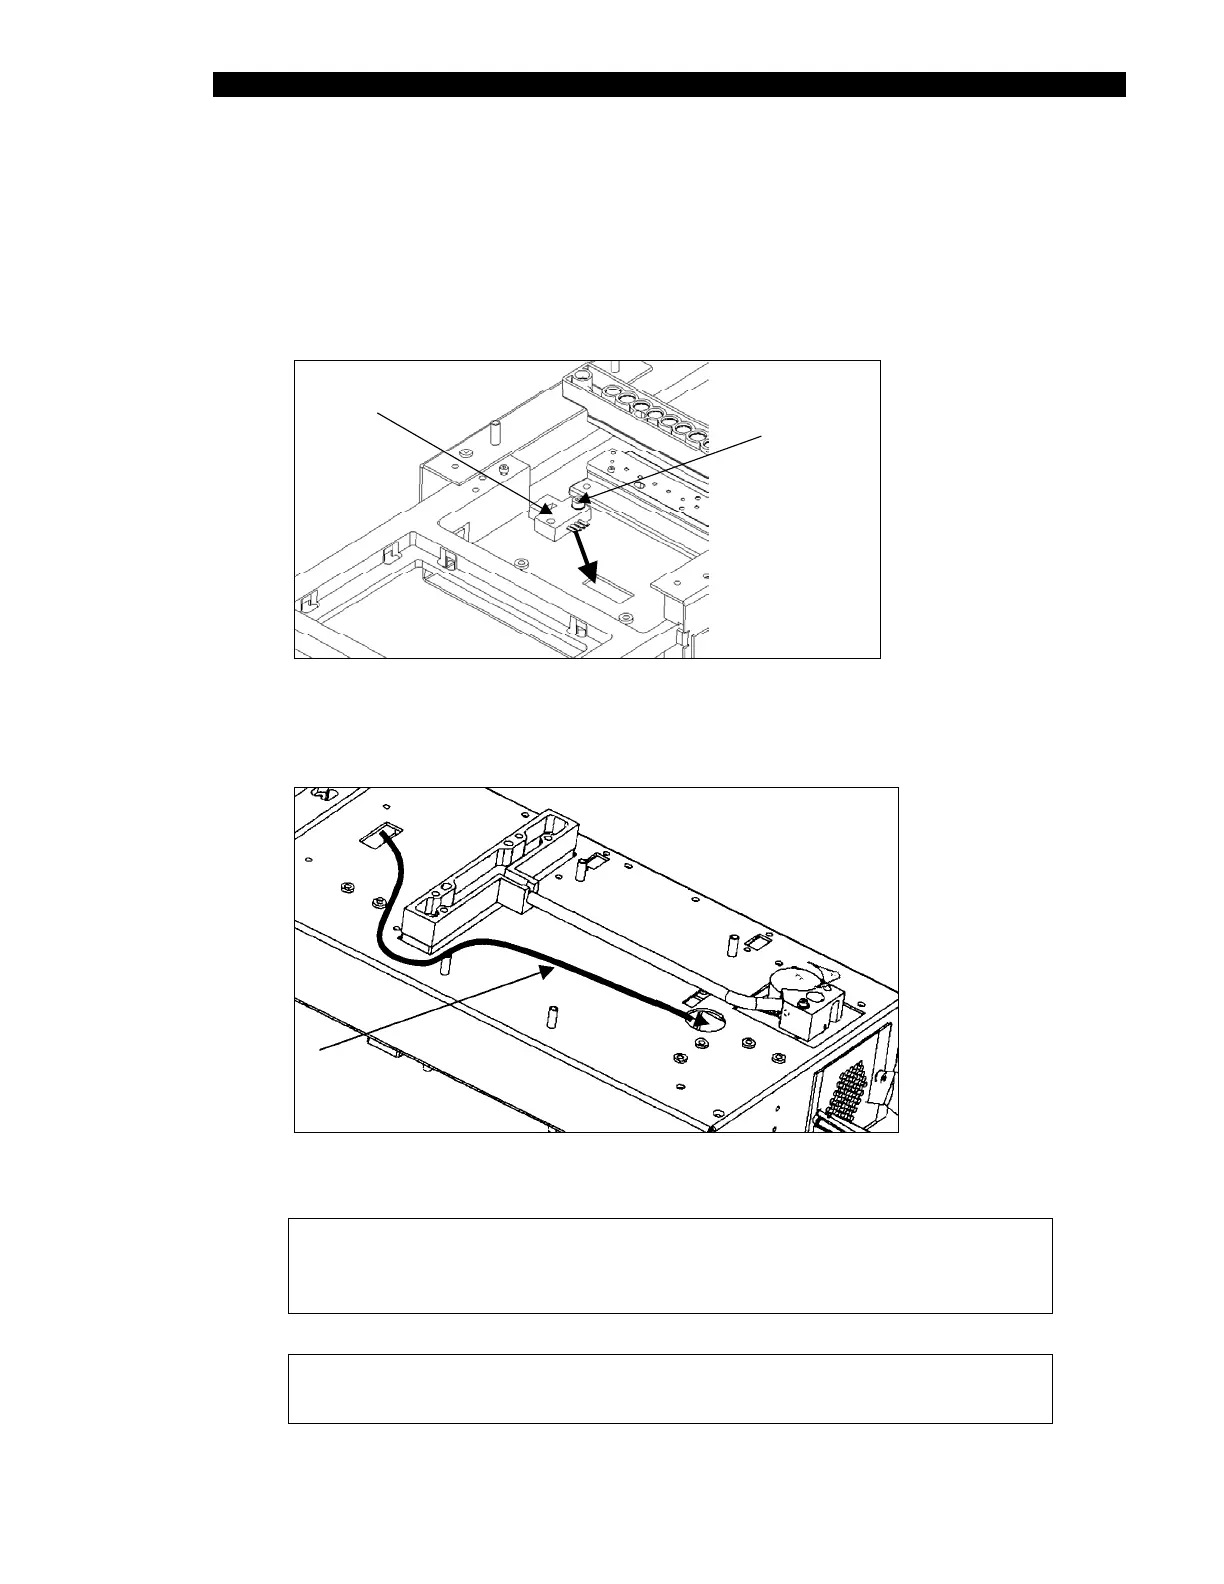
11.4.20 Removal of the Eject Sensor
To Remove the Eject Sensor (Part No. 15000600):
1 Remove the two M3 x 10 SHCP screws and two M3 lockwashers (Figure 11-34).
EJ ECT
SENSOR
SCREWS AND
LOCKWASHERS
ROUT
Figure 11-34 Eject Sensor
2 Remove the cable as shown in Figure 11-35.
EJ ECT SEN SO
CABLE PATH
Figure 11-35 Cabling for Eject Sensor
Note: When re-installing the cable, route cable through cut-out as
shown. Ensure that cable from eject sensor lies flat on chassis to
prevent interference with plate carrier movement.
Note: After installation, the eject sensor must be calibrated using
DynexTest software.