The Y-Drive Assembly
DSX™ System Service Manual 7-31
7.5 The Y-Drive Assembly
7.5.1 Removing the Y-Drive Assembly
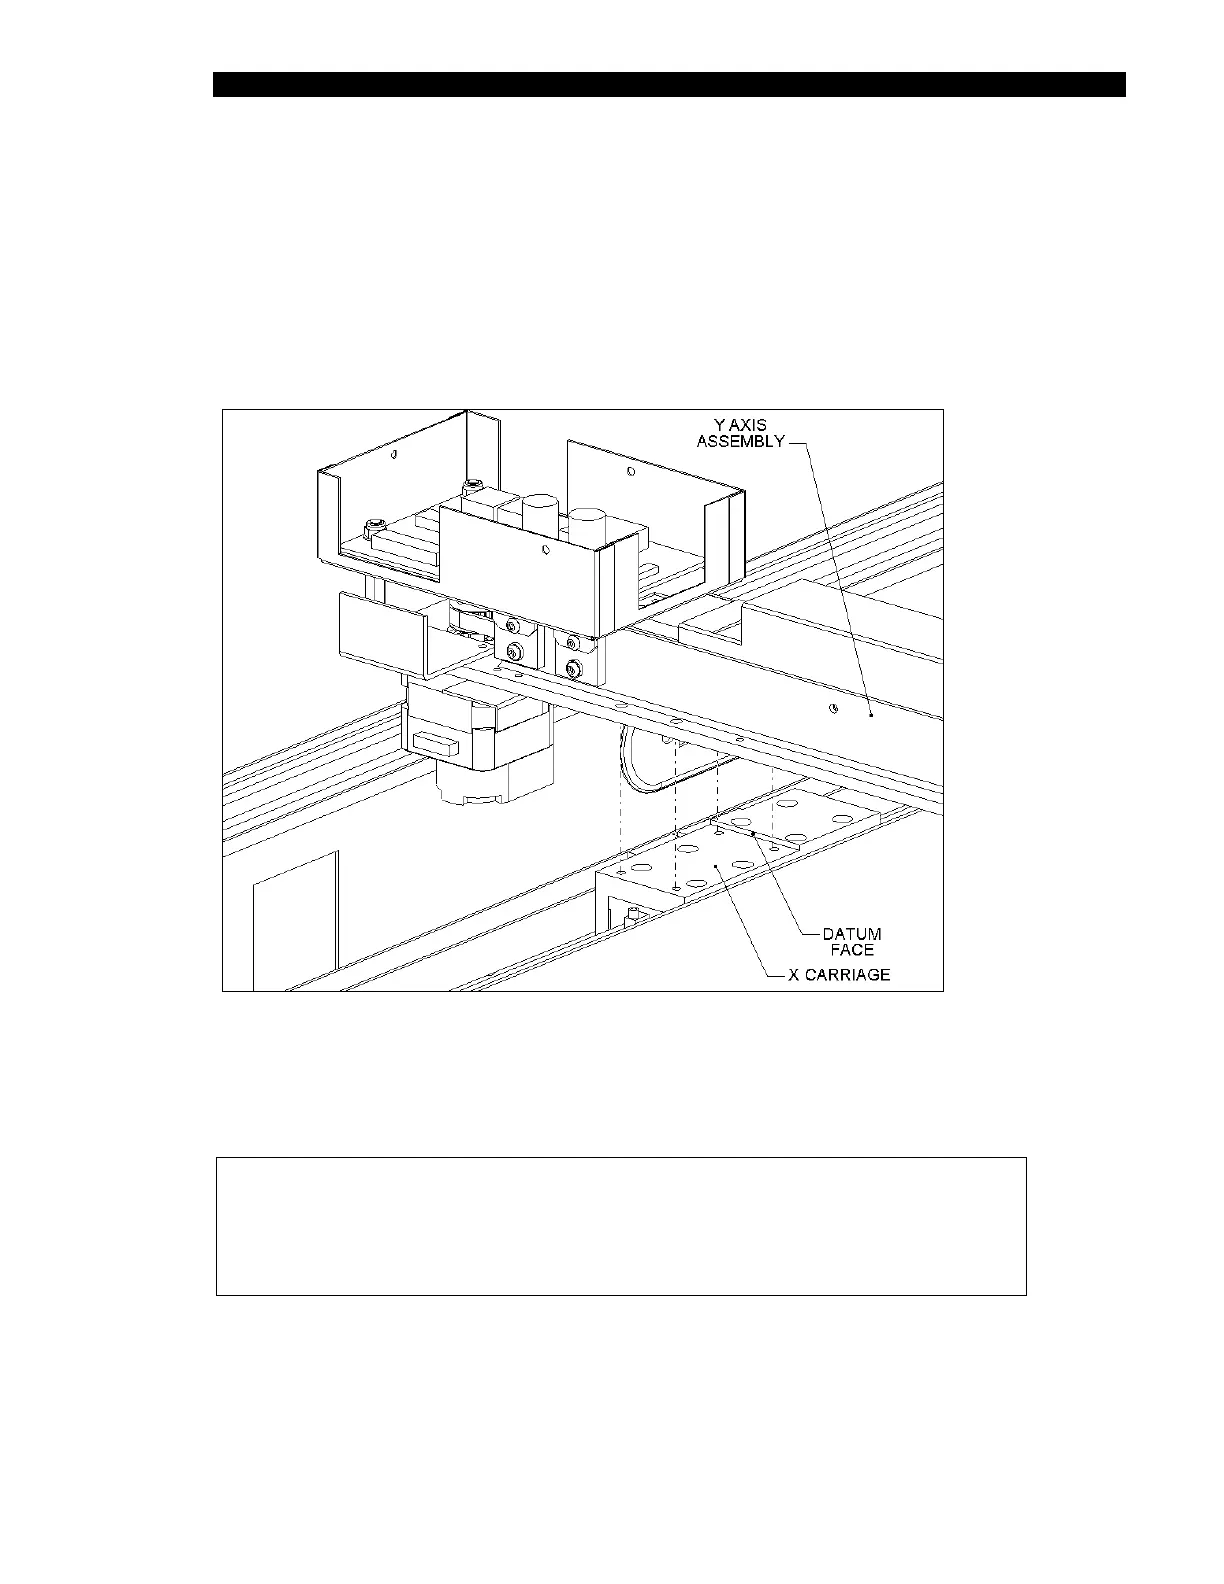
The Y-Drive Assembly is attached to the X-Drive Assembly as shown in Figure 7-35. To
remove the Y-Drive Assembly, remove the four M4 x 10 SHCS Screws and 4 M4 washers
that attach the Y-Drive Assembly to the X assembly (Figure 7-35).
Figure 7-35 Mounting the Y-Drive Assembly on the X-Drive Assembly
When re-attaching the Y-Drive assembly to the X-Drive Assembly, hold the Y-Drive
Assembly tight against the datum edge, and tighten the screws.
Note: Apply Loctite 222 to the screw before tightening them.
Be sure to hold the Y-Drive Assembly tight against the datum edge when
reassembling. Otherwise there may not be sufficient travel along the
Y-axis, causing problems when the seventh rack is handled.