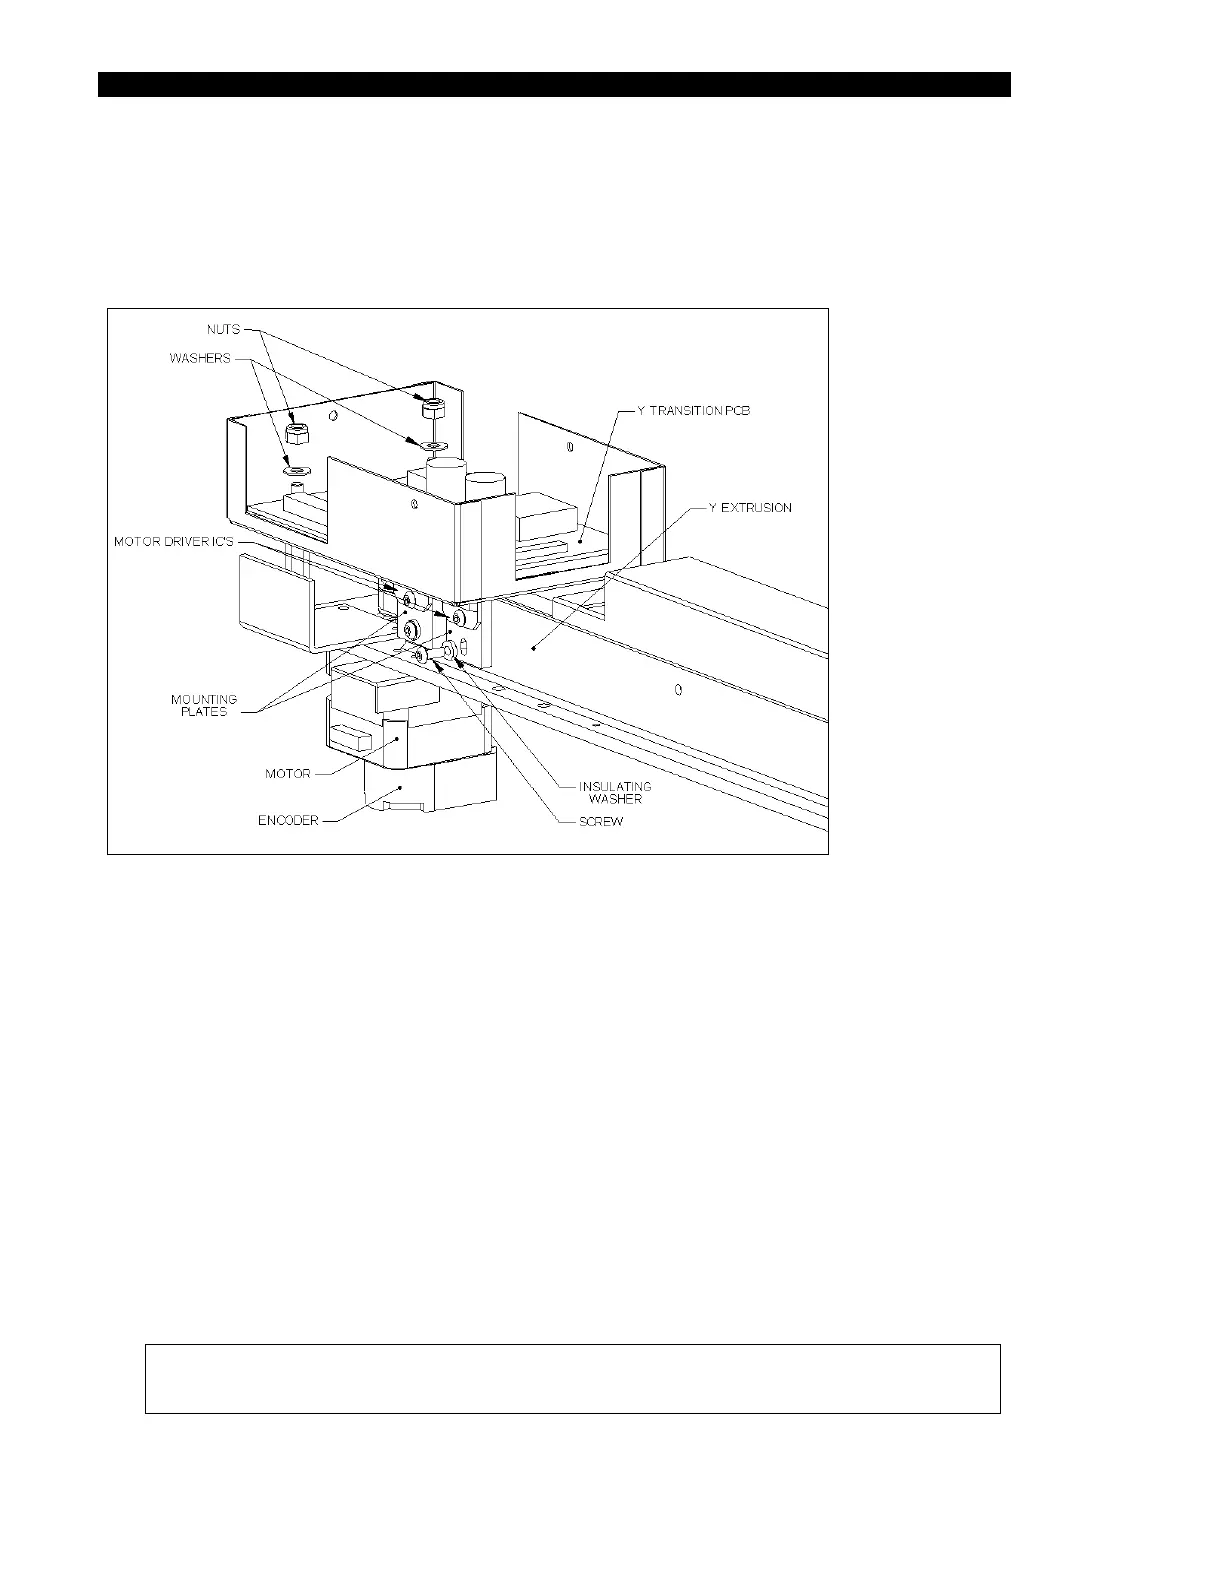
The Y-Drive Assembly
7-32 DSX™ System Service Manual
7.5.2 Removing the Y-Transition Printed Circuit Board
The Y-transition printed circuit board (Part No. 582050502) is mounted in the EMC box
mounted as shown in Figure 7-36.
Figure 7-36 Y Transition Board Mounted in EMC Box
To Remove the Board:
1 Disconnect the motor cable from J1, the encoder harness from J6 and Y-Axis
Optical Interrupter from J5.
2 Remove the 2 M4 Nyloc Nuts and M4 Nylon Washers that attach the board to the
EMC box.
3 Remove the IC Mounting Plates to the Y extrusion using 2 M3 x 8 buttonhead
screws.
When you replace the board, slide insulation (Part No. 344001201) between the motor
driver IC plates and the Y extrusion and secure the IC mounting plates to the extrusion
and assemble in reverse order.
Note: The cover for the EMC box should be added after the Y-axis is mounted
on the system.