Replacing Components - Y-Drive Assembly
13-36 DSX™ System Service Manual
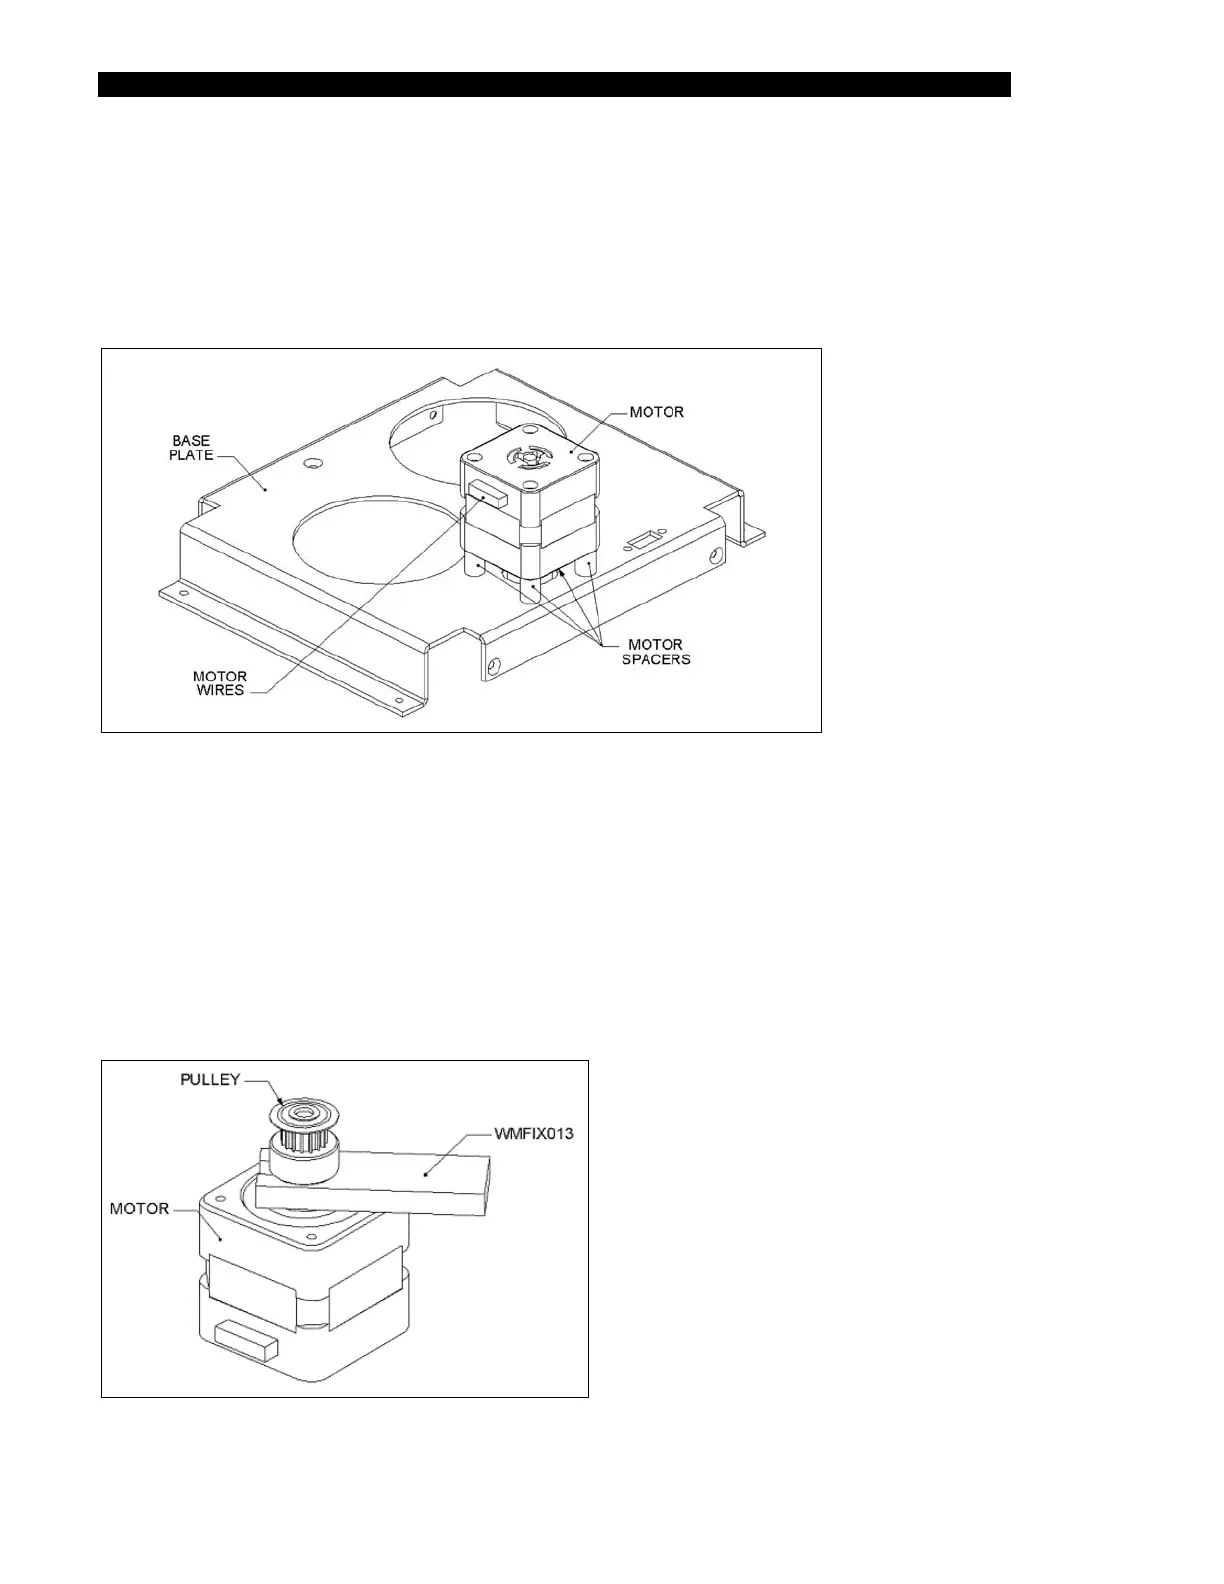
13.6.5 Replacing the Motor Assembly
To remove the Motor Assembly, remove the 4 M3 x 16 cap head screws and Motor Spacers
(Figure 13-30).
When replacing the motor assembly, use Loctite 222 to secure the screws.
Figure 13-30 Y Motor Assembly.
13.6.6 Replacing the Motor Pulley
The Pulley (Part No. 32010800) is mounted on the motor and is removed by loosening the M
4x 6 set screw.
When replacing the pulley, the Y Motor Pulley Height Setting Jig (WMFIX013) should be
used as shown in Figure 13-31. If the jig is not available, the pulley should be mounted
6.5 mm above the motor.
Figure 13-31: Attaching the Motor Pulley