Servicing Internal Components
DSX™ System Service Manual 15-13
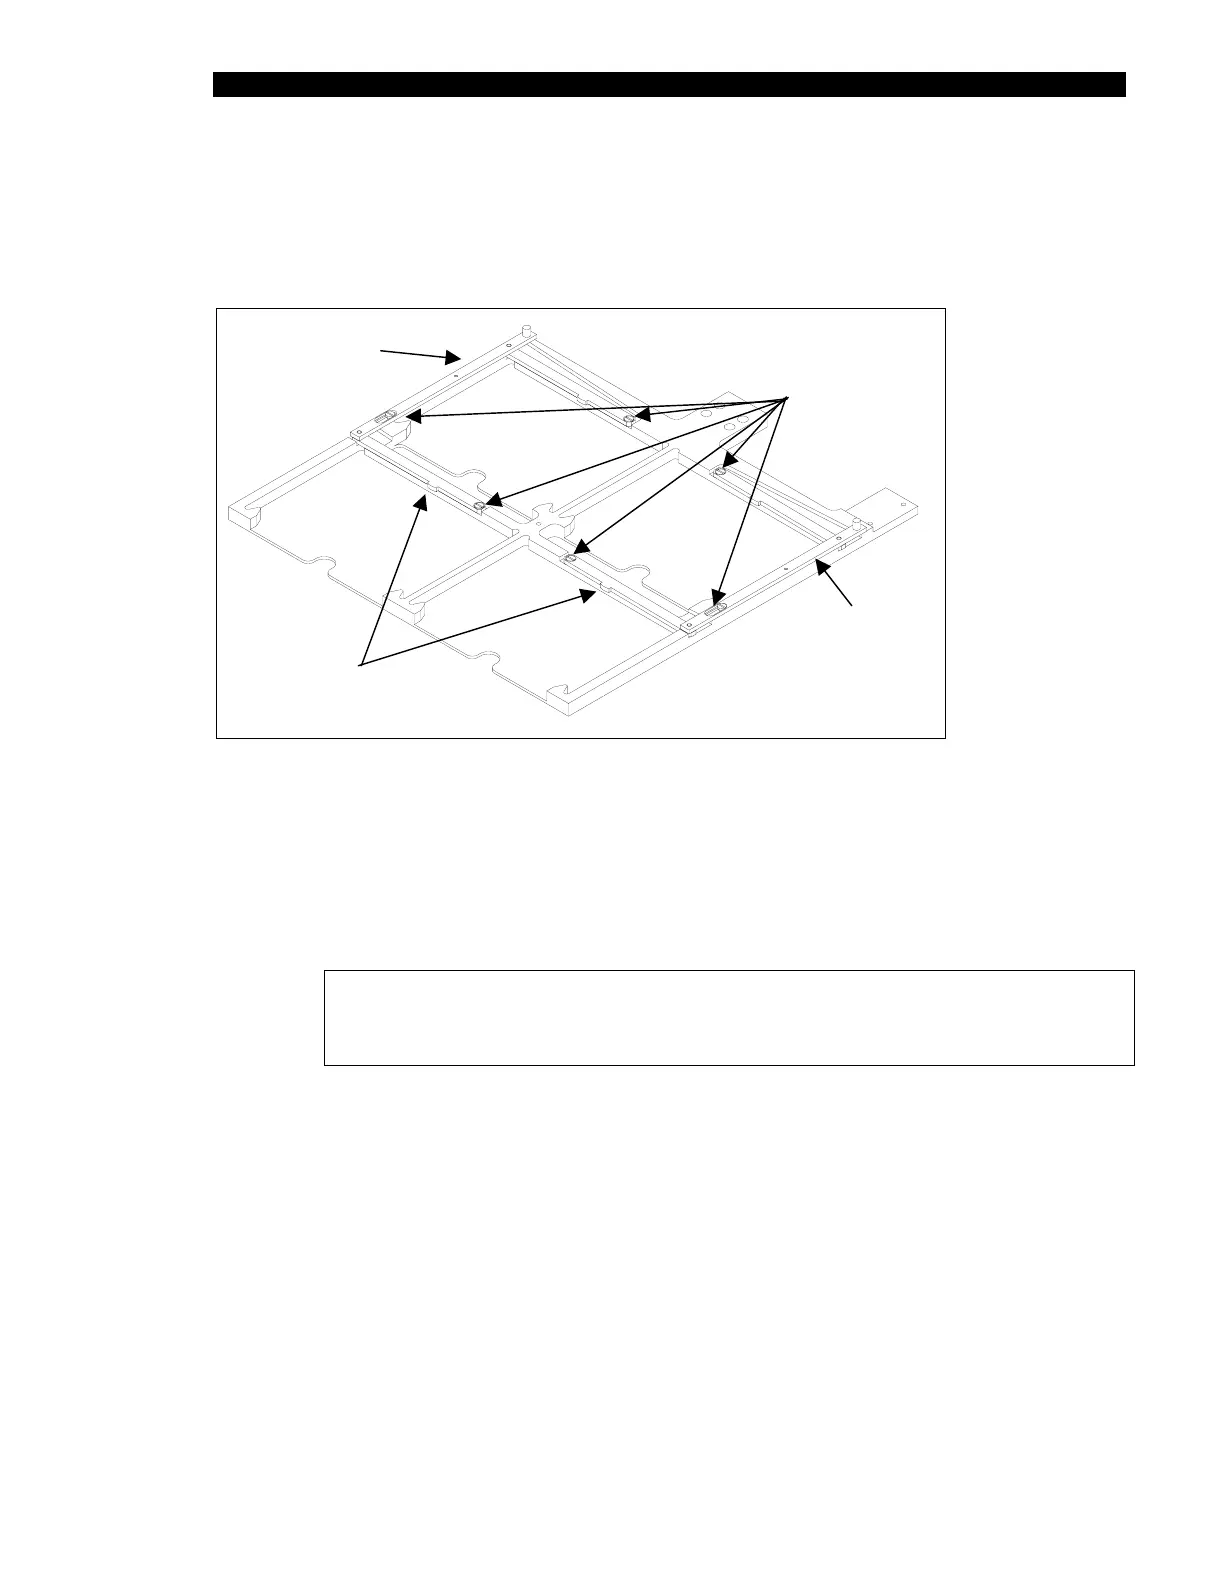
15.4.7 Replacing the Actuating Levers
Locking nubs (Figure 15-12) are used on the actuating levers to maintain the plates in
position.
LEFT
Locking Nub
RIGHT
Shoulder Screws
204020200
Spring
324001200
Spring
324001200
Figure 15-12 Locking Nubs on the Actuating Levers
To Replace the Actuating Lever Subassembly:
1 Remove the three shoulder screws (Figure 15-12) that secure the right (or left)
actuating lever assembly to the drawer. Remove the actuating lever assembly
from the drawer.
Note: When removing the actuating lever assembly, note the position of
the spring (Part No. 324001200) between the spring pin on the actuating
lever and the spring pin in the spring groove of the drawer.
2 Install the new (right or left) actuating lever assembly. Be sure that the spring is
installed and properly positioned.
3 Secure the actuating lever subassembly to the drawer using three shoulder
screws that were removed in Step 1.
4 Repeat the above process on the other side of the drawer using left actuating
lever sub-assembly and the second spring.