K117sm7e2
7-25
7. 2. 2.10 Dirt on the back of the print
Check the following matters with the Test Pattern No.1 S(0) and No.4 S(0).
If necessary use other Test Patterns.
Cause Checking
order
Checking Result Treatment
1 Try to readjust each image creation
component according to [7.2.1 Basic
Image Adjustment].
Is the problem fixed?
Yes OK
Transfer
Guide Plates
2 Are Transfer Guides or the black rubber
area of the guide plate near Transfer /
Separation Corona dirty with the toner?
Yes Clean them.
After that, check the distance
between Transfer Guide and
Drum. (It should be 0.5 to
0.7mm.)
Developer Unit 3 Is too much toner accumulating under
the Developer Roller?
Yes Clean the Developer Unit.
Machine inside 4 Is the inside of the machine dirty with
the toner?
Yes Clean it, and also find where
the toner came.
Fuser Unit 5 Is the Guide Plate at the entrance of
Fuser Unit dirty with the toner?
Yes Clean it.
Are Fuser Roller and Pressure Roller
dirty with the toner?
Yes Clean them
7. 2. 2.11 Defective fusing
Check the following matters with the Test Pattern No.1 S(0) and No.3 S(0).
If necessary use other Test Patterns.
Cause Checking
order
Checking Result Treatment
Fuser Unit 1 Is the Fuser Roller properly heated up
after turning on the machine?
No Refer to [7. 1. 2. 1 Fuser
Error (E-001, E-002 &
E-004)] to check the Fuser
Unit.
Paper 2 Is the type of paper selected on the UI
same with that of actually installed
paper?
No Select the correct paper type
on the UI.
Can you fix the problem if you use a
newly unpacked paper?
Yes 1. If the paper was
humidified, instruct the
customer of the way store
the paper.
2. If the paper was not the
specified one, explain the
customer that some
image problem may
occur in that case.
Fusing temperature
setting
3 Does the fusing temperature specified
in the Service Mode suits with the
weight (gram/square meter) of paper?
Yes Is there any part which is
burnt? Replace that part if
burnt.
No Set the fusing temperature
correctly.
Fusing pressure
(Nip)
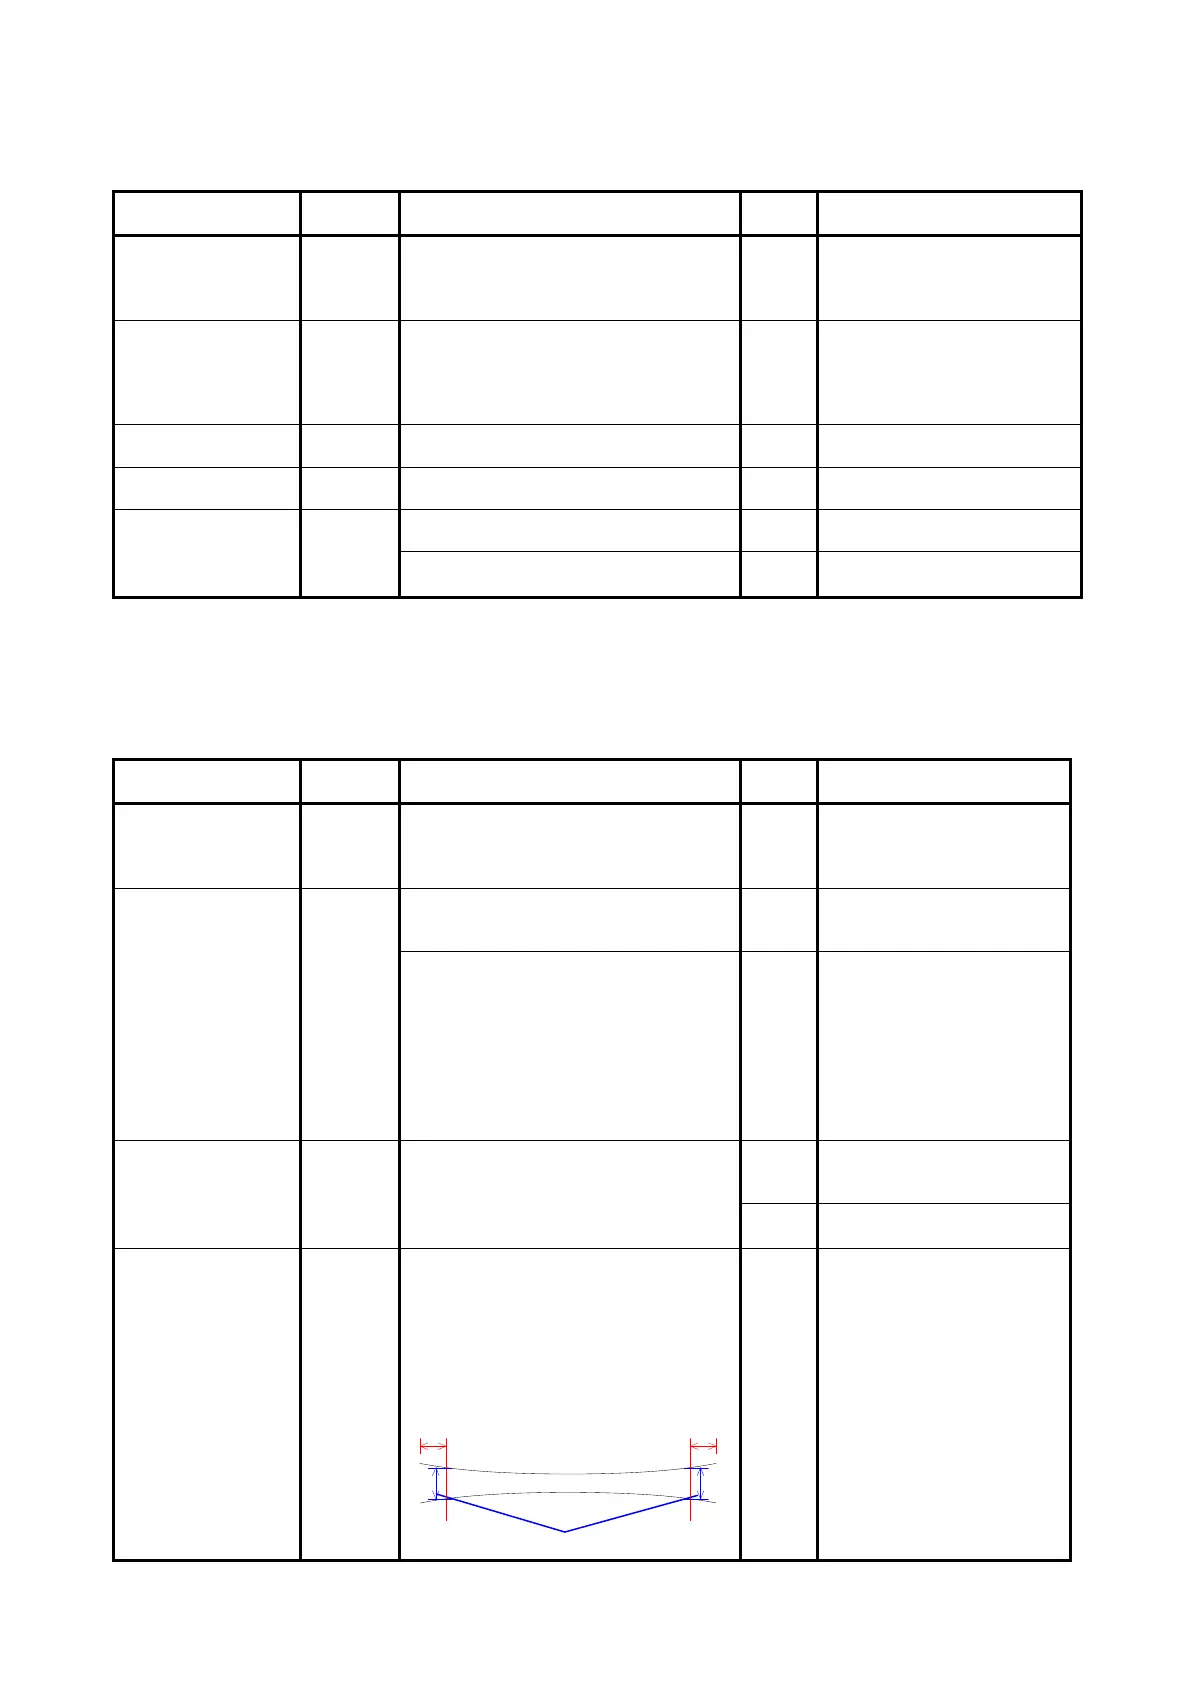
4 Print the Test Patter No.2 S(0) with a
tracing paper (36” or A0), and turn off
the machine in the middle of printing.
Remove the print from the machine and
check the “nip width”.
Is it 8.5 to 9.0mm?
(Measure at 2 mm from the edge.)
2mm 2mm
8.5 to 9.0mm
No Adjust the fusing pressure
correctly.