K117sm5e6
5-73
5. 4. 2 CIS
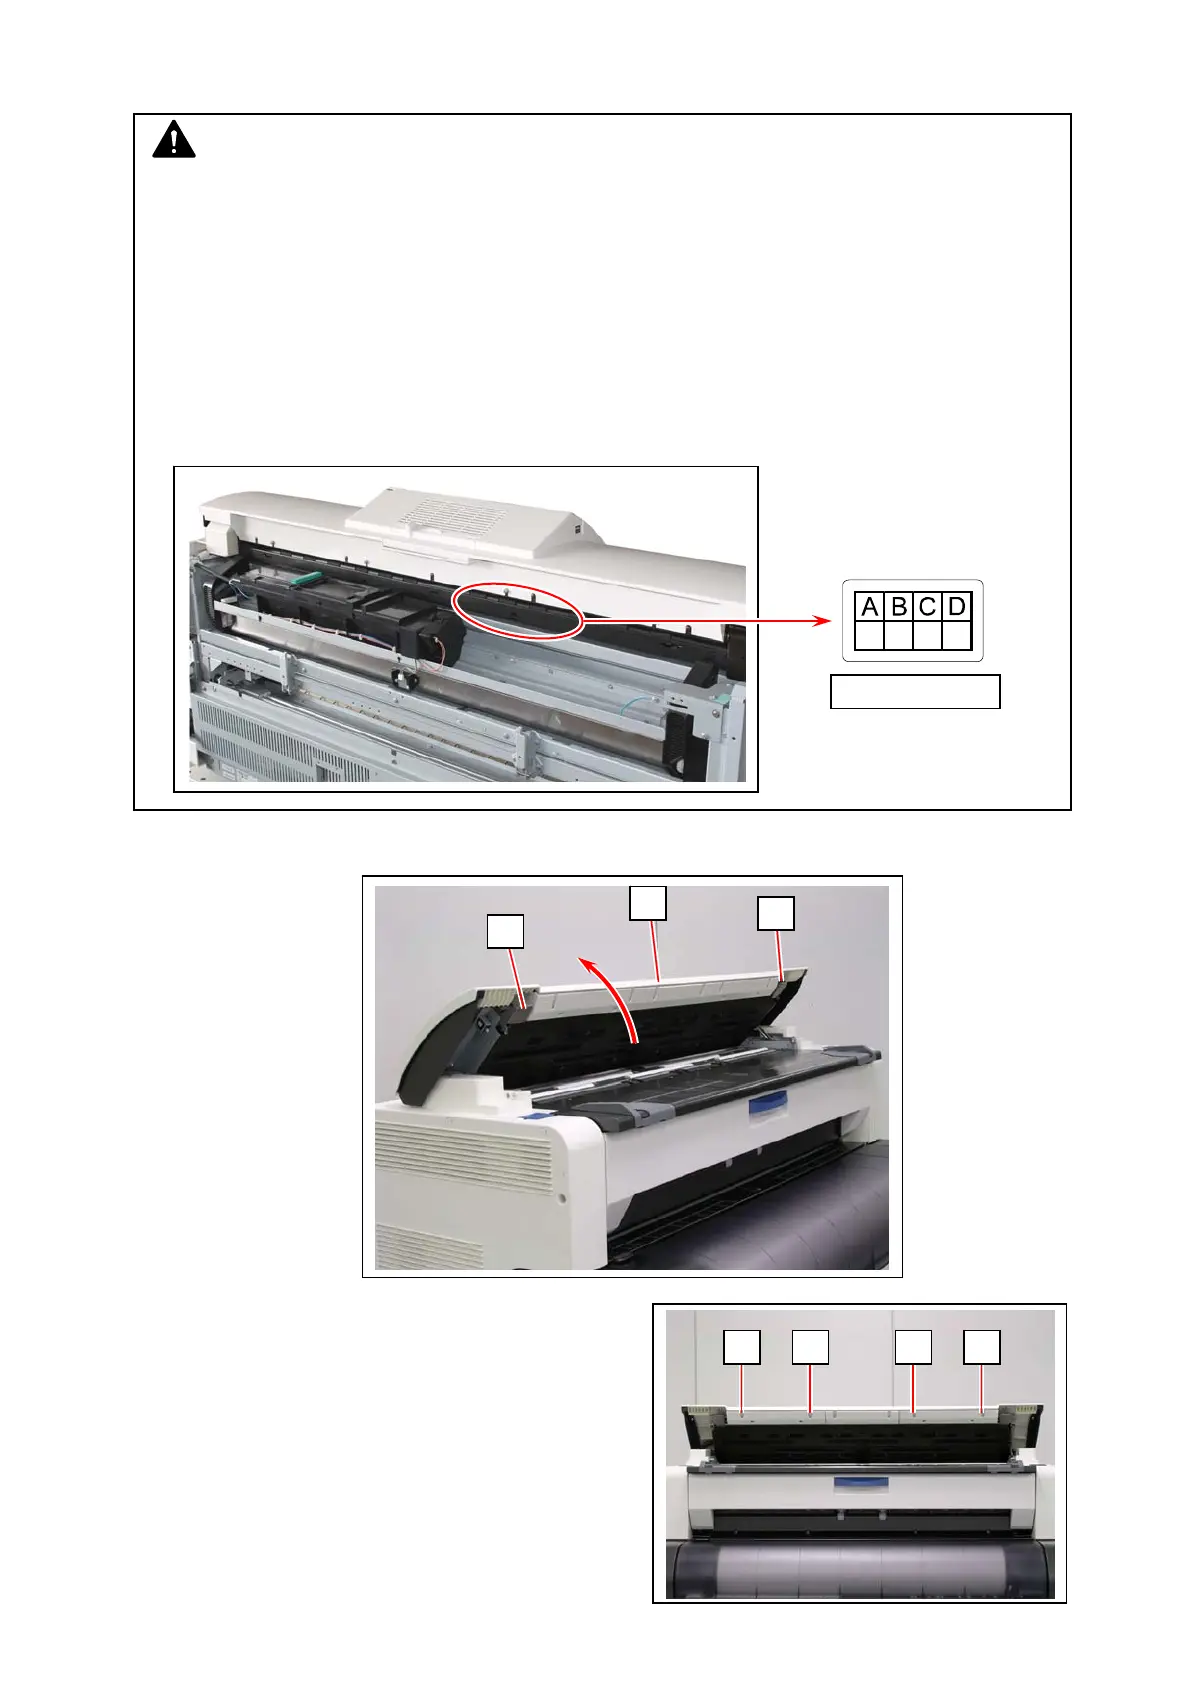
1. Lift up both sides (1) of the Scanner Unit (2).
2. Remove 4 screws (3) on the front.
1
1
2
NOTE
1. Please take re-calibration after the replacement of CIS by performing Shading,
Stitching and Black Brightness Correct. (See [8.14. 6 Motion].)
2. CIS Sensor is classified into classes according to wavelength variations of their LED.
All 5 pieces of CIS on a certain scanner should belong in the identical class to assure even
image quality (brightness, color quality and etc) among image blocks.
Be sure to check which CIS class is used to the scanner before replacing to avoid class
mixing. Otherwise even image quality cannot be expected.
Equipped CIS class can be checked with the label on CIS itself or the label at the rear of
the scanner.
CIS Class Label
3 3 3 3