K117sm7e2
7-35
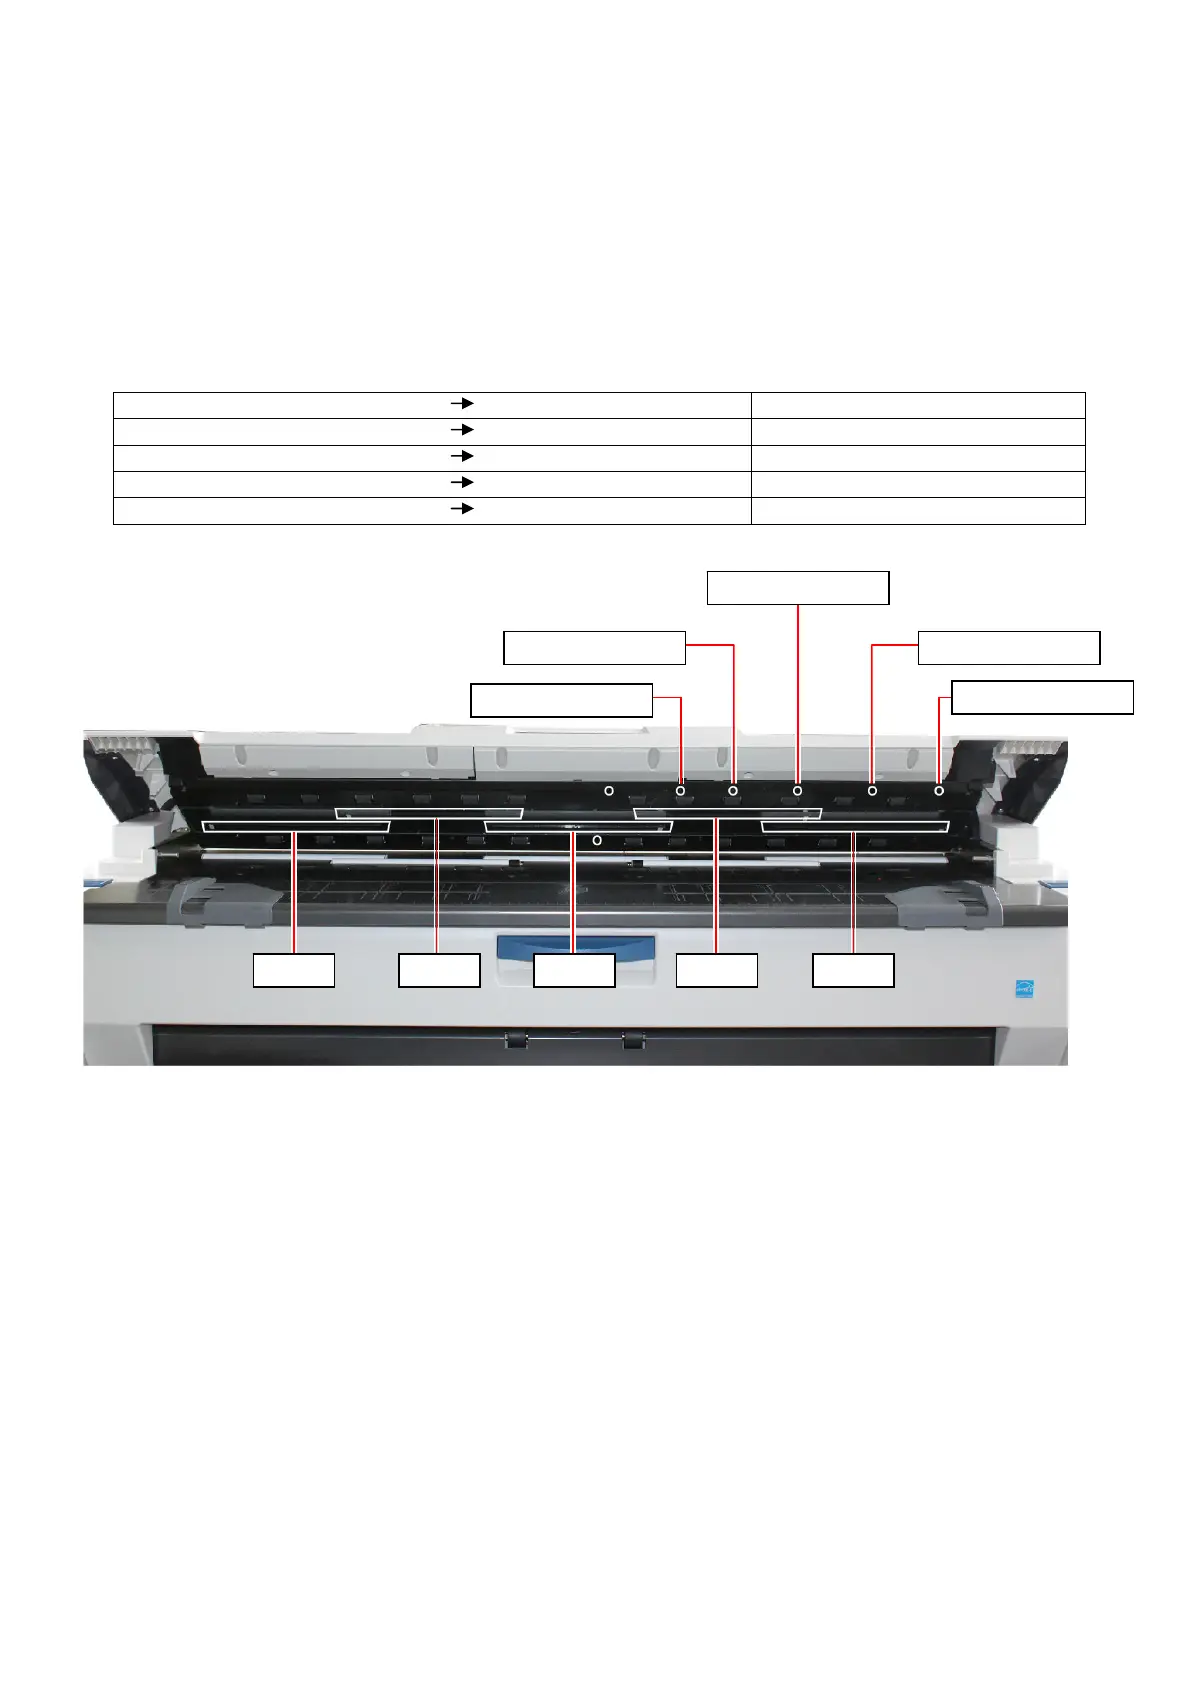
7. 3. 1. 8 Check of Size Sensors (for New Scanner)
1. Open the Upper Unit when the machine is turned on.
2. Turn off the scanner then turn it on again.
3. Insert a piece of paper under each size sensor to block the sensor light.
4. It is possible to check whether the size sensor is working correctly or not by checking the LED
of concerning CIS.
Size sensor and concerning harness and Main PCB are working correctly if the LED of related
CIS lights in red.
If it does not light, any of size sensor, harness and Main PCB has any abnormality.
See the following list for the relationship of size sensor and CIS.
Block the light of Sensor 1 (PH2) LED of CIS 1 lights in red. Sensor 1 (PH2) is working fine.
Block the light of Sensor 2 (PH3) LED of CIS 1 lights in red. Sensor 2 (PH3) is working fine.
Block the light of Sensor 3 (PH4) LED of CIS 1 lights in red. Sensor 3 (PH4) is working fine.
Block the light of Sensor 4 (PH5) LED of CIS 1 lights in red. Sensor 4 (PH5) is working fine.
Block the light of Sensor 5 (PH6) LED of CIS 1 lights in red. Sensor 5 (PH6) is working fine.
CIS 1 CIS 2 CIS 3 CIS 4 CIS 5
Sensor 3 (PH4)
Sensor 4 (PH5)
Sensor 5 (PH6)
Sensor 1 (PH2)
Sensor 2 (PH3)