K117sm9e3
9-29
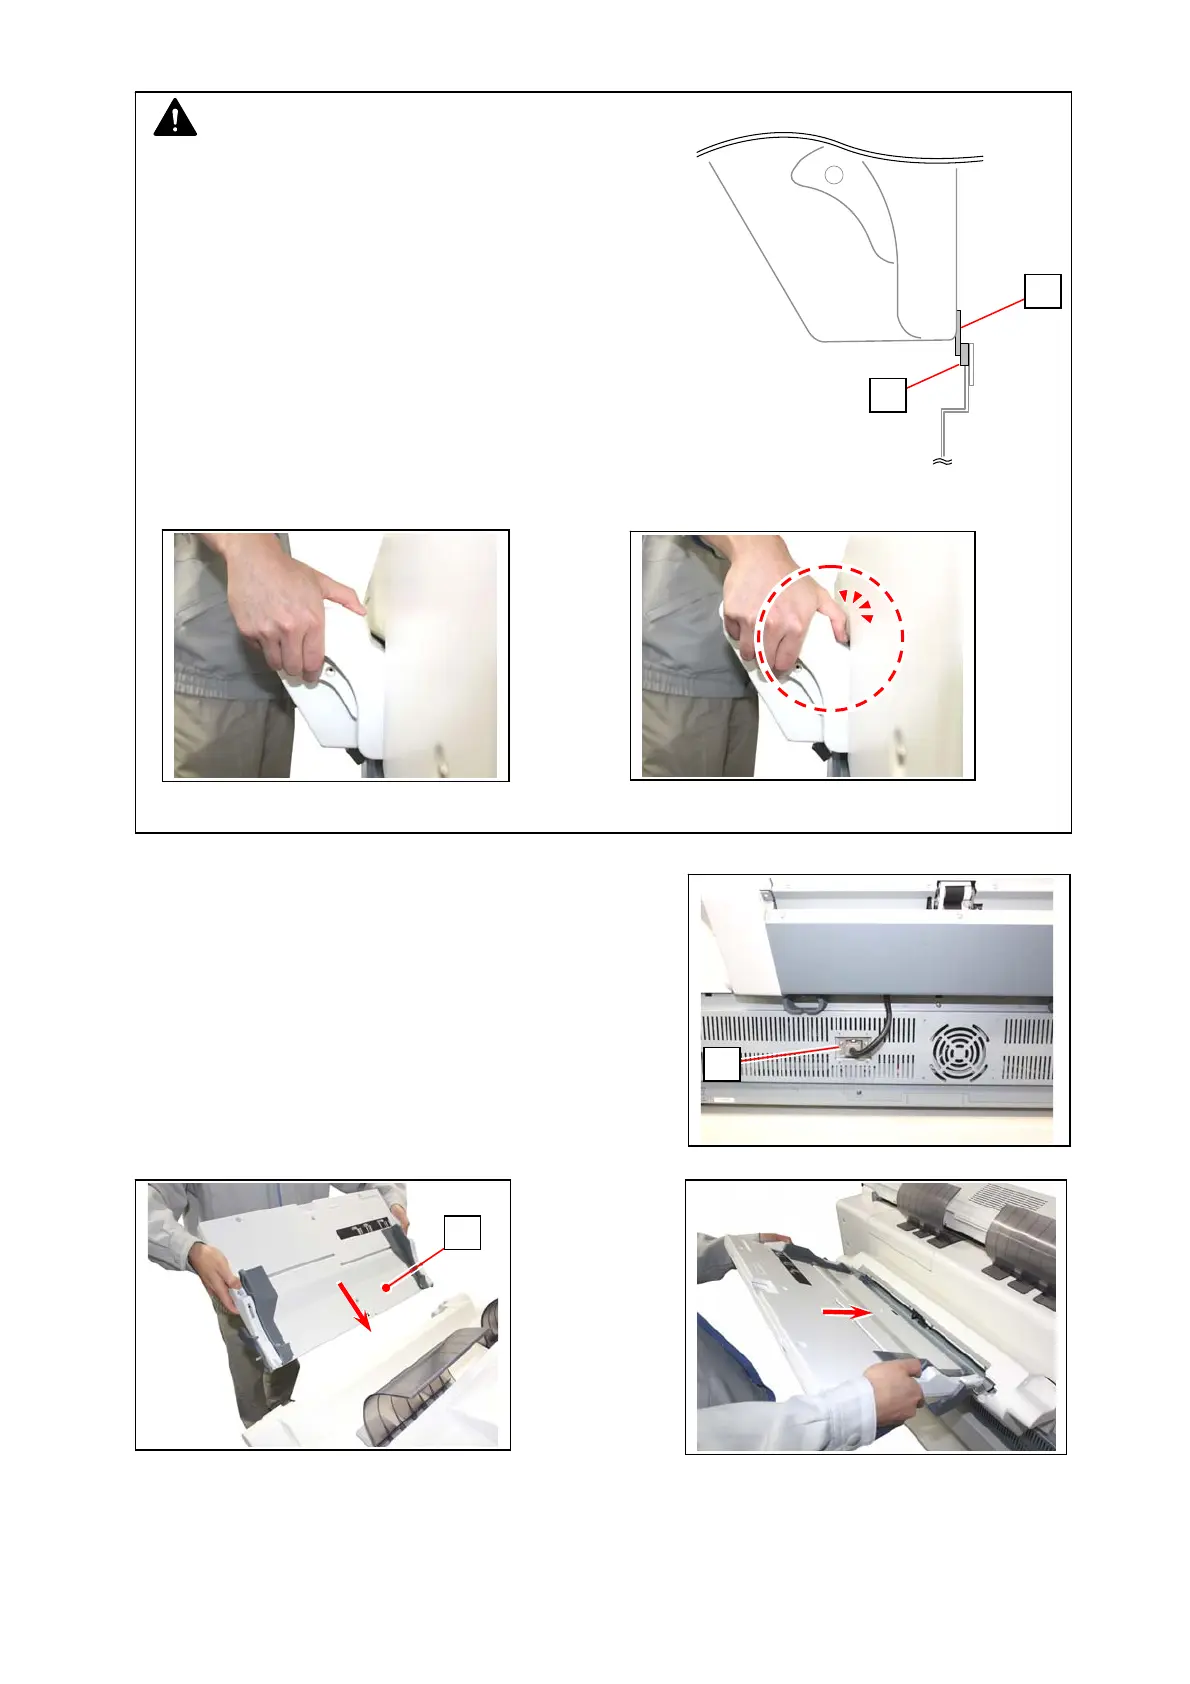
9. Connect the connector (17) of Base Assy to
Connector Bracket.
10. Insert Table Assy (18) to the rear of Base Assy.
11. Extend the tray (housed in Table Assy). Gently open and close the printer’s Upper Unit.
Confirm that Paper Tray is installed firmly.
NOTE
(1) The Gasket (16) should come over the
Gasket (11) mentioned on step 7 like the
following figure.
(2) Be careful not to catch your finger in the space as shown below.
17
18
Correct : Puts on top
Wrong: gets caught
16
11