Chapter 12: Final Recording Medium Setup, Rev. 1.5
12.3.1.5 Test Rutter-ACR Float-free SFRM Capsule Physical Connection
1. Confirm the cable connections between the SFRM and the VDR.
2. Open the command prompt from Start/All Programs/Accessories/Command Prompt on
the VDR.
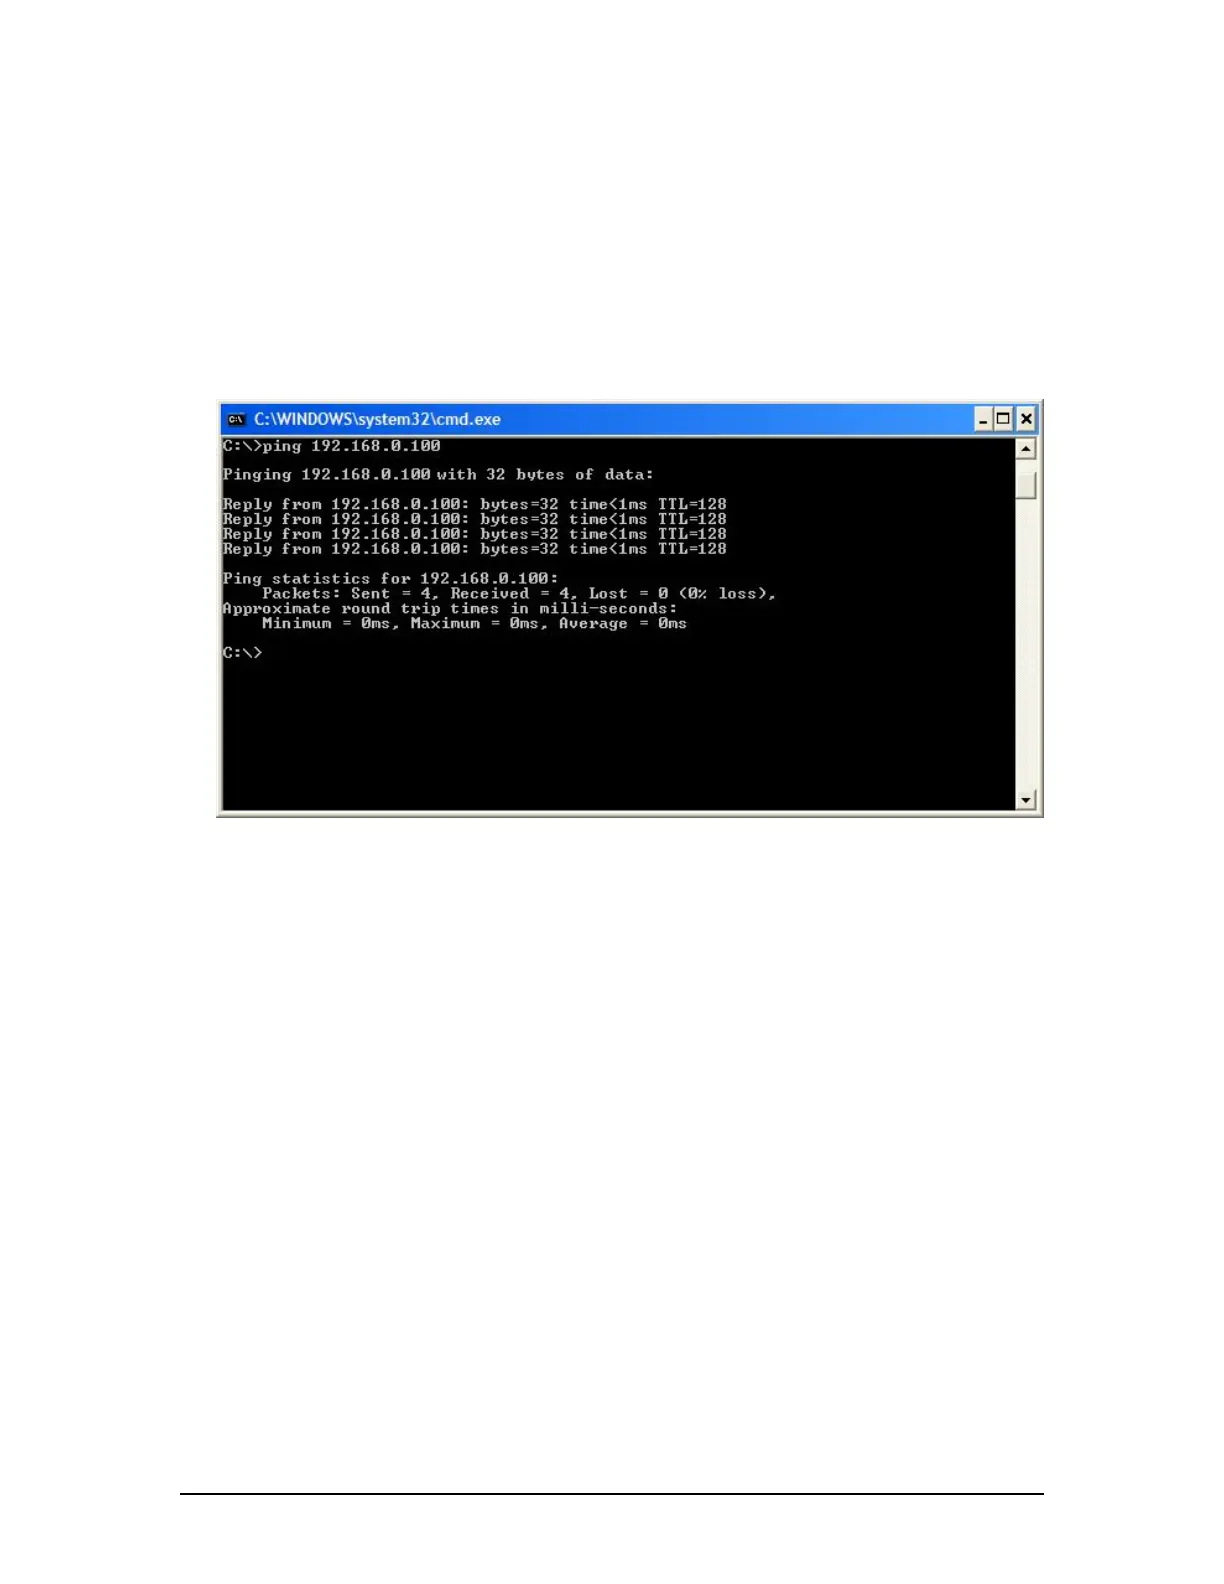
3. At the C:\> prompt, type ping 192.168.0.100
4. Hit the Enter key on the keyboard;
5. Observe that 4 replies are received from the Rutter-ACR Float-free SFRM Capsule;
6. If the request times out, check Rutter-ACR Float-free SFRM Capsule cable connections;
and see paragraph 12.3.1.6
Figure 12–14 - Pinging the Rutter-ACR Float-free SFRM Capsule
7. Once communications has been verified, close the command prompt window and go to
Section 12.3.1.7. If communications cannot be verified go to Section 12.3.1.6.
12.3.1.6 How to Check FRM Ethernet Port IP Address for Rutter-ACR Float-free
SFRM Capsule Port
The default IP address of the Rutter-ACR Float-free SFRM Capsule is 192.168.0.100. The
VDR’s factory configuration for the FRM Ethernet port IP address is 192.168.0.189. If this
address is not correctly configured, communication between the VDR and the Rutter ACR Float
Free SFRM Capsule will not be possible. The FRM port must be in the same range as the Rutter
ACR Float Free SFRM Capsule with the last segment different that the VDR (as shown below).
To check and/or change the IP segment of the VDR’s FRM Ethernet port:
1. Click the Start menu;
2. Open the Control Panel;
3. Double-click the Network Connections icon;
4. Right-click on the SFRM icon;
5. Select Properties from the pop-up menu.
6. In the Local Area Connection Properties window, highlight “Internet Protocol (TCP/IP)”;
7. Click the “Properties” button directly under the available options;
8. The “Internet Protocol (TCP/IP) Properties” window will open;
9. Select the “Use the following IP address” radio button;
10. Enter 192.168.0.189 (last number can be any number from 2 to 254, except 100.);
11. Click the “OK” button in the Internet Protocol (TCP/IP) Properties;
12. Click the “OK” button in the Local Area Connection Properties.
13. The connection should now be established.
VDR-100G3/G3S Installation Manual 10/12/2008
12 - 24