Chapter 9: Video Module, Rev. 1.2
9.5.3.2 Dimensions
If part of the image is not visible in the Capture window after it is moved to the upper left corner, it
may be necessary to adjust the image height and/or width. To adjust the image size:
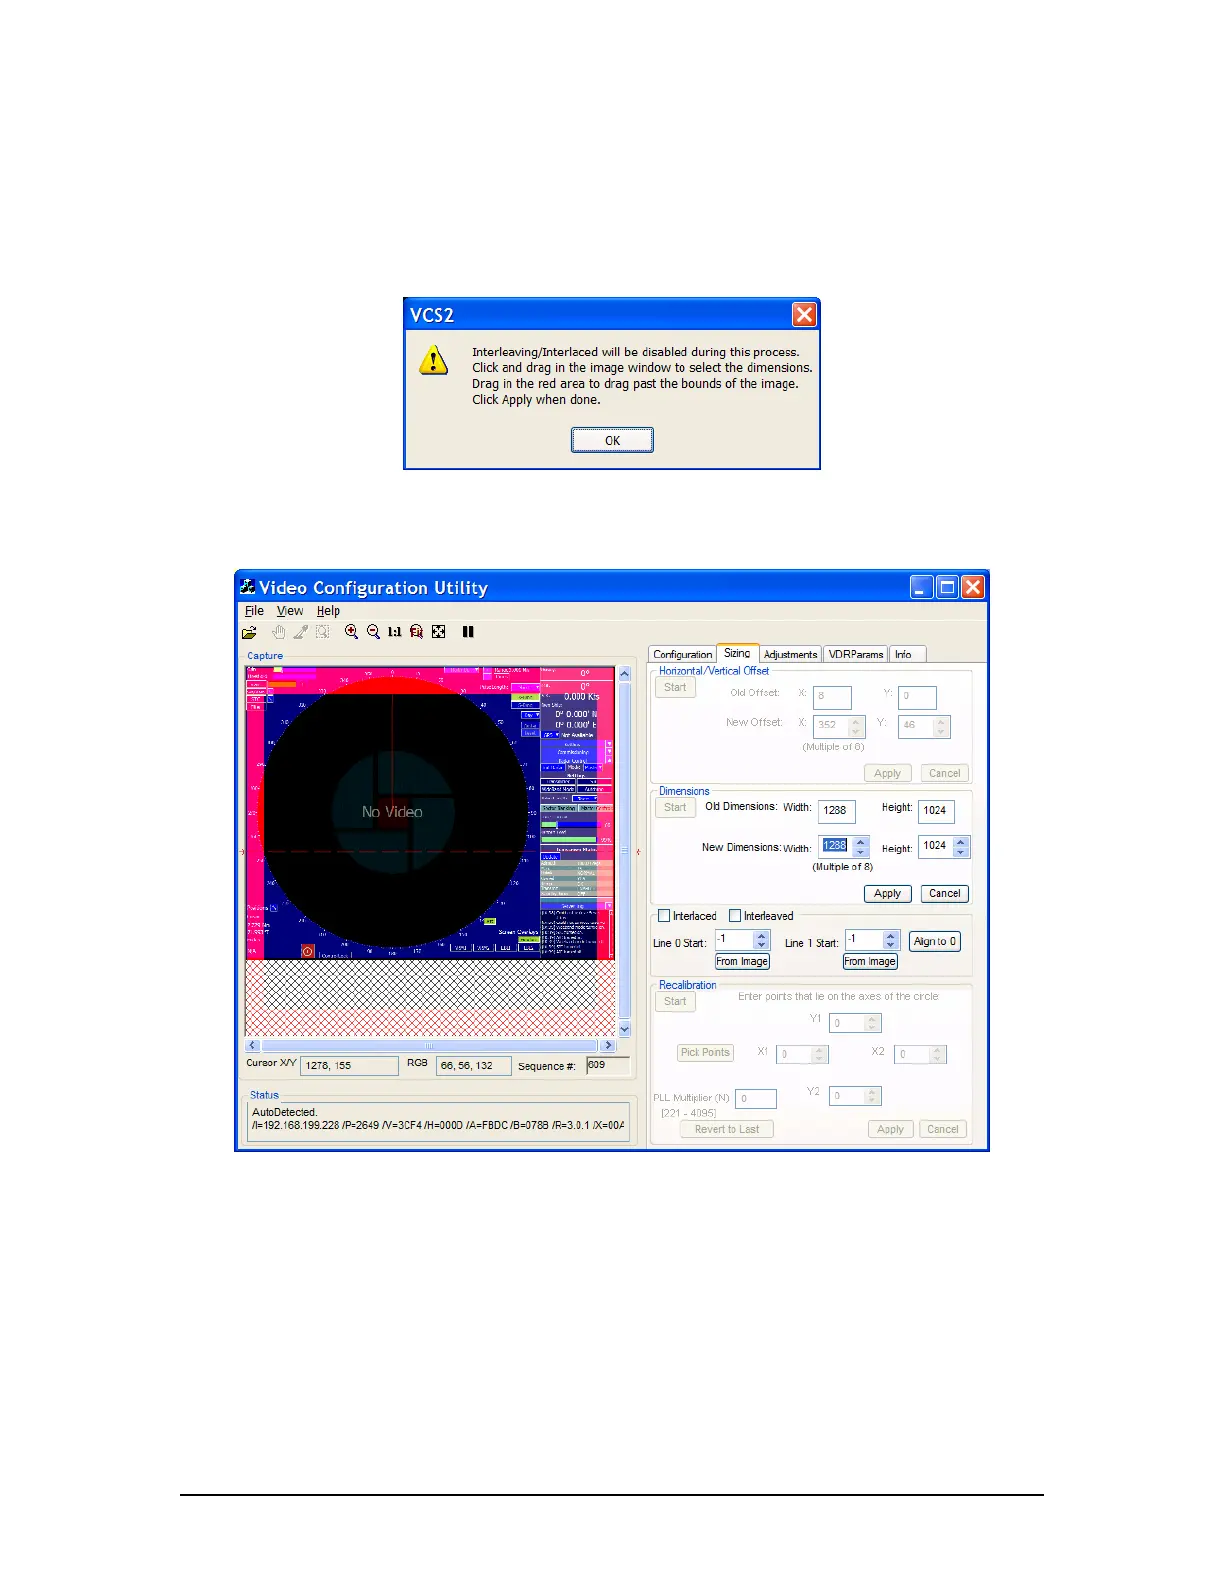
1. Click the “Start” button on the Dimensions section of the Sizing page;
2. The following warning will be displayed;
Figure 9-9 – “Adjusting the Image Size” Warning
3. Click Okay and the captured video image will appear as in Figure 9-10 - Setting the
dimensions:
Figure 9-10 - Setting the dimensions
4. Click and drag the cursor on the image to reveal a rectangle that defines the image size;
5. Click and drag the rectangle in the red transparent area;
6. Pan the image outside the current viewing area to select a larger size;
7. Alternatively, enter a Width and Height number by::
a. Entering the desired width in the New Dimensions: Width scroll box (Must be
multiple of 8),
b. Entering the desired height in the New Dimensions: Height scroll box;
8. Click the Apply button in the lower right corner of the Dimensions section.
9. The “Extents Changed” dialogue box confirms that the image size is adjusted;
10. Click “OK”.
VDR-100G3/G3S Installation Manual 06/10/2008
9-12