Chapter 12: Final Recording Medium Setup, Rev. 1.5
12.5.2 Copying the Downloaded Data to a Playback PC
Data may be moved to a Playback PC running the Rutter Playback Application for review. See
Appendix 5 – Playback Software for details of installing and using the Rutter Playback software.
12.5.2.1 Copying the Downloaded Data via Drive Mapping
With data downloaded to the VDR-100G3’s hard drive, connect the Playback PC to the VDR-
100G3’s Download Ethernet port to retrieve the data. The following steps illustrate this procedure:
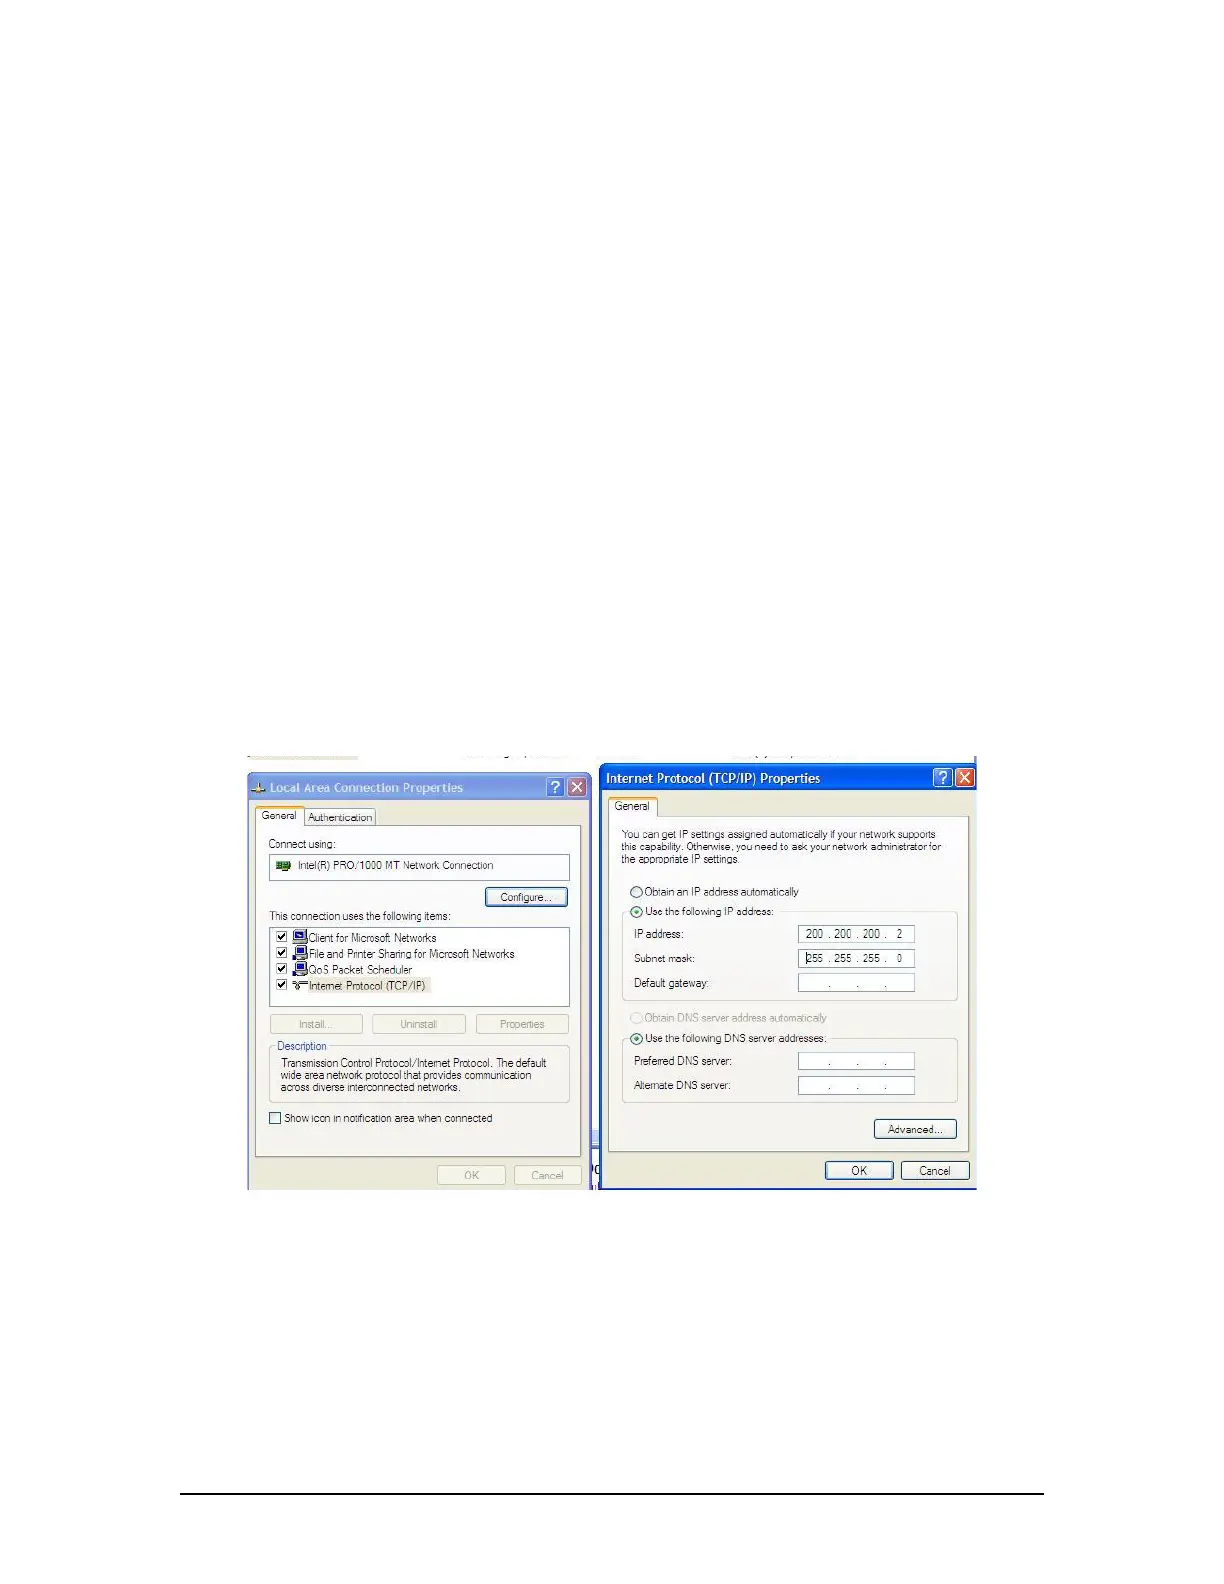
1. The Playback PC must be in the same IP segment as the VDR-100G3’s Download Ethernet
port. The VDR-100G3’s Download Ethernet port occupies IP address 200.200.200.200. The
Playback PC must be in the same range, with the last segment different than the VDR-
100G3 (as shown below.) To change the IP segment:
a) Open the Control Panel via the Start menu.
b) Double-click the Network Connections icon.
c) Right-click on the Local Area Connection icon and select Properties from the
pop-up menu.
d) In the Local Area Connection Properties window, highlight “Internet Protocol
(TCP/IP)” and click the “Properties” button located directly below the available
options.
e) In the subsequent Internet Protocol (TCP/IP) Properties window, select the “Use
the following IP address” radio button and enter 200.200.200.2 (the last number
can be any number from 2 to 254, except 200 and 100.)
f) Click the “OK” button in the Internet Protocol (TCP/IP) Properties and the Local
Area Connection Properties.
Figure 12–28- Establishing TCP/IP Address
2. Locate the VDR Data Port, a RJ45 wall jack,
3. Connect the Playback PC to the VDR Data Port via a straight-through Ethernet cable.
4. Open Windows Explorer;
5. Select Tools;
6. Select Map Network Drive;
7. Select a drive letter not in use by the Playback PC;
8. Enter ‘\\200.200.200.200\Secured Data’ in the ‘Folder’ text box; and
9. Select Finish..
VDR-100G3/G3S Installation Manual 10/12/2008
12 - 41