Appendix 5: Playback Software, Rev. 1.1
A5.6 Configuring the Client to Receive Real Time Data
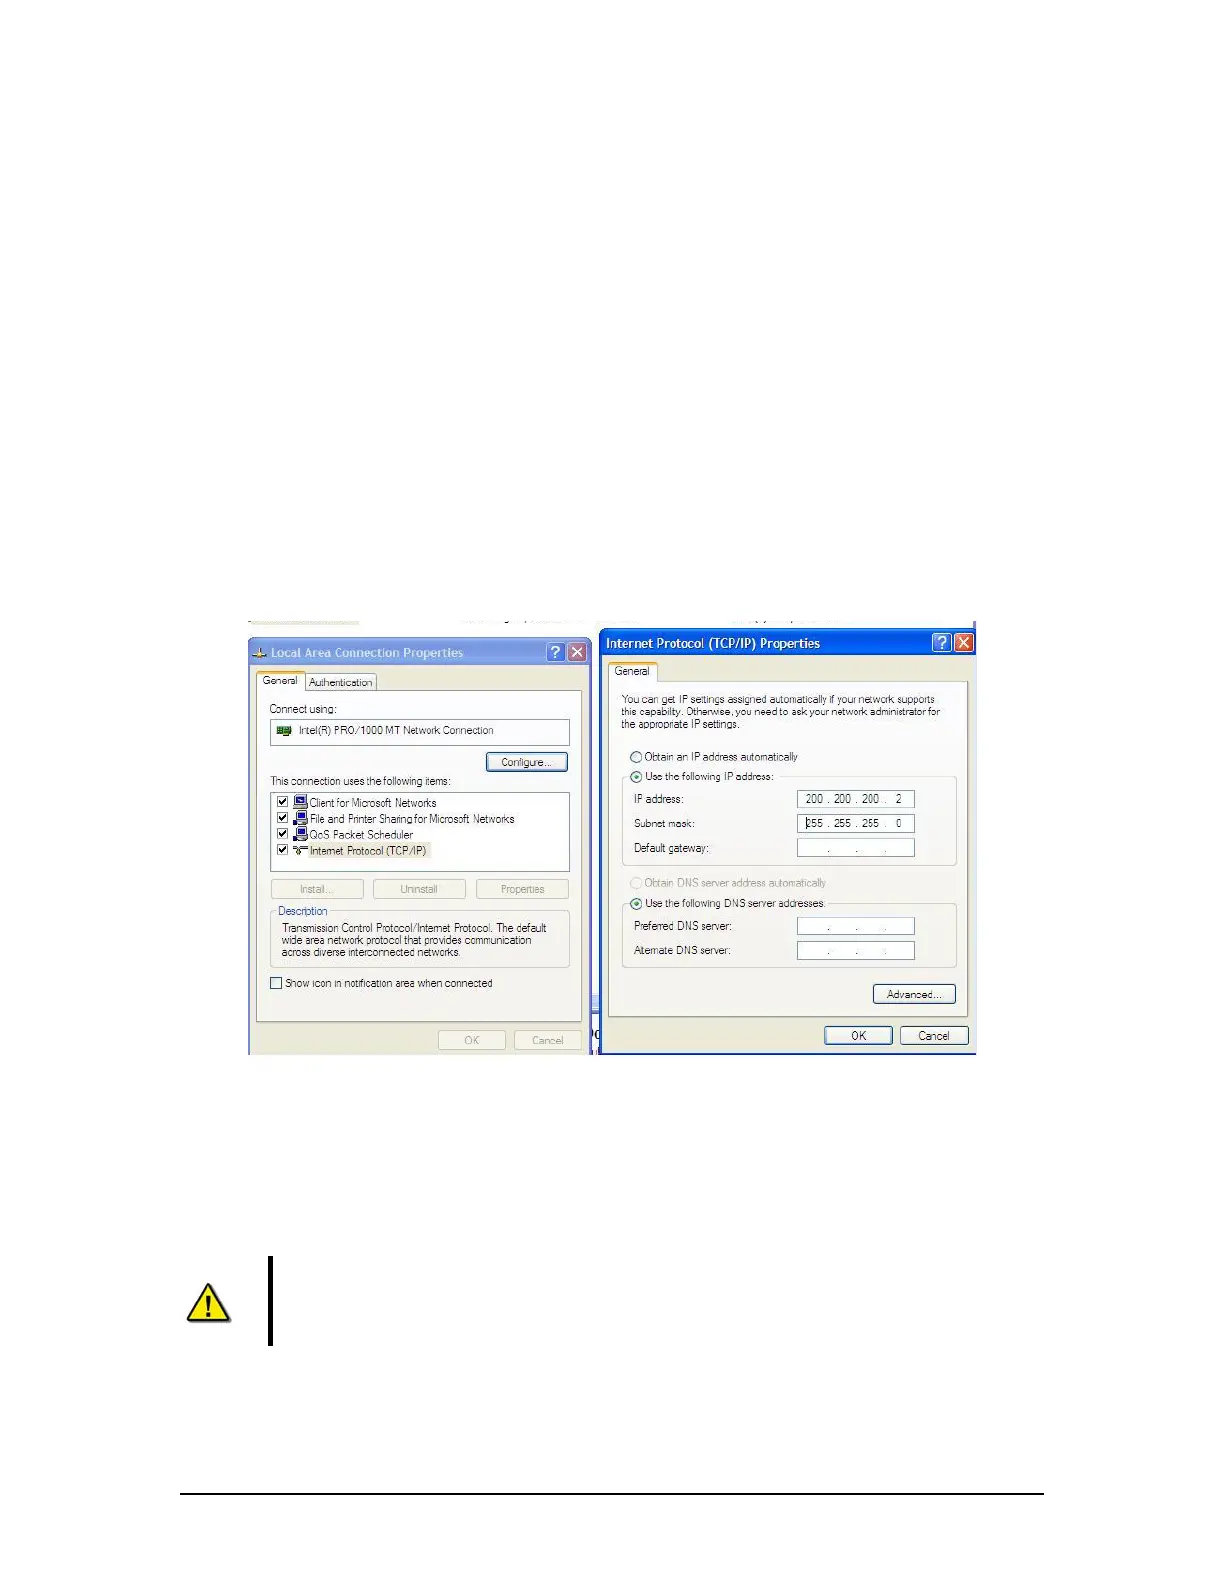
Configure the Client PC for the VDR Playback application to connect to the VDR-100G3 and
receive the recorded data. To do this the Client PC must be in the same IP segment as the
download port on the VDR. The VDR’s download port occupies IP address 200.200.200.200. The
client PC must be in the same range, with the last segment different than the VDR (as shown
below.) To change the IP segment:
1. Open the Control Panel via the Start menu.
2. Double-click the Network Connections icon.
3. Right-click on the Local Area Connection icon, and select Properties from the pop-up
menu.
4. In the Local Area Connection Properties window, highlight Internet Protocol (TCP/IP)
and click the Properties button located directly below the available options.
5. In the subsequent Internet Protocol (TCP/IP) Properties window, select the Use the
following IP address radio button and enter 200.200.200.2 (the last number can be any
number from 2 to 254, except 200.)
6. Click the OK button in the Internet Protocol (TCP/IP) Properties and the Local Area
Connection Properties.
Figure 15 - Establishing TCP/IP Address
A5.7 Enabling Real Time Display Mode
The Playback application has two modes of operation. In playback mode, the user can replay
saved data sets. In Real Time Display mode (RTD), the Playback application will replay real time
Video and NMEA data received from the VDR. Audio data is not available during Real Time
Display Mode.
Note! Prior to enabling Real Time Display on the Playback application, the Client
PC must be connected to the VDR’s download port (or the Ethernet switch that
may be attached to the VDR’s download port) via Ethernet. Refer to section A5.6
VDR-100G3/G3S Installation Manual 06/10/2008
8