Chapter 11: Operation and Alarm Unit Test and User Guide, Rev. 1.1
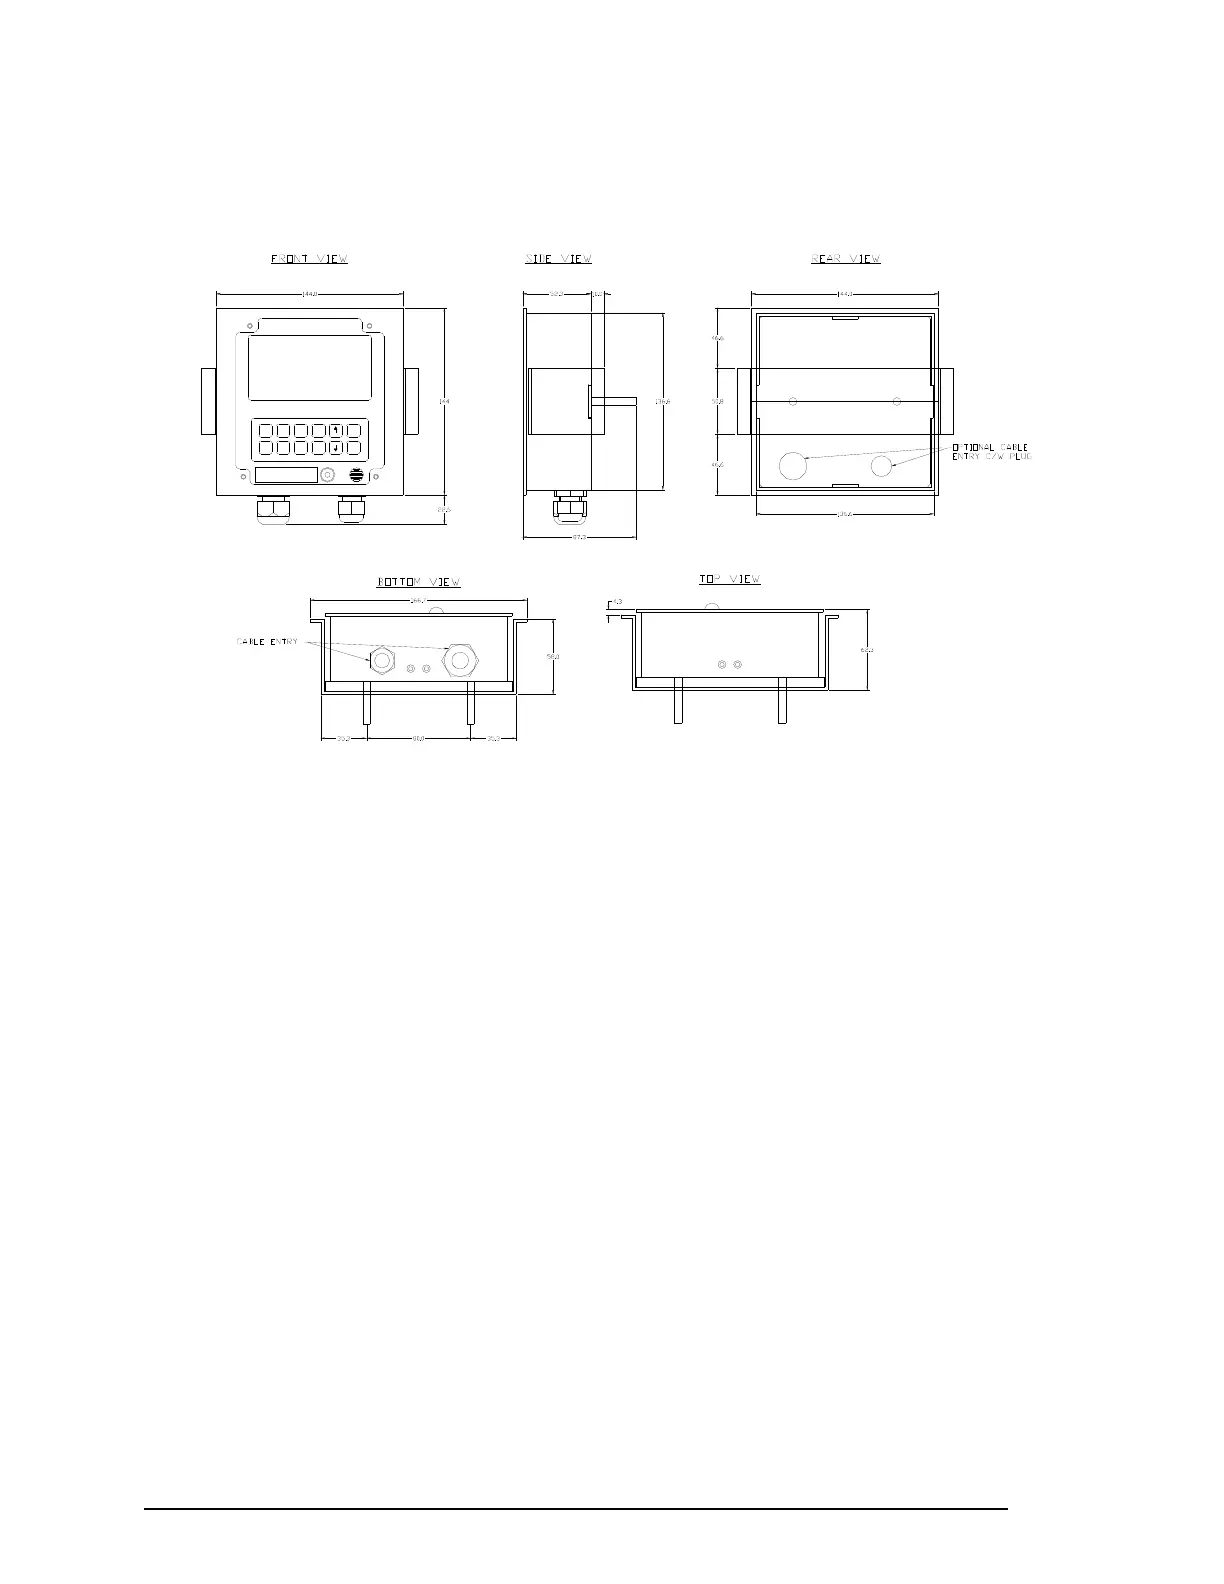
To move the cable entry location from the bottom to the back of the unit, remove the glands in the bottom
and the silver hole-caps on the back cover plate of the unit. Re-install the glands in the back plate holes
and insert the silver hole-caps into the holes in the bottom.
Emrg.
Backup
View
Data
Enter
Cancel
Prev .
Text
Next
RSM
Mute
Dim
STATUS CLEAR
> ENTER FOR MAIN MENU
Figure 11-2 - OAU Dimensions (See Appendix 7: Drawing Details)
Follow the steps below to surface mount the OAU:
1. Remove the back plate of the OAU by unscrewing the 4 hex screws (2 in the top and 2 in the
bottom);
2. Secure the back plate to the surface using 2 screws through the 2 visible screw holes in the
back plate;
3. Complete the wiring of the OAU to the VDR; and
4. Re-attach the OAU to the back plate.
11.2.2 Flush Mounting the OAU
To flush mount the OAU a correct sized hole must be cut in the console—in accordance with Figure 11-3
- OAU Mounting Assembly—the mounting bracket must be positioned against the inside of the hole; and
the unit must be mounted and tightened to the bracket. The steps below provide a procedure for flush
mounting the OAU:
1. Install the front mounting plate to the front face of the OAU;
2. Remove the back plate of the OAU by unscrewing the 4 hex screws—2 in the top and 2 in the
bottom);
3. Cut a hole in the panel into which the OAU is to be flush mounted (See Appendix 7: Drawings);
4. Move the glands to the back if necessary;
5. Install the 2 - 35mm hex screws (long bolts) through the 2 visible screw holes in the back cover.
NOTE: The screws should extend out through the back cover of the OAU.
6. Secure each screw to the back plate with two nuts
7. Complete the wiring of the OAU to the VDR.
VDR-100G3/G3S Installation Manual 06/10/2008
3