M5: Measurement
7.5 Setting zeros, workpiece measuring and tool measuring
Extended Functions
Function Manual, 03/2013, 6FC5397-1BP40-3BA1
455
Setpoints
The resultant frame is calculated so that the measurement complies with the setpoints
specified by the user.
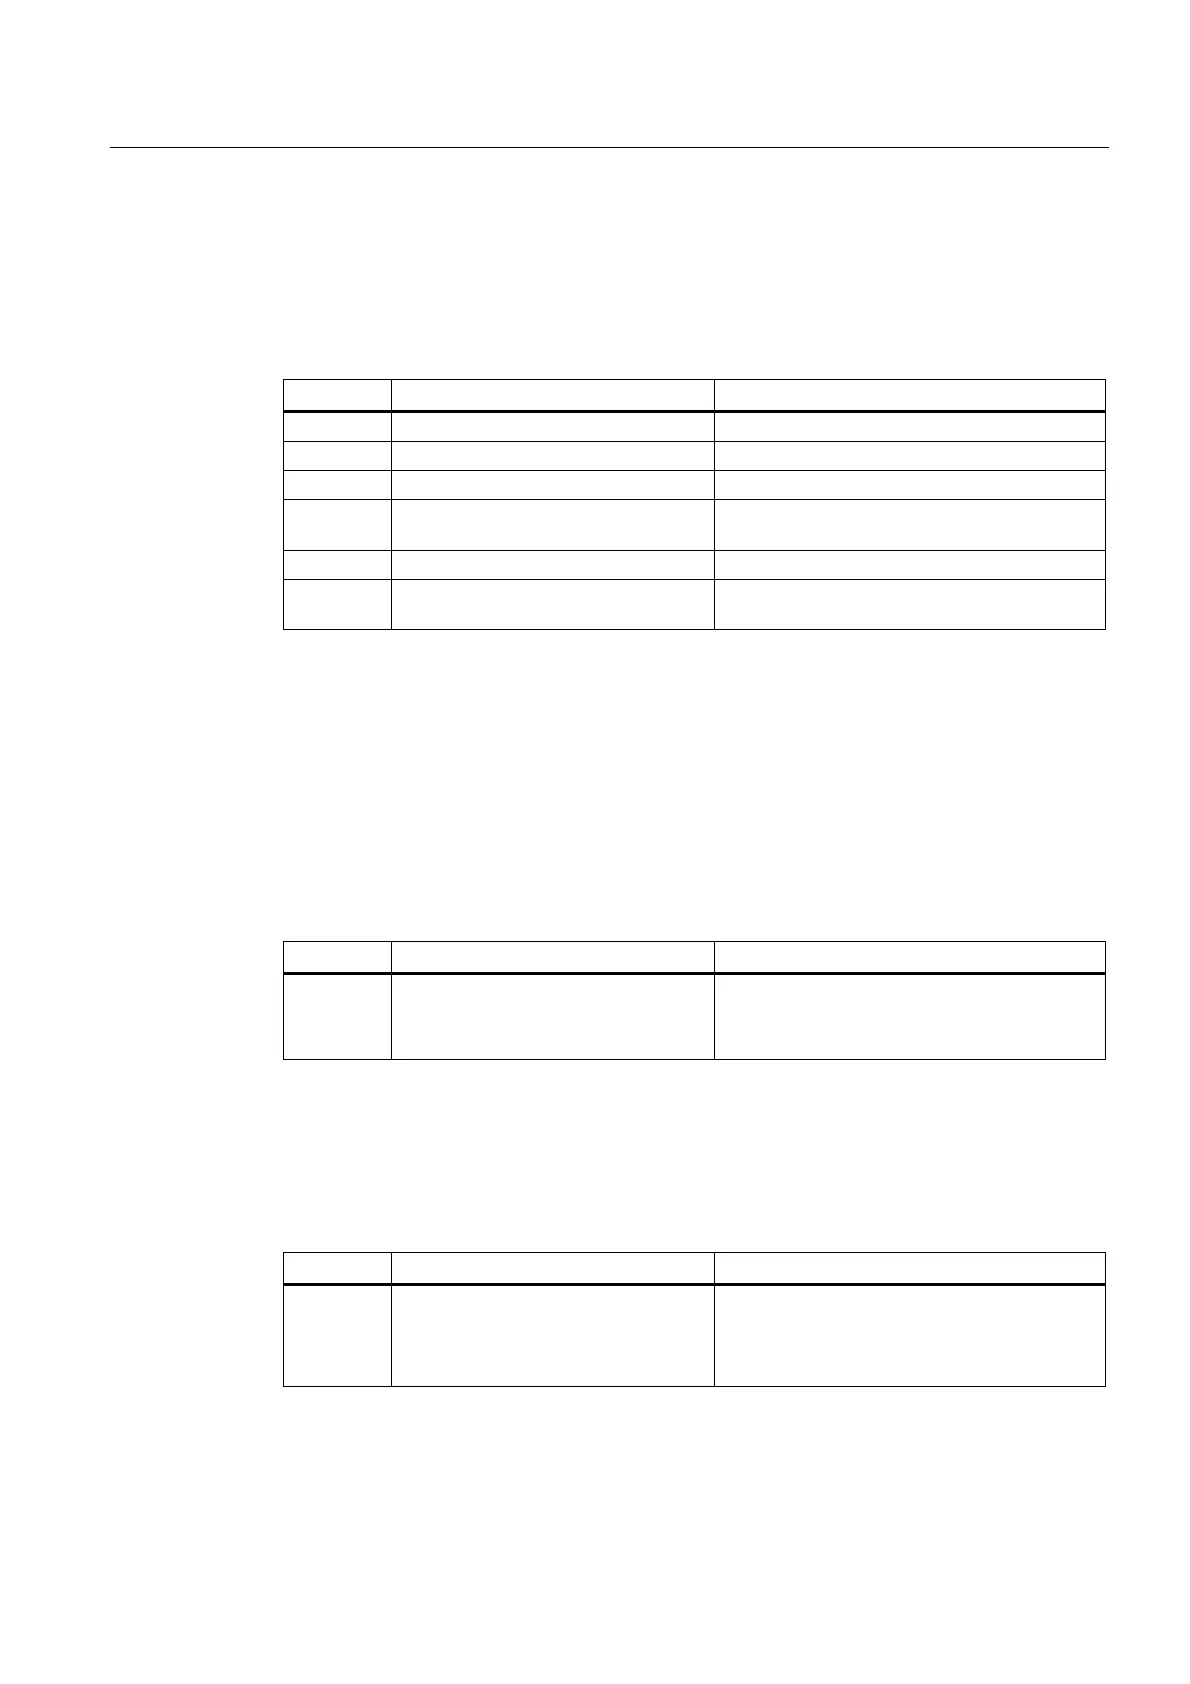
Table 7- 3 Input values for the user setpoint values
Type System variable Meaning
REAL $AA_MEAS_SETPOINT[ax] Setpoint position of an axis
REAL $AA_MEAS_SETANGLE[ax] Setpoint angle of an axis
INT $AA_MEAS_SP_VALID[ax] 1: Setpoint position of axis is valid / 0: Invalid
REAL $AC_MEAS_WP_SETANGLE Rated workpiece position angle α: -90 < α <
180
REAL $AC_MEAS_CORNER_SETANGLE Setpoint cutting angle φ of corner: 0 < φ < 180
INT $AC_MEAS_DIR_APPROACH *) Approach direction:
0: +x, 1: -x, 2: +y, 3: -y, 4: +z, 5: -z
*) The approach direction is required only for the edge, groove, web and tool measurement.
The following measuring points are irrelevant and not evaluated:
● On inputting the setpoint workpiece position angle α: of the 2nd measuring point.
● When inputting the setpoint angle of intersection φ: at the 4th measuring point.
Plane separation
Plane separation for defining the tool orientation. The active level is used for all calculations
if no level is specified.
Type System variable Values
INT $AC_MEAS_ACT_PLANE 0: G17 working plane x/y infeed direction z
1: G18 working plane z/x infeed direction y
2: G19 working plane y/z infeed direction x
Translational offsets
When measuring workpieces, translational offsets can be entered in the fine offset
component of the selected frame. Variable $AC_MEAS_FINE_TRANS is used for this
purpose.
Type System variable Values
INT $AC_MEAS_FINE_TRANS 0: Translational compensation is entered in the
coarse offset.
1: Translational compensation is entered in the
fine offset.

 Loading...


