(5) Remove oil filler pipe.
(a) Remove bolts (2) (F ig. 27) to cylinder hea d.
(b) Remove bolt (3) (Fig. 27) to tran sm ission
flan ge an d bolt (2) t o tra nsmission housing.
(c) Pull lower connect ion of oil filler pipe (1) (F ig.
27) ou t of th e fill hole in t he side of t he t ransm is-
sion housing.
(d) Gu ide oil filler pipe (1) (Fig. 27) u p a nd
out.
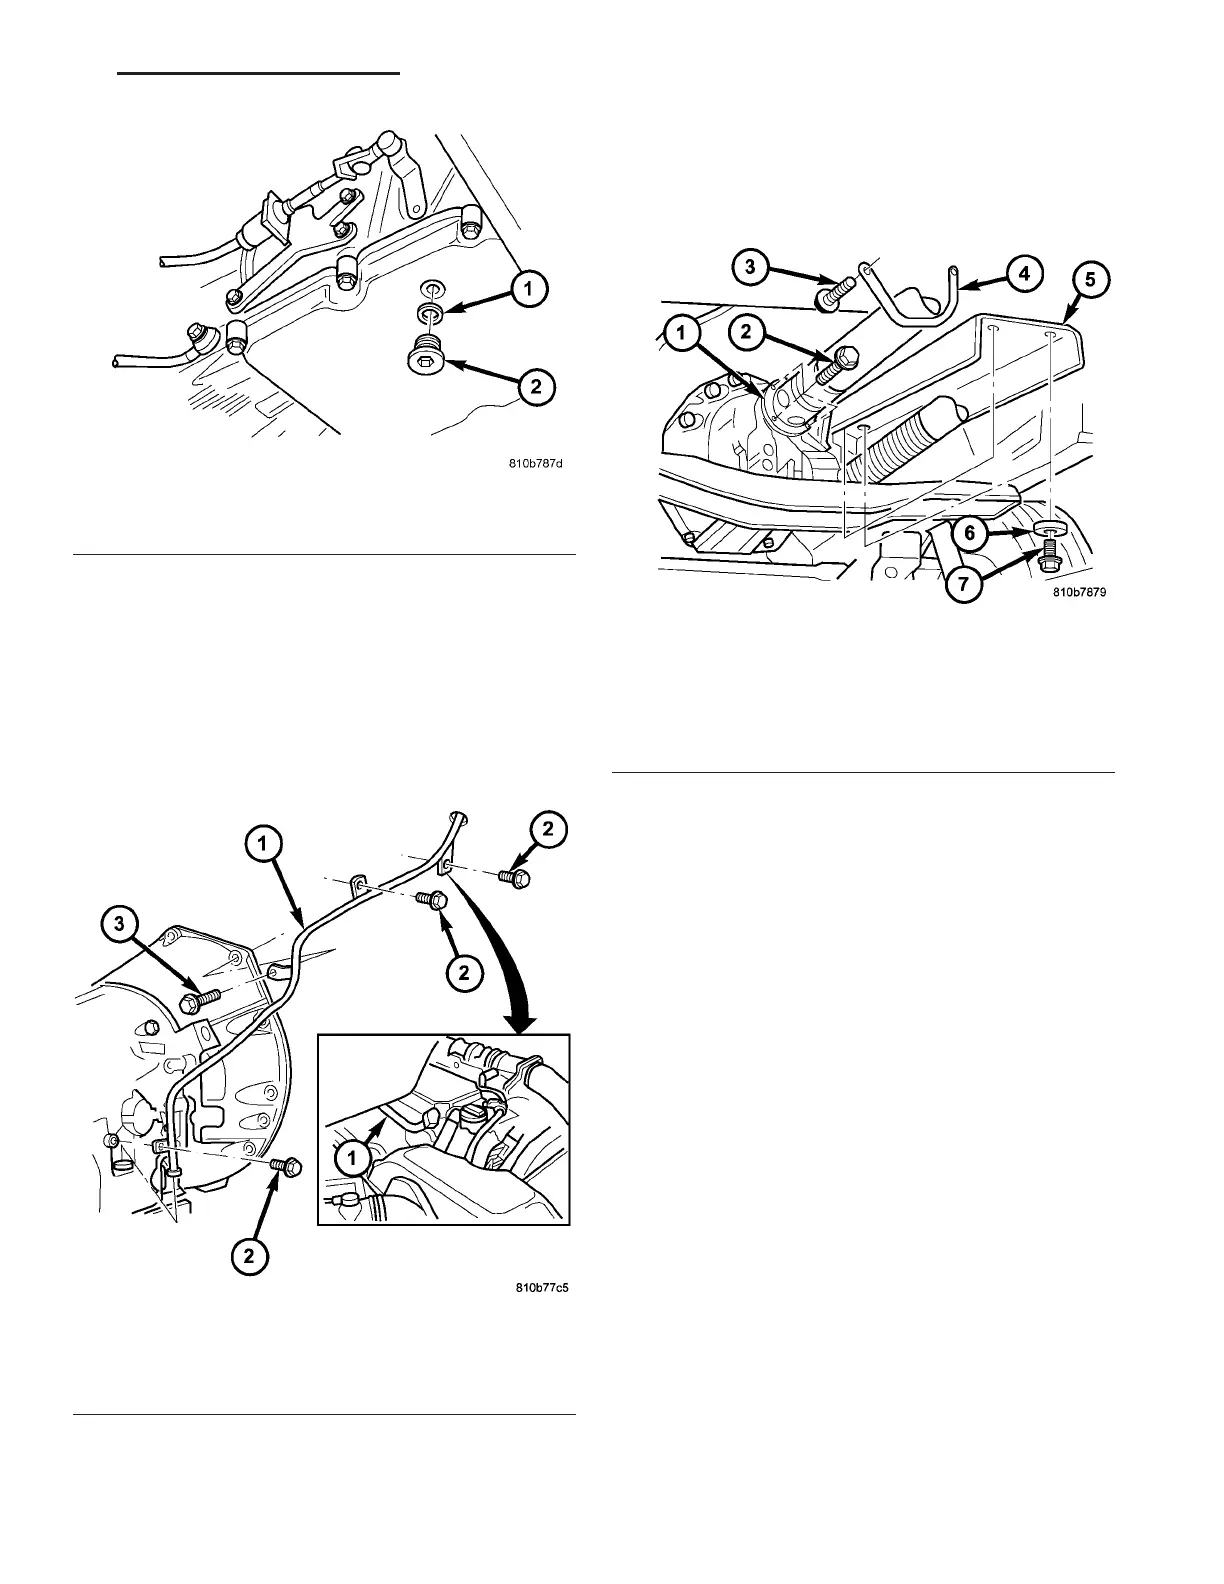
(6) Remove exh aust heat shield (5) (F ig. 28).
(7) Remove ret aining bracket (4) (Fig. 28).
(8) Detach propeller shaft (1) (Fig. 28) at tra nsmis-
sion (Refer to 3 - DIFFERENTIAL & DRIVELINE/
PROPELLER SHAFT/PROPELLER SHAF T -
REMOVAL). Move propeller sha ft t o t he right an d tie
up.
(9) Remove the cooler lines a t tran sm ission.
(a) Remove bracket for the oil cooler feed and
retu rn lines (1) (Fig. 29) from engine oil pan
flan ge. Detail sh ows right side of motor. Position is
mirrored for th e left side of engine.
(b) Detach br acket of cable ret ain er (4) (Fig. 30)
from the threaded shank of a engine oil pan bolt
(5).
(c) Press ca ble ret ainer (4) (Fig. 30) down an d
out.
(d) Remove the bolts holding the oil cooler lines
(6) (F ig. 31) t o th e left and r ight sides of transmis-
sion and h ang the lin es to the side.
Fig. 26 Drain Transmission
1 - SEAL
2 - DRAIN PLUG
Fig. 27 Fill Tube
1 - FILL TUBE
2 - BOLTS TO CYLINDER HEAD AND TRANSMISSION HOUS-
ING
3 - BOLT TO TRANSMISSION FLANGE
Fig. 28 Propeller Shaft and Heat Shield
1 - PROPELLER SHAFT
2 - BOLT
3 - BOLT
4 - RETAINING BRACKET
5 - HEAT SHIELD
6 - WASHER
7 - BOLT
VA AUTOMATIC TRANSMISSION NAG1 - SERVICE INFORMATION 21 - 43