To avoid over filling t ransmission after a fluid
change or overh aul, per form t he following procedure:
(1) Verify that the veh icle is par ked on a level su r-
face.
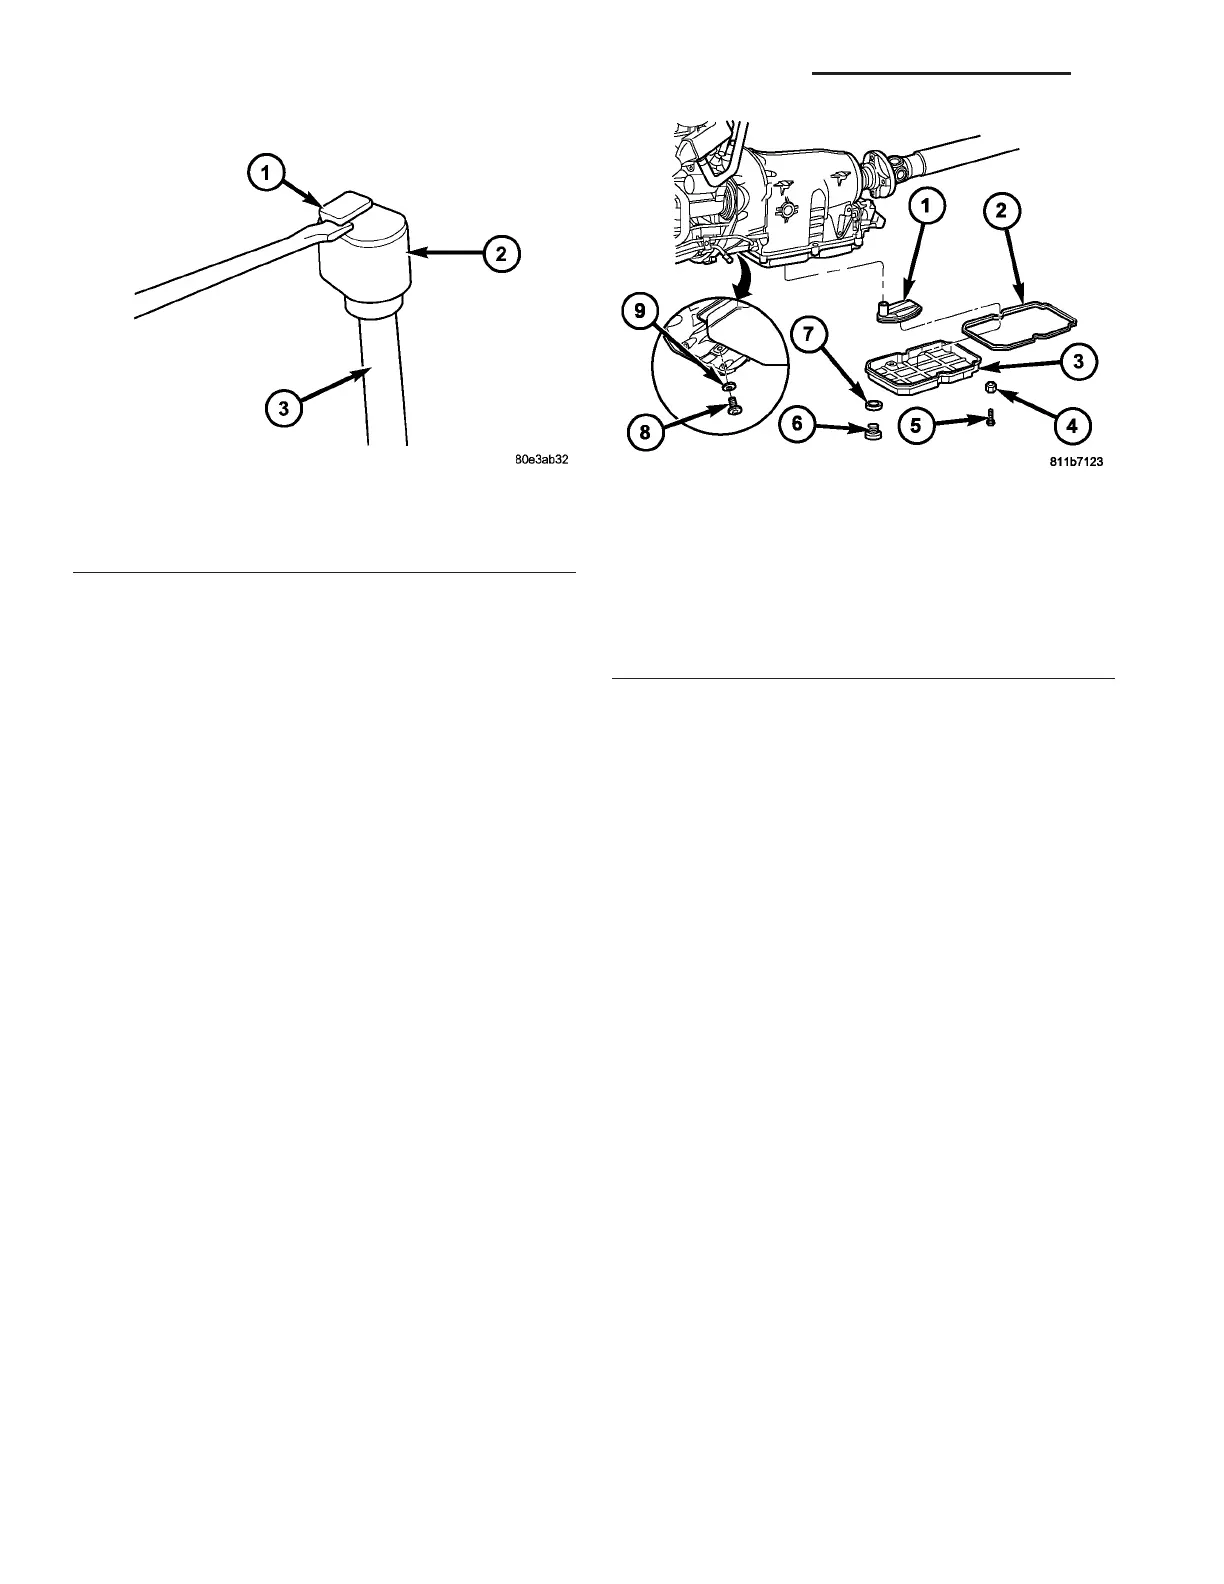
(2) Remove locking pin (1) (Fig. 152). Rem ove th e
plate of the l ocking pin with a suitable tool and press
out the pin rem ain ing in th e cap downwards.
(3) Remove cap (2).
(4) Add following initia l quantity of requ ired fluid
(Refer to LUBRICATION & MAINTENANCE/FLUID
TYPE S - DESCRIPTION) t o tra nsmission:
(a) If on ly fluid an d filter were ch anged, add 7.4
L(14.8pts.)of tr ansmission flu id t o transmission.
(b) If tr ansmission was com pletely overha uled,
torqu e converter was replaced or dr ain ed, and
cooler was flushed, add 7.7 L (16.3 pts .) of trans-
mission fluid to tr ansmission.
(5) Check the tran sm ission fluid (Refer to 21 -
TRANSMISSION/AUTOMATIC - NAG1/FLUID AND
FLUID - STANDARD PROCE DURE - CHECK OIL
LEVEL) and adjust as r equired.
FLUID / FILTER SERVICE
(1) Run the en gin e u ntil the tr ansmission oil
reach es operat ing temper ature.
(2) Raise and support vehicle.
(3) Remove the torqu e converter dr ain plug access
plug from the bottom of the torque con vert er hous-
ing.
(4) Rotat e the en gin e clockwise u ntil the tor que
conver ter drain plug (8) (Fig. 153) is align ed with the
access hole.
NOTE: Clean the area around the drain plug to pre-
vent dirt from entering the torque converter.
(5) Usin g a suitable drain pa n to ca tch the fluid,
remove the torque converter dra in plug (8) an d allow
the t orque converter t o drain complet ely.
(6) In spect the torqu e convert er dra in plug seal (9)
(Fig. 153). Replace the seal if necessa ry.
(7) In st all the torqu e converter drain plug (8).
Tighten t he drain plug to 14 N·m (10 ft.lbs.).
(8) In st all th e torqu e converter drain plu g a ccess
plug into th e bot tom of the torque converter h ousing.
(9) Usin g a suitable drain pa n to ca tch the fluid,
remove th e transmission oil pan drain plug (6) (Fig.
153) and allow th e oil pan to drain completely.
(10) Inspect the tr ansmission oil pa n dr ain plug
seal (7). Repla ce the seal if necessa ry.
(11) In st all the tra nsmission oil pan dra in plug (6).
Tighten t he drain plug to 20 N·m (15 ft.lbs.).
(12) Remove th e bolts (5) and reta iner s (4) (Fig.
153) holding the oil pa n to th e tra nsmission.
(13) Remove t he t ran smission oil pa n (3) and gas-
ket (2) from the tra nsmission.
Fig. 152 Remove Dipstick Tube Cap Lock
1 - LOCKING PIN
2 - TUBE CAP
3 - DIPSTICK TUBE
Fig. 153 Fluid/Filter Service Points
1 - OIL FILTER
2 - OIL PAN GASKET
3 - OIL PAN
4 - RETAINER
5 - BOLT
6 - OIL PAN DRAIN PLUG
7 - SEAL
8 - TORQUE CONVERTER DRAIN PLUG
9 - SEAL
21 - 134 AUTOMATIC TRANSMISSION NAG1 - SERVICE INFORMATION VA