ASSEMBLY
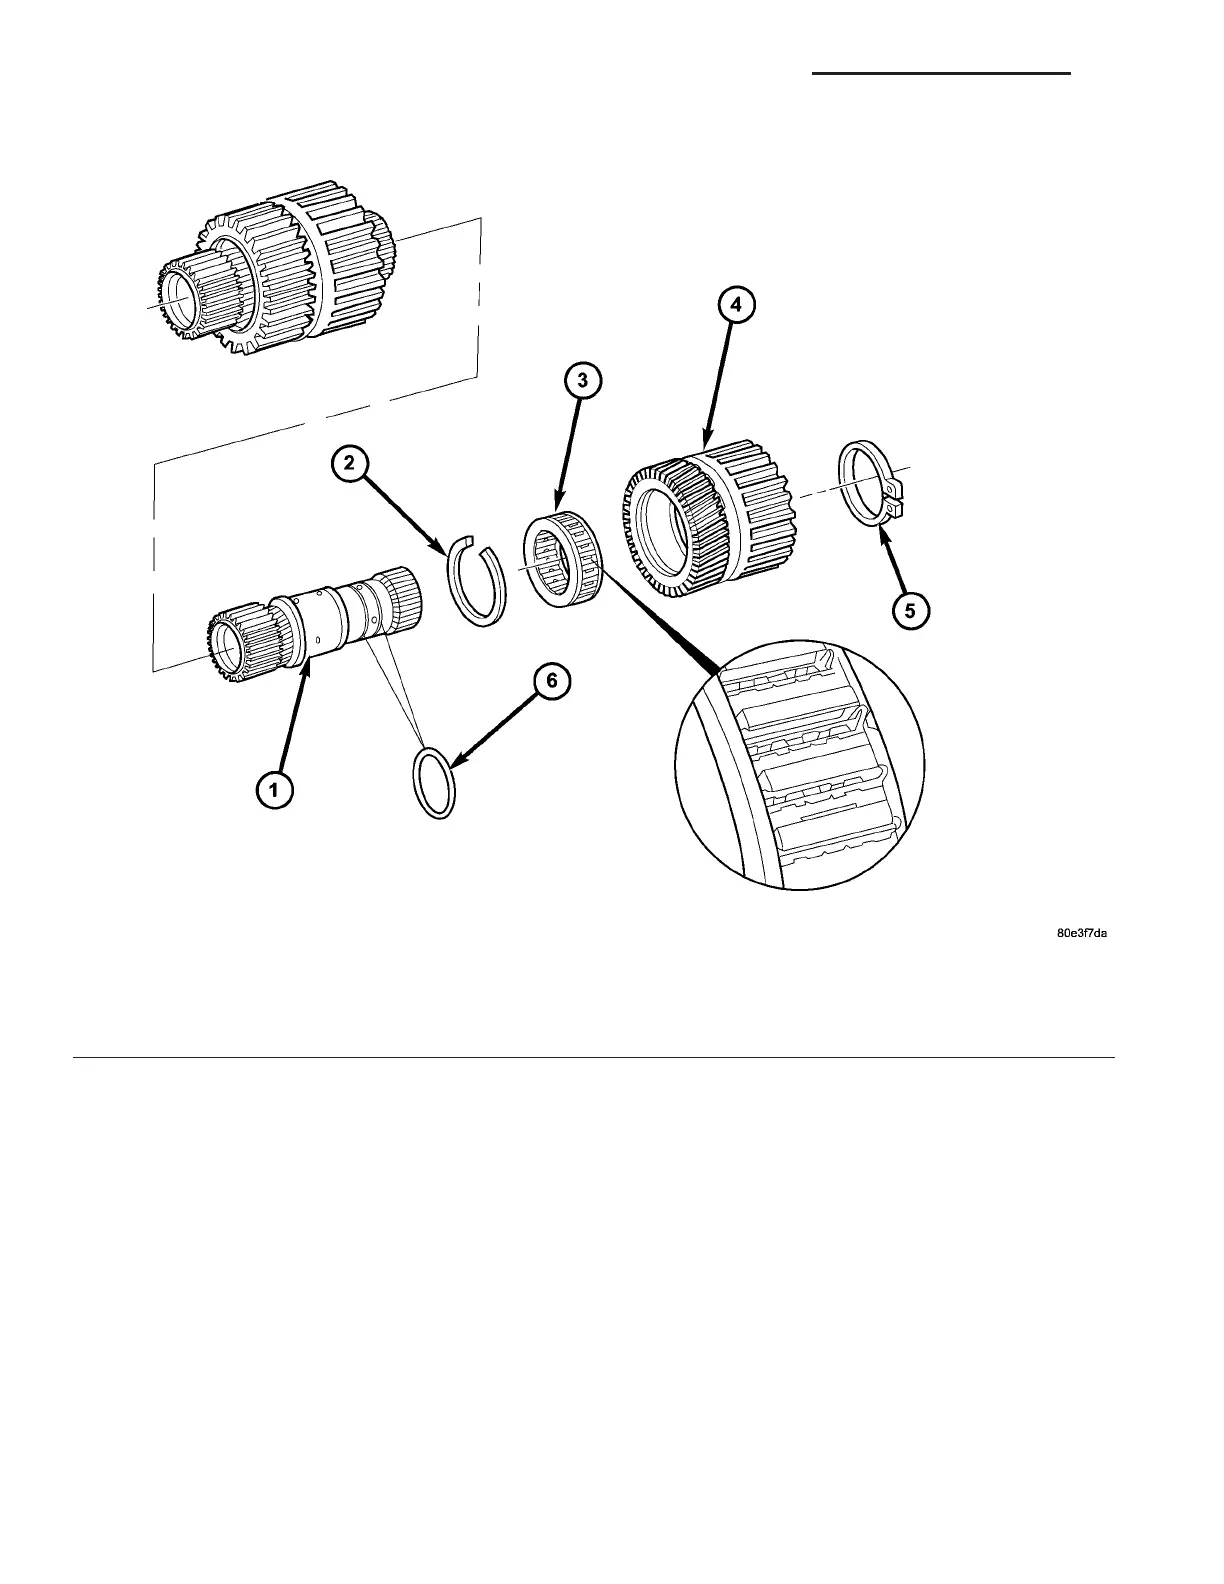
NOTE: The side of the freewheeling clutch F2 (3)
with the markings (directional arrow, part number,
etc.) must be up when the clutch is installed in the
sun gear (4).
(1) Press freewheelin g clutch F2 (3) (Fig. 158) into
su n gear (4).
(2) In st all snap-ring (2) for freewheelin g clutch.
(3) Check O-r ings (6) (Fig. 158) on hollow shaft,
repla ce if n ecessary.
(4) In st all rear sun gear (4) with K3 in tern ally
toothed disc carr ier and rear freewheeling clu tch (3)
onto t he hollow sh aft.
(5) Verify pr oper operat ion of th e freewheelin g
clutch F2. When the assembly is h eld wit h the F2
clutch sna p-r ing upwa rd, it sh ould be possible to
rotate the hollow sha ft counter-clockwise.
(6) In st all retaining ring (5) onto hollow shaft (1).
GEARSH I FT CABLE
DI AGN OSI S AN D T EST I N G
GEARSHIFT CABLE
(1) The floor shifter lever an d gate positions
sh ould be in a lignmen t with all t ransmission PARK,
NEUTRAL, and gear det ent positions.
(2) Engine starts must be possible with floor shift
lever in PARK or NE UTRAL ga te positions only.
Fig. 158 Freewheeling Clutch F2
1 - HOLLOW SHAFT 4 - K3 INNER DISC CARRIER AND REAR PLANETARY SUN
GEAR
2 - F2 CLUTCH SNAP-RING 5 - RETAINING RING
3 - FREEWHEELING CLUTCH F2 6 - O-RINGS
21 - 138 AUTOMATIC TRANSMISSION NAG1 - SERVICE INFORMATION VA