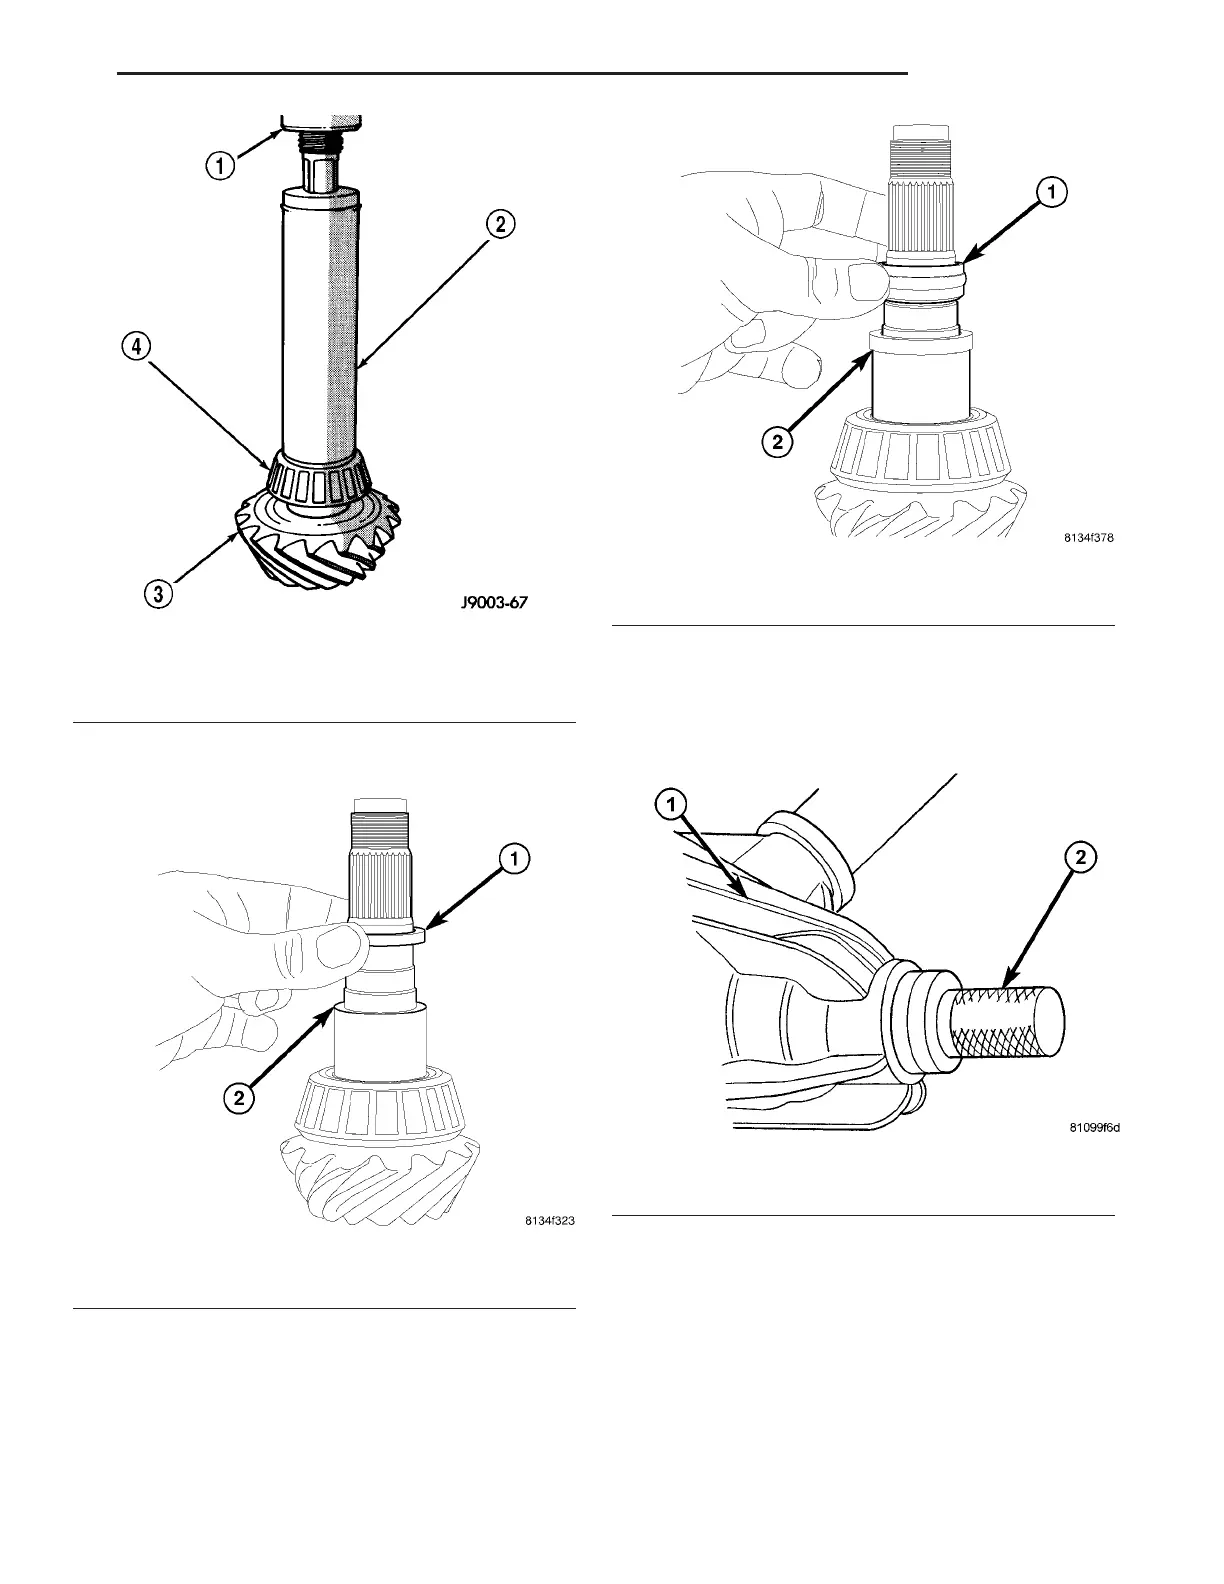
(6) In st all pinion spa cer on pin ion shaft (Fig.
70).
(7) In st all new colla psible preload spa cer on pin-
ion shaft (F ig. 71) and install pinion gear into the
housin g.
(8) In st all front pinion bea rin g into housing with
Insta ller 9548.
(9) Apply a light coating of gea r lubr ican t on th e
lip of pinion sea l a nd in stall seal with In staller 9276
(Fig. 72).
(10) Hold pin ion flange wit h Fla nge Wrench
C-3281.
(11) Scr ew on the new collar ed nut.
(12) Tighten collar nut car efully to a tor que to
rotate of 2.5-3 N·m (22-27 in. lbs.).
(13) Cut the collar of t he tightened collared nut
(Fig. 73).
Fig. 69 REAR BEARING INSTALLATION
1 - PRESS
2 - INSTALLER
3 - DRIVE PINION GEAR
4 - REAR PINION BEARING
Fig. 70 SPACER
1 - SPACER
2 - PINION SHAFT
Fig. 71 COLLAPSIBLE SPACER
1 - COLLAPSIBLE SPACER
2 - SPACER
Fig. 72 PINION SEAL INSTALLER
1 - AXLE
2 - INSTALLER
VA REAR AXLE 3 - 43