Operat e tester pump to apply 103.4 kPa (15 psi)
pr essu re to system. If hoses enla rge excessively or
bulges while testin g, replace a s necessary. Observe
gau ge pointer and det ermine condition of cooling sys-
tem accor ding to following cr iter ia:
Holds Steady: If pointer remains steady for two
minutes, ser ious coolant leaks are not presen t in sys-
tem. However, there could be an in tern al leak tha t
does not a ppea r with n ormal system t est pressure. If
it is cert ain that coolant is bein g lost an d leaks can-
not be det ected, inspect for interior leakage or per-
form Internal Leakage Test.
Drops Slowly: Indica tes a sm all leak or seepa ge
is occurrin g. Examine all connection s for seepa ge or
slight leakage with a fla sh light. Inspect radiator,
hoses, gasket edges an d heat er. Seal small leak holes
with a Sealer Lubr icant (or equivalent ). Repair lea k
holes and inspect system a gain with pressu re
applied.
Drops Quickly: Indicates that seriou s leakage is
occurring. Examine system for external leakage. If
leaks are not visible, inspect for internal leakage.
Large radia tor leak h oles shou ld be repaired by a
reputable radiator repa ir shop.
INTERNAL LEAKAGE INSPECTION
Remove engine oil pa n drain plug and dr ain a
sm all amou nt of engine oil. If coolant is pr esent in
the pan , it will dr ain fir st because it is h eavier tha n
oil. An alt erna tive meth od is to oper ate engine for a
sh ort per iod to chur n th e oil. After this is don e,
remove engine dipstick and inspect for wat er glob-
ules. Also inspect transmission dipstick for water
globules a nd tra nsmission fluid cooler for leakage.
WARNING: WITH RADIATOR PRESSURE TESTER
TOOL INSTALLED ON RADIATOR, DO NOT ALLOW
PRESSURE TO EXCEED 110 KPA (20 PSI). PRES-
SURE WILL BUILD UP QUICKLY IF A COMBUSTION
LEAK IS PRESENT. TO RELEASE PRESSURE,
ROCK TESTER FROM SIDE TO SIDE. WHEN
REMOVING TESTER, DO NOT TURN TESTER MORE
THAN 1/2 TURN IF SYSTEM IS UNDER PRESSURE.
Operat e engine without pressur e cap on coola nt
container un til thermostat opens. At tach a Pressu re
Tester to container. If pressure builds up quickly it
indicates a combustion leak exists. This is usua lly
the result of a cylinder head gasket leak or cra ck in
engine. Repair as necessary.
If th ere is n ot an immediate pressure increase,
pu mp the P ressure Tester. Do t his until indicated
pr essu re is with in syst em ra nge of 110 kPa (16 psi).
Fluctuat ion of gauge pointer indicates compression or
combustion lea kage in to cooling system.
Because the vehicle is equipped wit h a cata lyt ic
conver ter, do not remove spark plu g ca bles or short
out cylinder s t o isola te compression leak.
If t he needle on dial of pressure tester does not
fluctuate, race engine a few t imes to check for an
abnor mal am ount of coolant or stea m. This would be
emit ting from exhaust pipe. Coola nt or steam from
exha ust pipe may indicate a fau lty cylinder hea d gas-
ket , cracked engine cylinder block or cylinder head.
A convenient check for exh aust gas leakage int o
coolin g system is pr ovided by a com mercially a vail-
able Block Leak Ch eck tool. Follow manufa cturer s
instr uctions when u sing this product.
COMBUSTION LEAKAGE TEST - WITHOUT PRES-
SURE TESTER
DO NOT WASTE reu sa ble coolant. If solution is
clean , dra in coola nt in to a clean a nd suitably ma rked
container for reuse.
WARNING: Do not remove cylinder block drain
plugs or loosen radiator drain with system hot and
under pressure. serious burns from coolant can
occur.
Drain sufficien t coola nt to allow thermosta t
removal.
Remove accessory drive belt.
Add coolant to pressure cont ainer to br ing level to
with in 6.3 m m (1/4 in) of top of thermosta t housing.
CAUTION: Avoid overheating. Do not operate
engine for an excessive period of time. Open drain-
cock immediately after test to eliminate boil over.
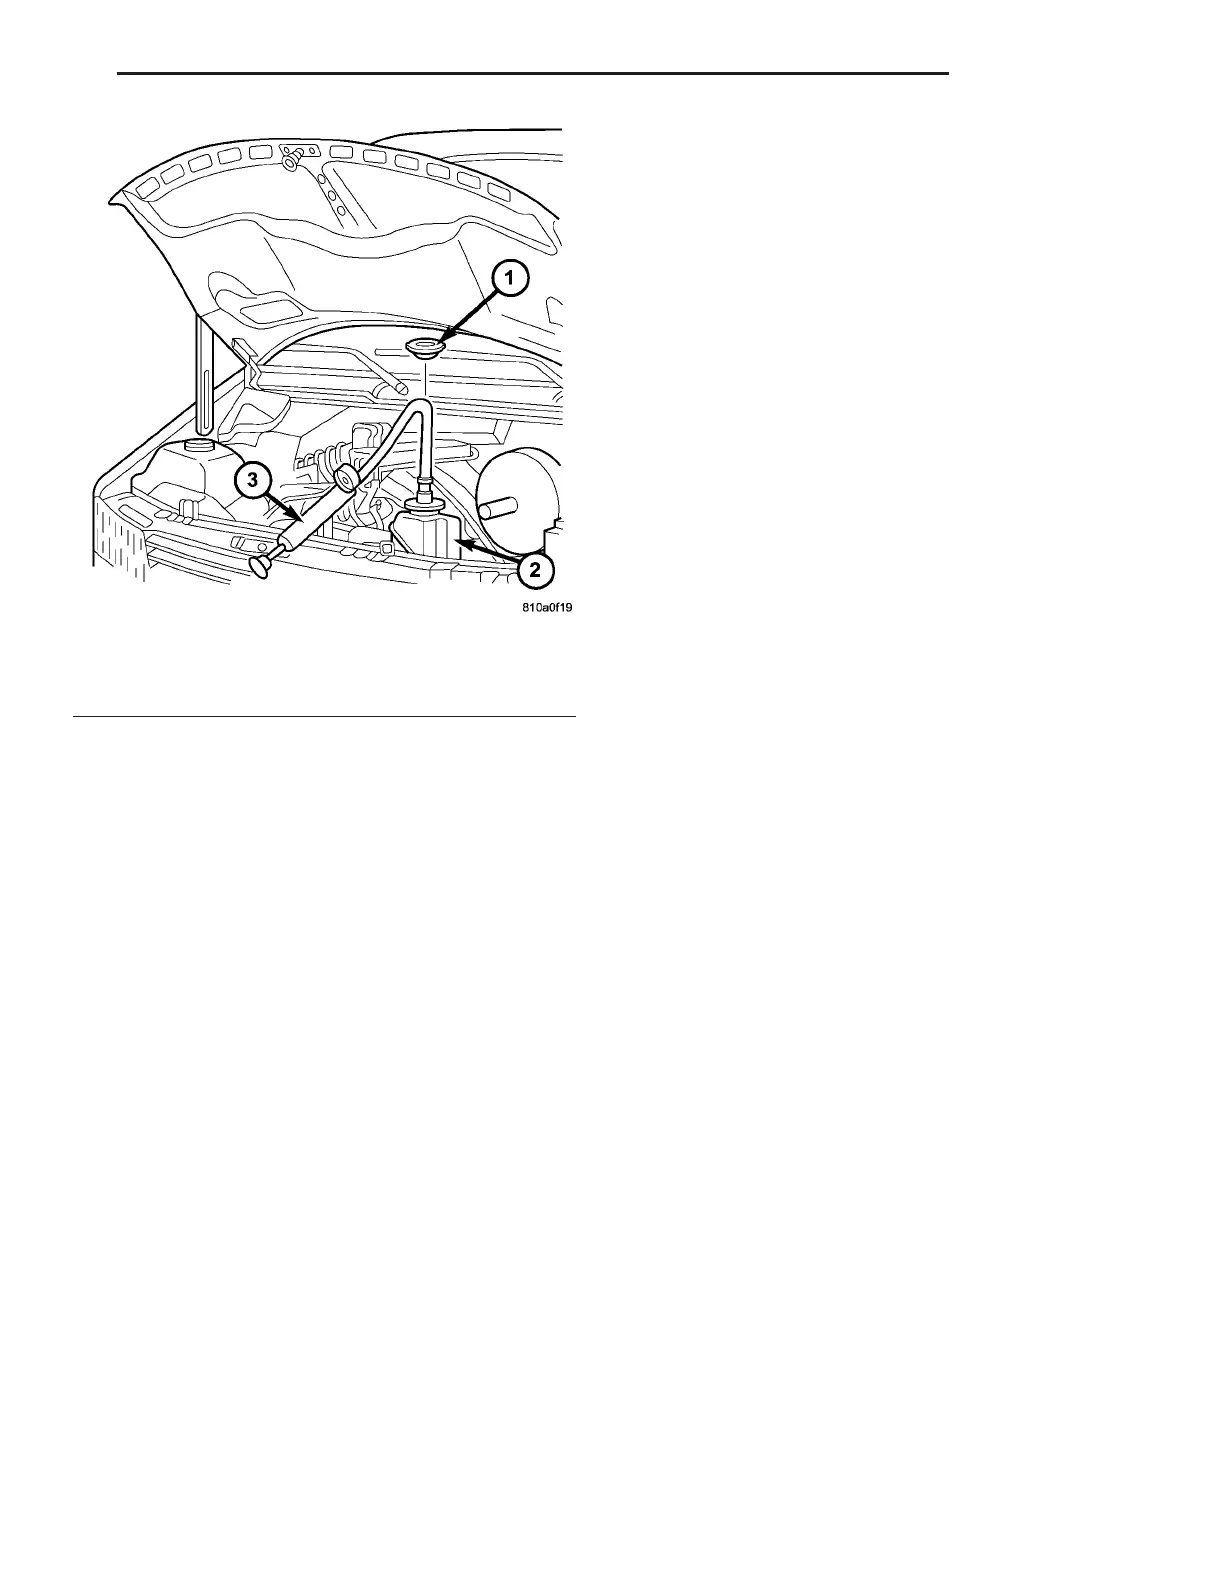
Fig. 2 PRESSURE TESTING
1 - PRESSURE RESERVOIR CAP
2 - PRESSURE RESERVOIR
3 - PRESSURE TESTER
VA ENGINE 7 - 11