(3) Refill coolan t system to proper level with
pr oper mixture of coolant (Refer to7-COOLING/
ENGINE/COOLANT - STANDARD PROCEDURE).
(4) In st all engine cover (Refer t o 9 - ENGINE -
INSTALLATION).
(5) Connect nega tive bat tery cable.
WARNING: Use extreme caution when engine is
operating. Do not stand in a direct line with fan. do
not put your hands near pulleys, belts or fan. Do
not wear loose clothes.
(6) St art en gine and inspect for lea ks.
EN GI N E COOLAN T T H ERM O-
STAT
REMOVAL
WARNING: RISK OF INJURY TO SKIN AND EYES
FROM SCALDING WITH HOT COOLANT. RISK OF
POISONING FROM SWALLOWING COOLANT. DO
NOT OPEN COOLING SYSTEM UNLESS COOLANT
TEMPERATURE IS BELOW 90°C (194°F). OPEN CAP
SLOWLY TO RELEASE PRESSURE. STORE COOL-
ANT IN SUITABLE AND APPROPRIATELY MARKED
CONTAINER. WEAR PROTECTIVE GLOVES,
CLOTHES AND EYE WEAR.
NOTE: Inspect condition of all clamps and hoses,
replace as necessary.
(1) Disconn ect nega tive battery cable.
(2) Partially dr ain engine coolant (Refer to 7 -
COOLING/ENGINE/COOLANT - STANDARD PRO-
CEDURE).
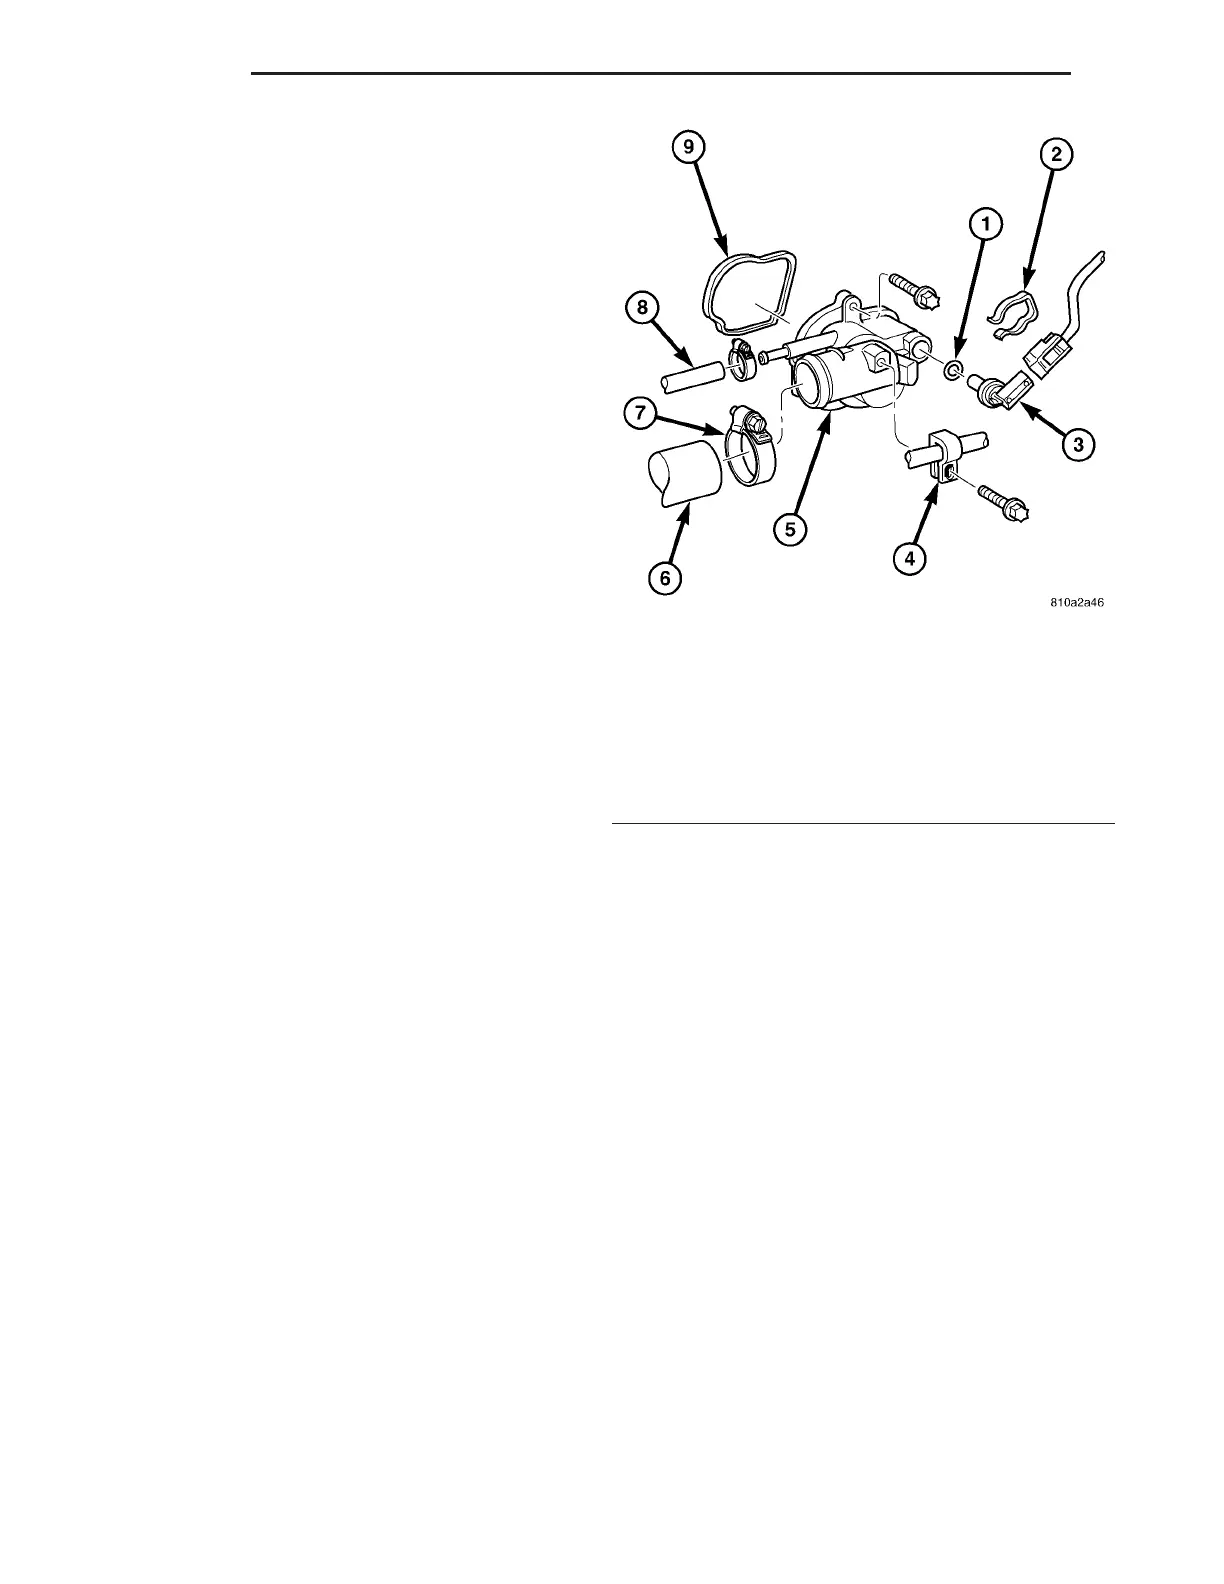
(3) Unplug connector, pull off locking element a nd
pu ll ou t coolant tempera ture sensor.
(4) Detach air intake hose a t cha rge air distribu -
tion pipe.
(5) Detach coolant h oses a t ther mostat housing.
(6) Unscr ew cap at oil filter housin g.
(7) Remove ther mostat h ousing (Fig. 8).
(8) Clean all sealing surfa ces.
INSTALLATION
(1) Clean all sealing surfa ces.
(2) Position and insta ll th ermosta t housing with
new gasket (Fig. 8). Tight en bolts to 9N·m (80
lbs.in .).
NOTE: Inspect condition of all clamps and hoses,
replace as necessary.
(3) In st all cap at oil filter housing.
(4) Connect coolant hoses and vent hose (Fig. 8).
(5) Attach air in take hose at charge air distr ibu-
tion pipe.
(6) Close coolant dra in.
(7) Connect nega tive bat tery cable.
(8) Fill coolant system t o pr oper level with appro-
pr iate coolant m ixture (Refer to 7 - COOLING/EN-
GINE/COOLANT - STANDARD PROCEDURE).
WARNING: USE EXTREME CAUTION WHEN ENGINE
IS OPERATING. DO NOT STAND IN DIRECT LINE
WITH FAN. DO NOT PUT YOUR HANDS NEAR PUL-
LEYS, BELTS OR FAN. DO NOT WEAR LOOSE
CLOTHES.
(9) St art en gine and inspect for lea ks.
Fig. 8 THERMOSTAT HOUSING ASSEMBLY
1 - O-RING
2 - CLAMP
3 - COOLANT TEMPERATURE SENSOR
4 - FUEL LINE W/BRACKET
5 - THERMOSTAT HOUSING ASSEMBLY
6 - COOLANT HOSE
7 - CLAMP
8 - COOLANT HOSE
9 - GASKET
7 - 16 ENGINE VA