GE HEALTHCAREDRAFT LOGIQ™ S7 EXPERT/PRO
DIRECTION 5460683, REVISION 3 DRAFT (JUNE 25, 2014) SERVICE MANUAL
Chapter 8 - Replacement Procedures 8-53
Section 8-13
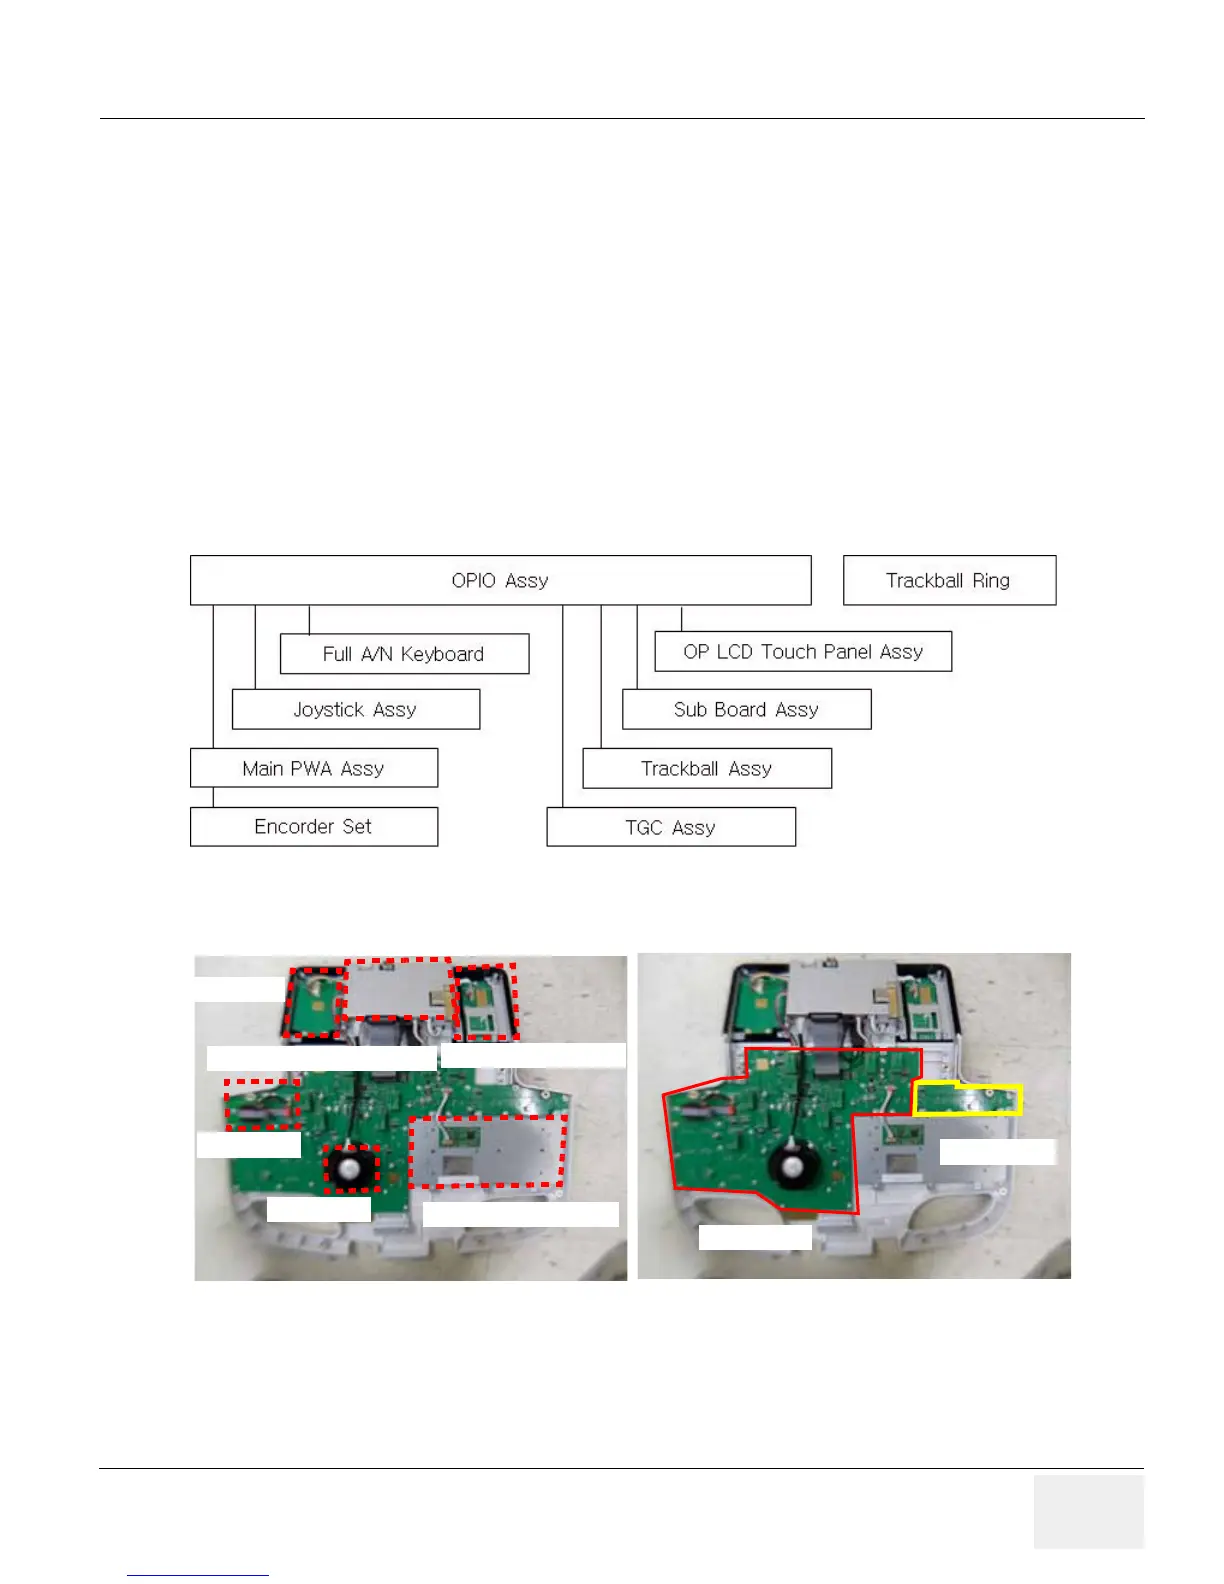
Replacement of OPIO and Related Parts
NOTE: This section describes removal and installation of OPIO and related parts.
OPIO Assy itself, Main PWA Assy, OP LCD Touch Panel Assy, Full A/N Keyboard, TGC Assy, Encoder,
Sub Board Assy, Joystick Assy and Trackball Assy.
8-13-1 Manpower
One person, 5minutes.
8-13-2 Tools
Phillips screwdriver.
8-13-3 Removal Procedure
Nesting of the parts are as follows;
For example, to access Encoder for repair, OP Panel must be removed and then Main OPIO PWA assy
must be removed.
Figure 8-41 OP Panel Assy & Trackball Ring
 Loading...