GE HEALTHCARERAFT LOGIQ™ S7 EXPERT/PRO
DIRECTION 5460683, REVISION 3 DRAFT (JUNE 25, 2014) SERVICE MANUAL
3-30 Section 3-8 - Printer Installation
Section 3-8
Printer Installation
NOTE: For Connection schemes refer to Section 3-6 "Connection of Auxiliary Devices" on page 3-10.
For further installation instructions see:
• Section 3-8-1 "Installing Digital Black & White Printer Sony UP-D897" on page 3-30
• Section 3-8-2 "Installing Digital Color Printer Sony UP-D25MD" on page 3-30
• Section 3-8-5 "Adjustment of Printer Settings" on page 3-34
3-8-1 Installing Digital Black & White Printer Sony UP-D897
1.) Power off/Shutdown the system as described in: Section 3-7-3 on page 3-25.
2.) Physically connect the printer cables as described on Section 3-6-2 on page 3-12.
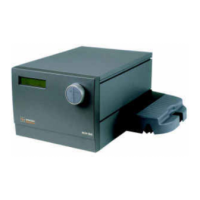
3-8-2 Installing Digital Color Printer Sony UP-D25MD
1.) Power off/Shutdown the system as described in: Section 3-7-3 on page 3-25.
2.) Physically connect the printer cables as described on Section 3-6-2 on page 3-12.
!! NOTICE:
After boot up of the system, verify the correct settings in the printer “Properties”,
see: Section 3-8-4 "Adding Printer to the system" for assigning the Printer to the remote keys P1
, P2,
P3
, P4, P5 and/or P6, and
see: Section 3-8-5 "Adjustment of Printer Settings" .
!! NOTICE:
After boot up of the system, verify the correct settings in the printer “Properties”,
see: Section 3-8-4 "Adding Printer to the system" for assigning the Printer to the remote keys P1
, P2,
P3
, P4, P5 and/or P6, and
see: Section 3-8-5 "Adjustment of Printer Settings" .
 Loading...