GE HEALTHCARERAFT LOGIQ™ S7 EXPERT/PRO
DIRECTION 5460683, REVISION 3 DRAFT (JUNE 25, 2014) SERVICE MANUAL
8-142 Section 8-36 - Replacement of UVC
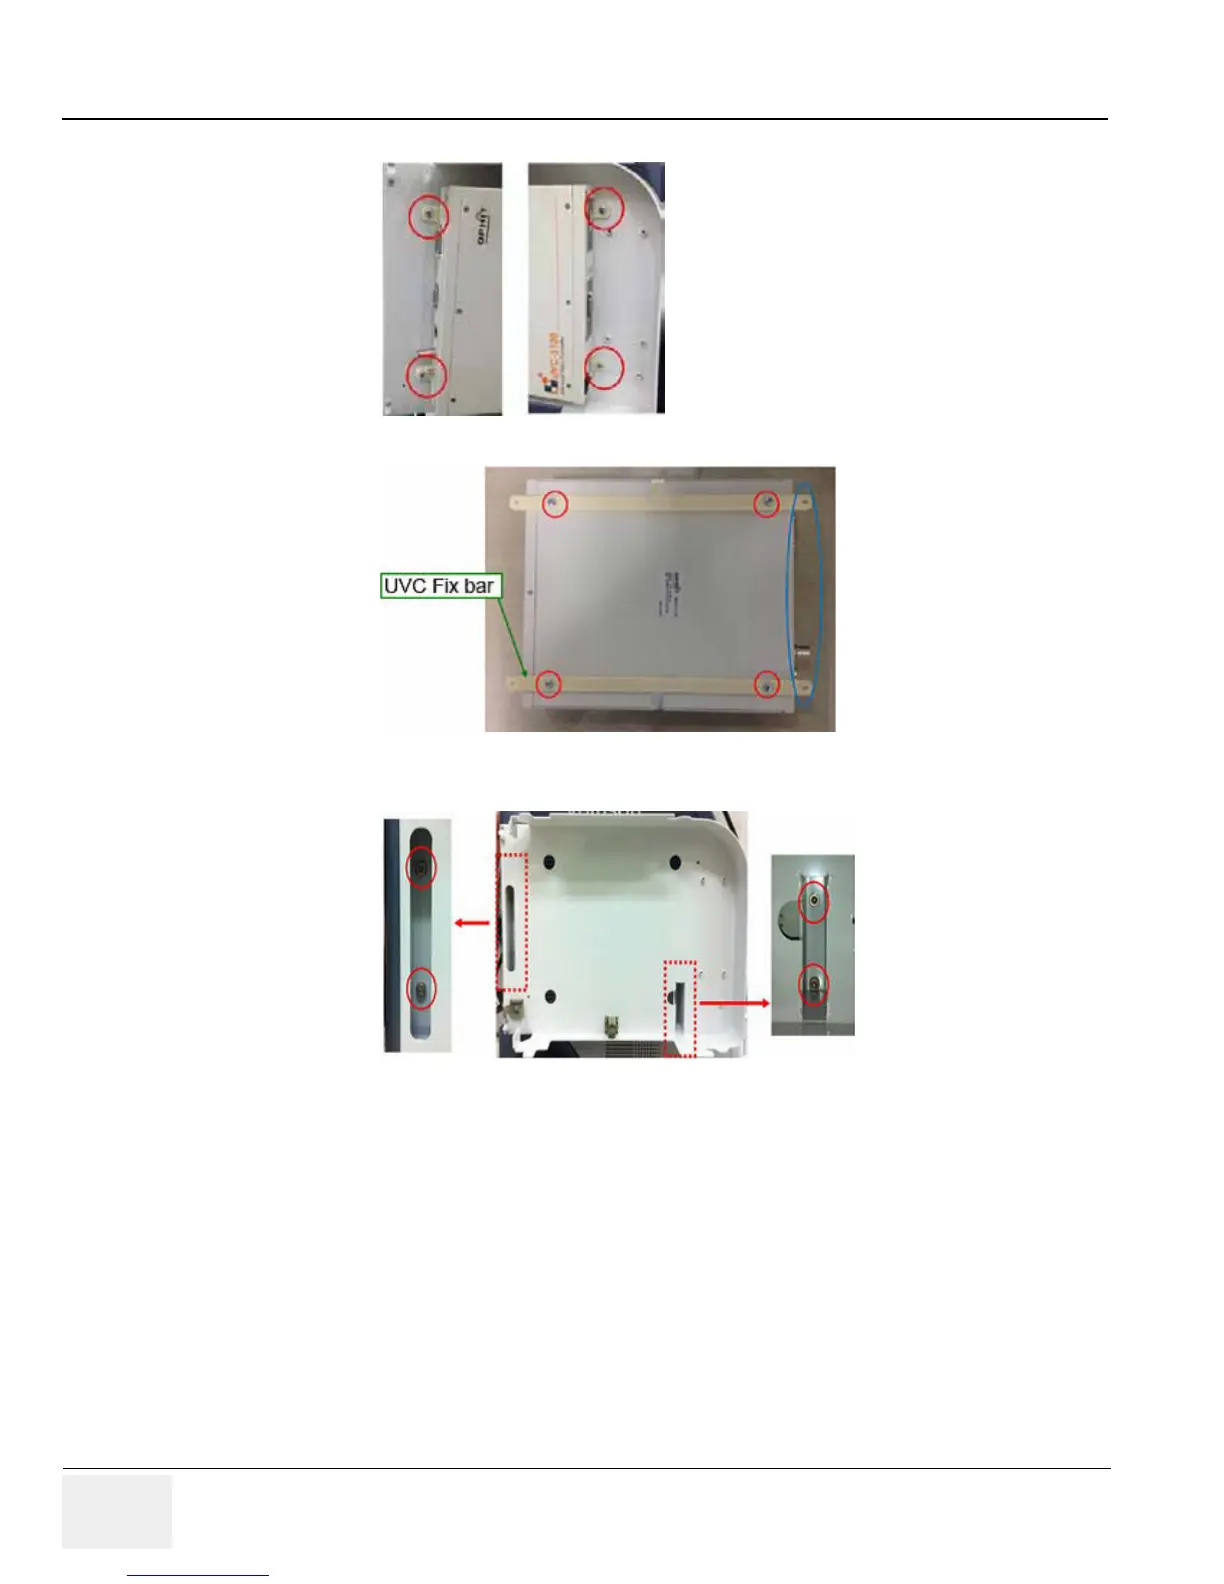
7.) Remove UVC module with the UVC FIX BRKT from UVC frame BRKT LS7/S8 with 4 screws.
8.) Remove 2 UVC FIX BRKT from UVC module with 4 screws.
*At the installation, align the slot hole with same position.
9.) Remove the UVC frame BRKT for LS7/S8 with 4 screws.
8-36-1-4 Installation Procedure
Parts to be installed in reverse order on removal.
8-36-1-5 Functional Check
1.) Connect output (DVI or D-sub or S-video/Composite) on UVC to the external monitor.
2.) Turn the system ON and wait for about 30seconds. (It takes about 30 seconds for UVC booting).
3.) Check that image on external monitor is displayed right. If you connect S-video/Composite port on
UVC to the external monitor, Cropped image (only Scan area out of the main display) will be
displayed on the external monitor.
 Loading...