K117sm8eC
8-153
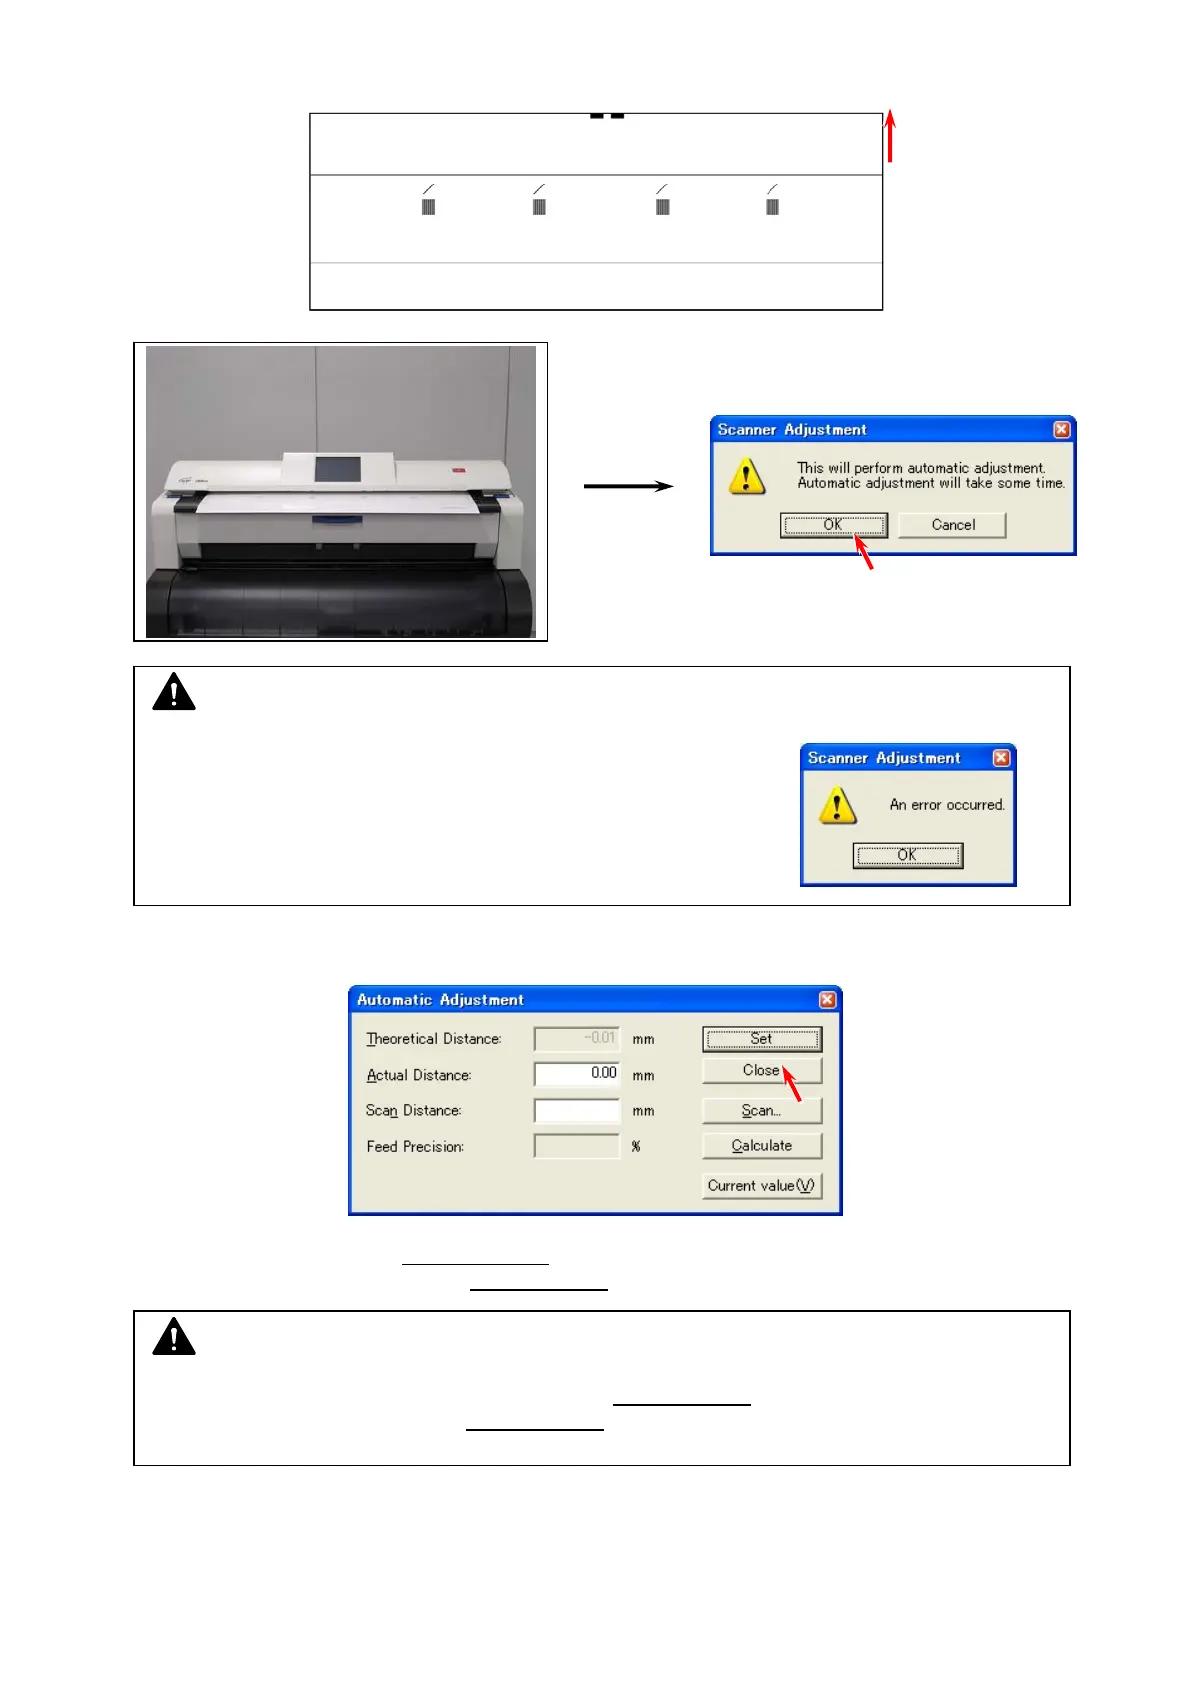
4. Set Stitch Adjustment Chart to the scanner noting the set direction and press [OK].
Stitch Adjustment Chart
5. After completing the scan, the following window will be displayed. Press [Close].
6. Automatic Adjustment for X/Y positioning
is completed.
Continue to the next step for the LE positioning
.
NOTE
An incorrect feeding of Stitch Adjustment Chart may result
in an error. Position Stitch Adjustment Chart with the center
of Original Table and avoid skewing.
NOTE
After Automatic Adjustment for X/Y positioning, LE positioning
is required. Be sure to follow
the later procedure to adjust the LE positioning
.