K117sm2e3
2-33
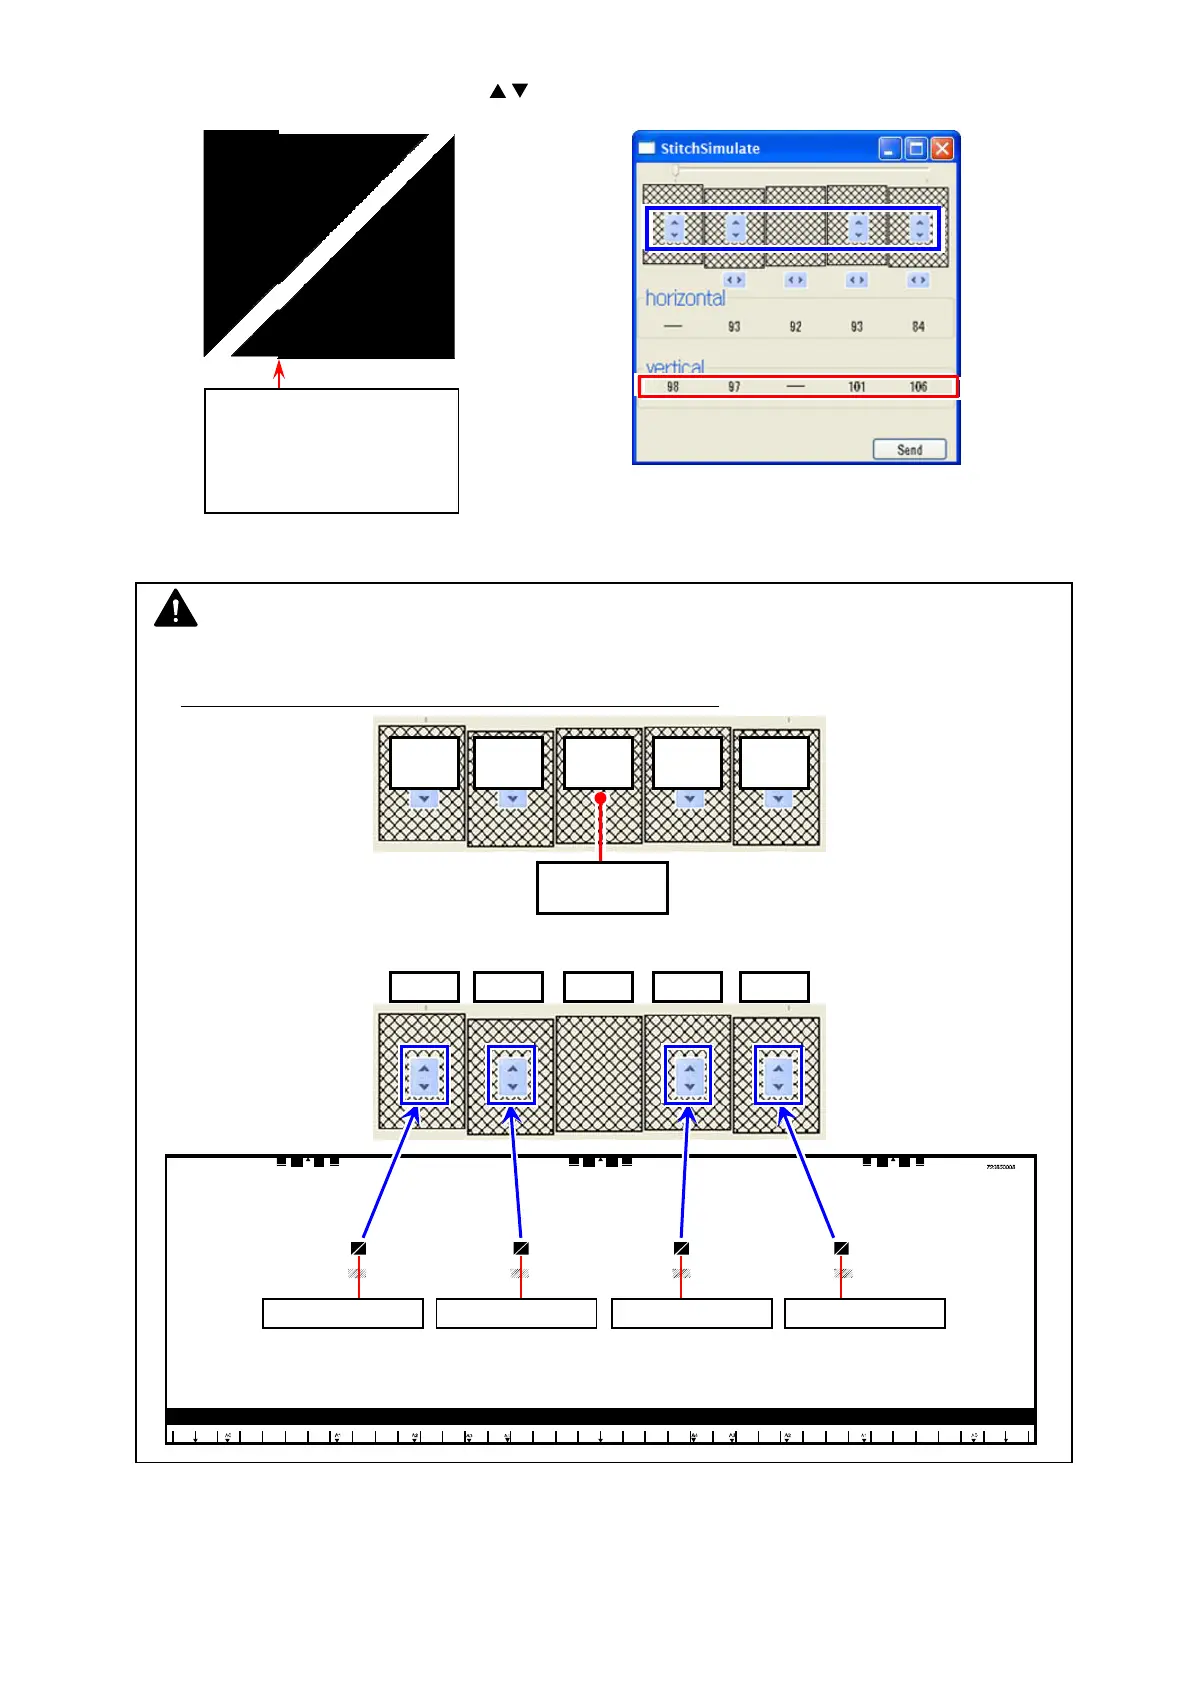
19. First, correct vertical misalignment as follows.
19-1. In “StitchSimulate” window, click the buttons (see below in blue frame) to change the
setting value for “vertical” (see below in red frame), in order to move the image block vertically.
Do the same way for all the 4 targets at the borders.
Setting values will turn red by setting changes. Setting value 1 step = 1 pixel to trailing edge
19-2. Image shifting (setting value in red) is not finalized yet. Click [Send].
Once the change is sent to the scanner’s Main Board, setting values turn black.
vertical misalignment
or
this may include vertical &
horizontal misalignment
at a time
NOTE
(1) For vertical correction, CIS 3 is the reference. You are asked to set the distance of shift for CIS
1/2/4/5 against CIS 3.
First finalize the shift for CIS 2, and next CIS 1, CIS 4, CIS 5.
(2) The increase/decrease buttons correspond to the CIS border as follows.
2nd:
CIS 1
1st:
CIS 2
CIS 3
3rd:
CIS 4
4th:
CIS 5
Reference:
CIS 3
CIS1 to CIS2 CIS2 to CIS3 CIS3 to CIS4 CIS4 to CIS5
CIS 1 CIS 2 CIS 3 CIS 4 CIS 5