9 - 3
Chapter 9 ESS Options
2.2 Installing the CF
1) Turn the printer power OFF and remove the power cord from the outlet.
2) Remove the COVER RIGHT (RRP1.2) (PL1.1.4).
3) Remove the SHIELD ASSY WINDOW (RRP12.8) (PL12.1.15).
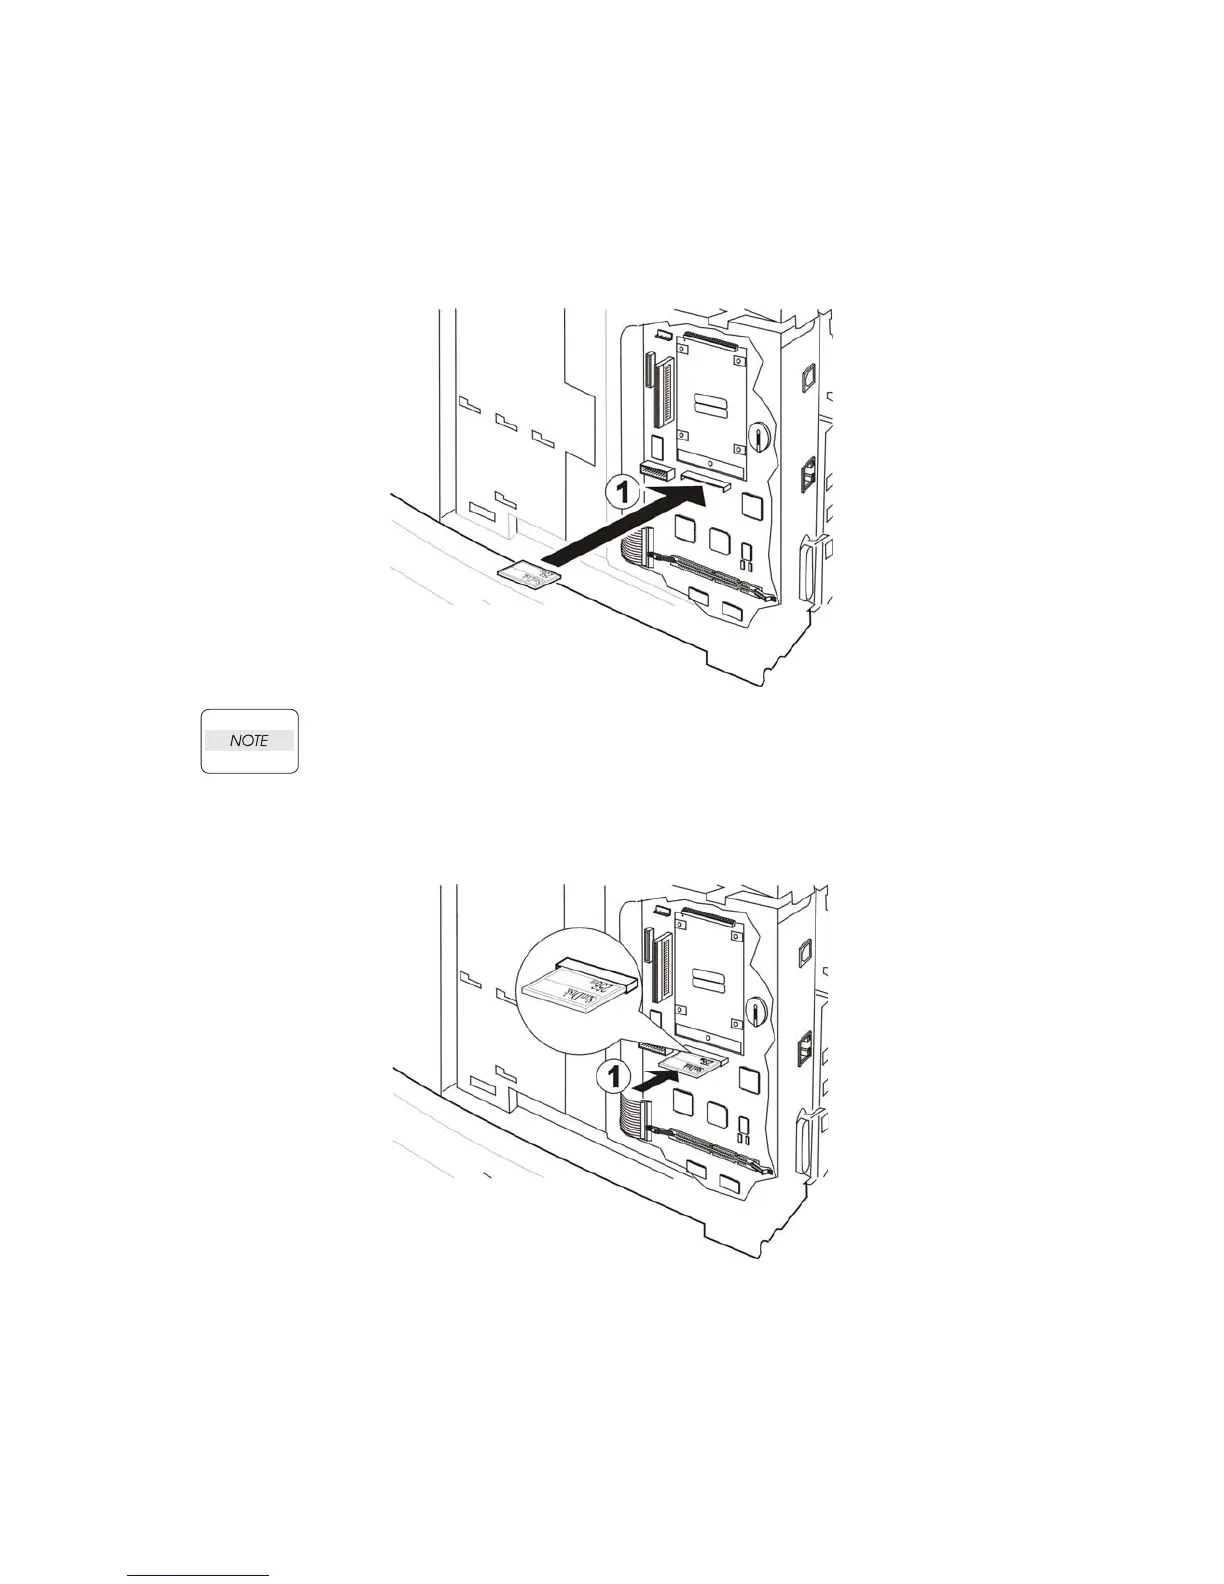
4) Align the CF with the socket on the ESS PWB (See figure below).
In the step that follows take care when seating the device. The pins are fragile and can be
easily damaged.
5) Carefully seat the CF in the socket on the ESS PWB (See figure below).
6) Replace the SHIELD ASSY WINDOW.
7) Replace the COVER RIGHT.
8) Plug the power cord into the AC outlet and turn the printer power ON.

 Loading...


