3 - 63
Chapter 3 Removal and Replacement Procedures (RRPs)
RRP4.5 ROLL REGI RUBBER (PL 4.1.12)
Removal
1) Remove the COVER REAR 500 (PL 7.1) (RRP7.9).
2) Remove the FUSER ASSEMBLY (PL 6.1) (RRP6.8).
3) Remove the COVER REAR (PL 1.1) (RRP1.1)
4) Remove the CHUTE TRANSFER (PL 6.1) together with the BTR ASSEMBLY (RRP6.9).
5) Remove the 150 FEEDER ASSEMBLY (PL 4.1) (RRP4.1).
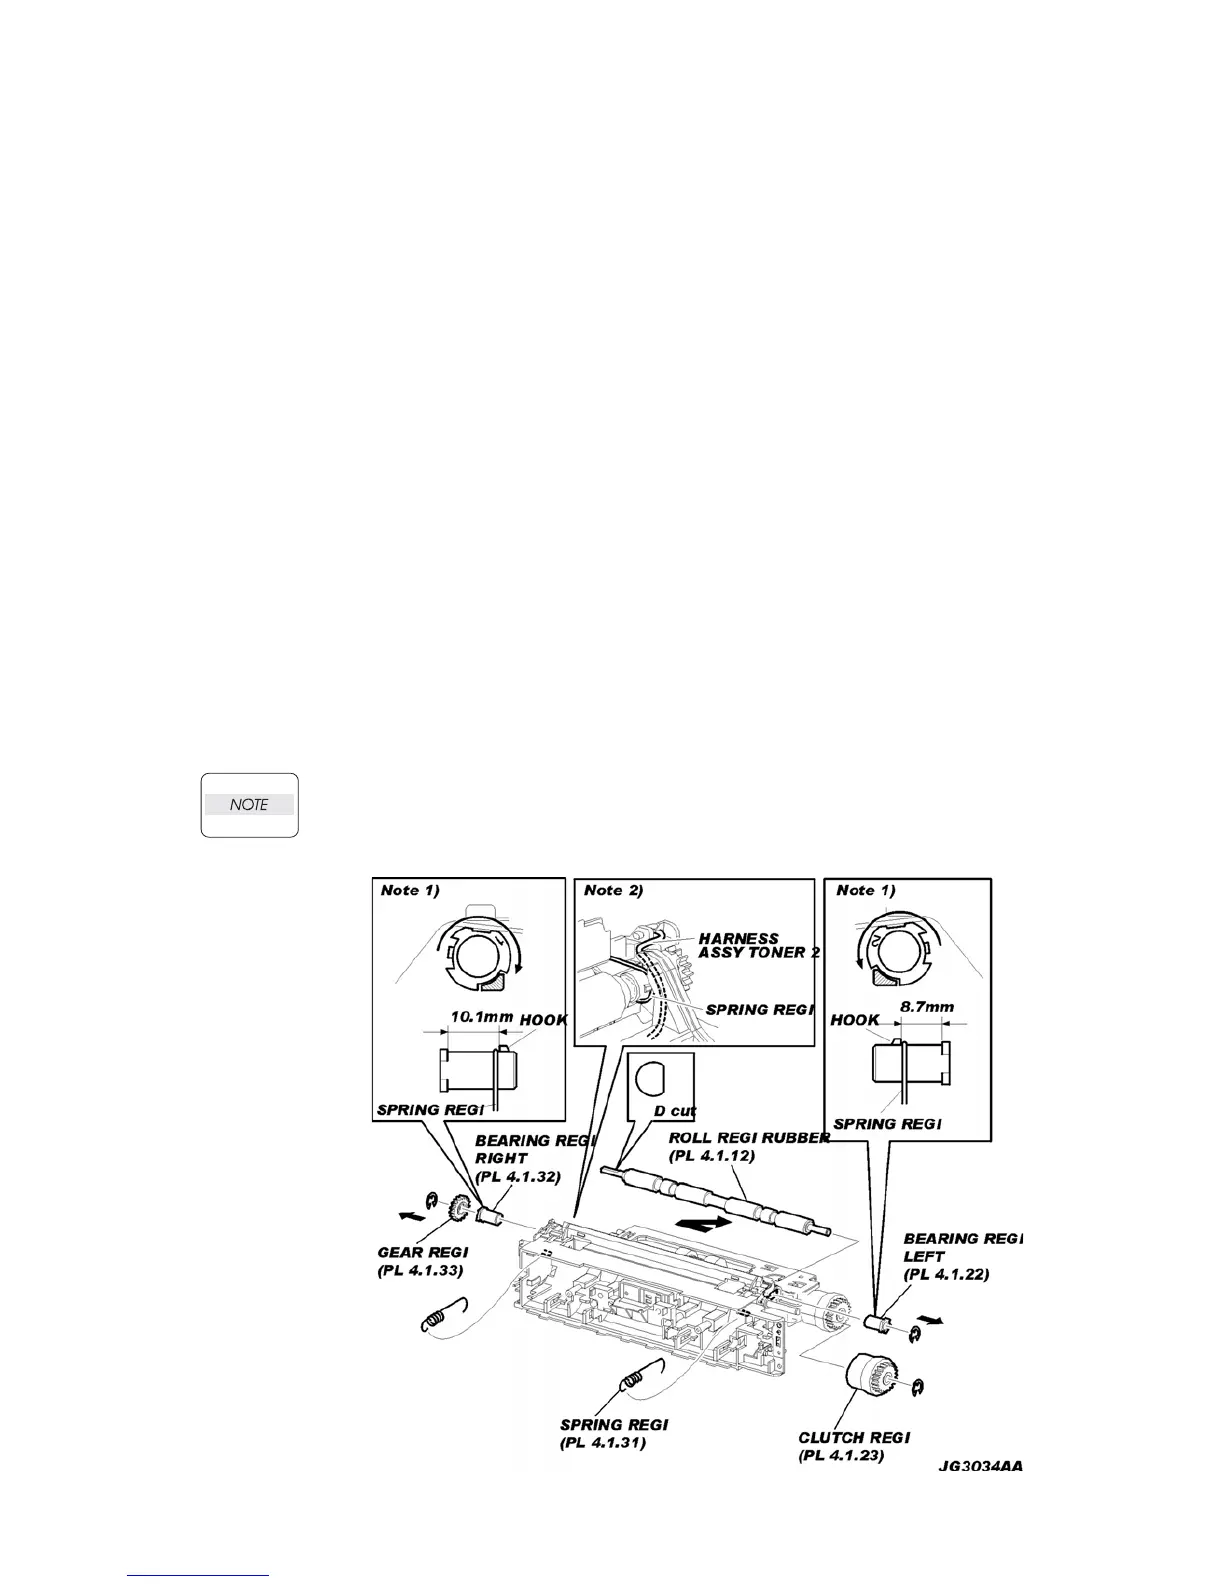
6) Remove 2 SPRING REGIs (PL 4.1) hanging to the CHUTE REGI (PL 4.1) and ROLL REGI RUB-
BER (PL 4.1.12) on both sides of the 150 FEEDER ASSEMBLY (Figure 1).
7) Remove the E-ring securing the GEAR REGI RUBBER (PL 4.1) to the ROLL REGI RUBBER, and
remove the GEAR REGI RUBBER from the ROLL REGI RUBBER (Figure 1).
8) Remove the E-ring securing the BEARING REGI LEFT (PL 4.1) to the ROLL REGI RUBBER.
9) Pull the BEARING REGI LEFT, and turn it in the direction of the arrow shown in the figure, and
remove the notch of the BEARING REGI LEFT from the protrusion of the CHUTE REGI (NOTE 1).
10) Pull the BEARING REGI LEFT out from the ROLL REGI RUBBER.
11) Remove the E-ring securing the CLUTCH REGI (PL 4.1), and remove the CLUTCH REGI.
12) Pull the BEARING REGI RIGHT (PL 4.1), and turn it in the direction of the arrow shown in the fig-
ure, and remove the notch of the BEARING REGI RIGHT from the protrusion of the CHUTE REGI
(NOTE 1).
13) Pull the BEARING REGI RIGHT out from the ROLL REGI RUBBER.
14) Shift the ROLL REGI RUBBER left, and extract the right of the ROLL REGI RUBBER from the hole
of the CHUTE REGI, and then extract the ROLL REGI RUBBER upward.
When removing, do not touch the roller surface of the ROLL REGI RUBBER.
Figure 1. Rubber Registration Roller