Protected by copyright. Copying for private or commercial purposes, in part or in whole, is not
permitted unless authorised by AUDI AG. AUDI AG does not guarantee or accept any liability
with respect to the correctness of information in this document. Copyright by AUDI AG.
– Continue installing the moulded headliner -1- in the reverse order of removal.
3 - Clips
4 - Tabs (4x)
5 - Bolts (2x)
❑ Tightening torque 4 Nm.
6 - Bolts (2x)
❑ Tightening torque 4 Nm.
7 - Bolts (4x)
❑ Tightening torque 4 Nm.
8 - Bolts (2x)
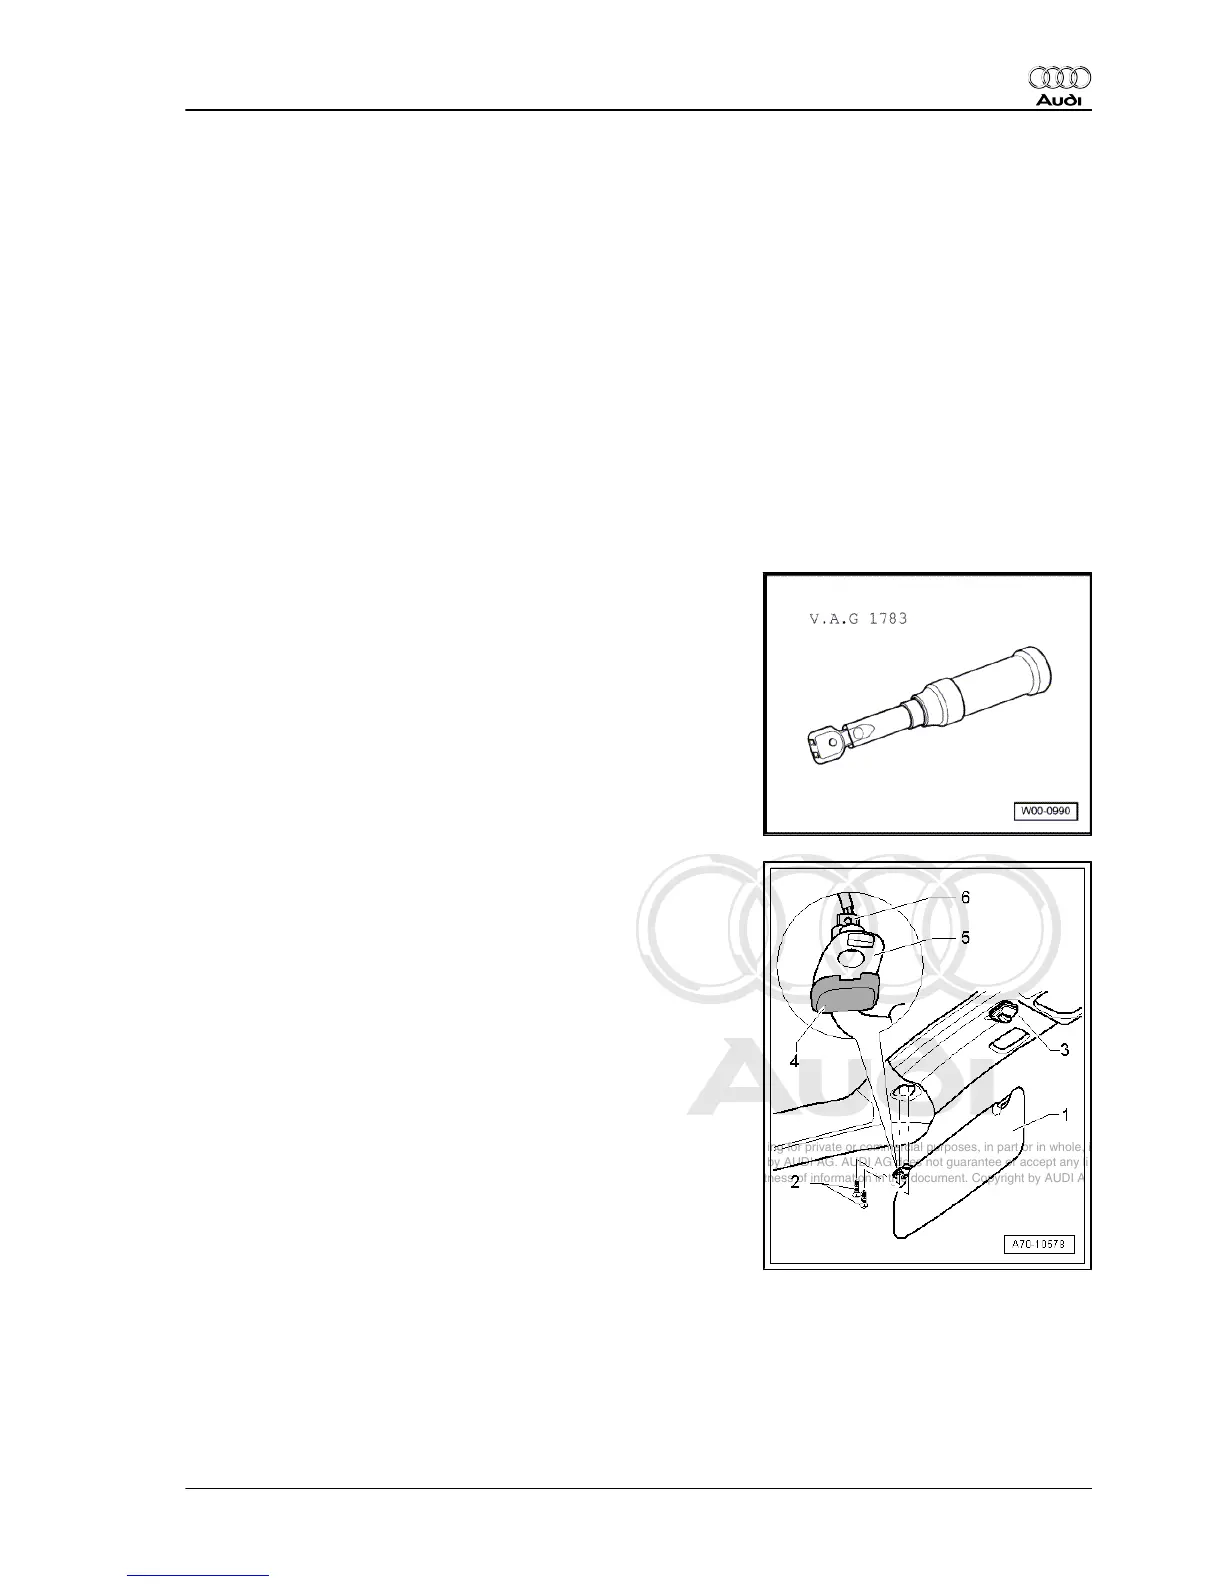
5.2 Removing and installing sun visor
Special tools and workshop equipment required
♦ Torque wrench -V.A.G 1783-
– Disengage the sun visor -1- from the mount -3- and fold the
sun visor towards the windscreen.
– Use a screwdriver to carefully prise the cap -4- out of the sun
visor base -5- at the recess.
– Screw out the bolts -2- (2x).
– Unplug the connector -6- and detach the sun visor.
♦ Tightening torque 3.5 Nm.
5.3 Removing and installing sun visor
mount
Special tools and workshop equipment required
Audi A8 2003 ➤
General body repairs, interior - Edition 07.2011
5. Roof trim 247