Protected by copyright. Copying for private or commercial purposes, in part or in whole, is not
permitted unless authorised by AUDI AG. AUDI AG does not guarantee or accept any liability
with respect to the correctness of information in this document. Copyright by AUDI AG.
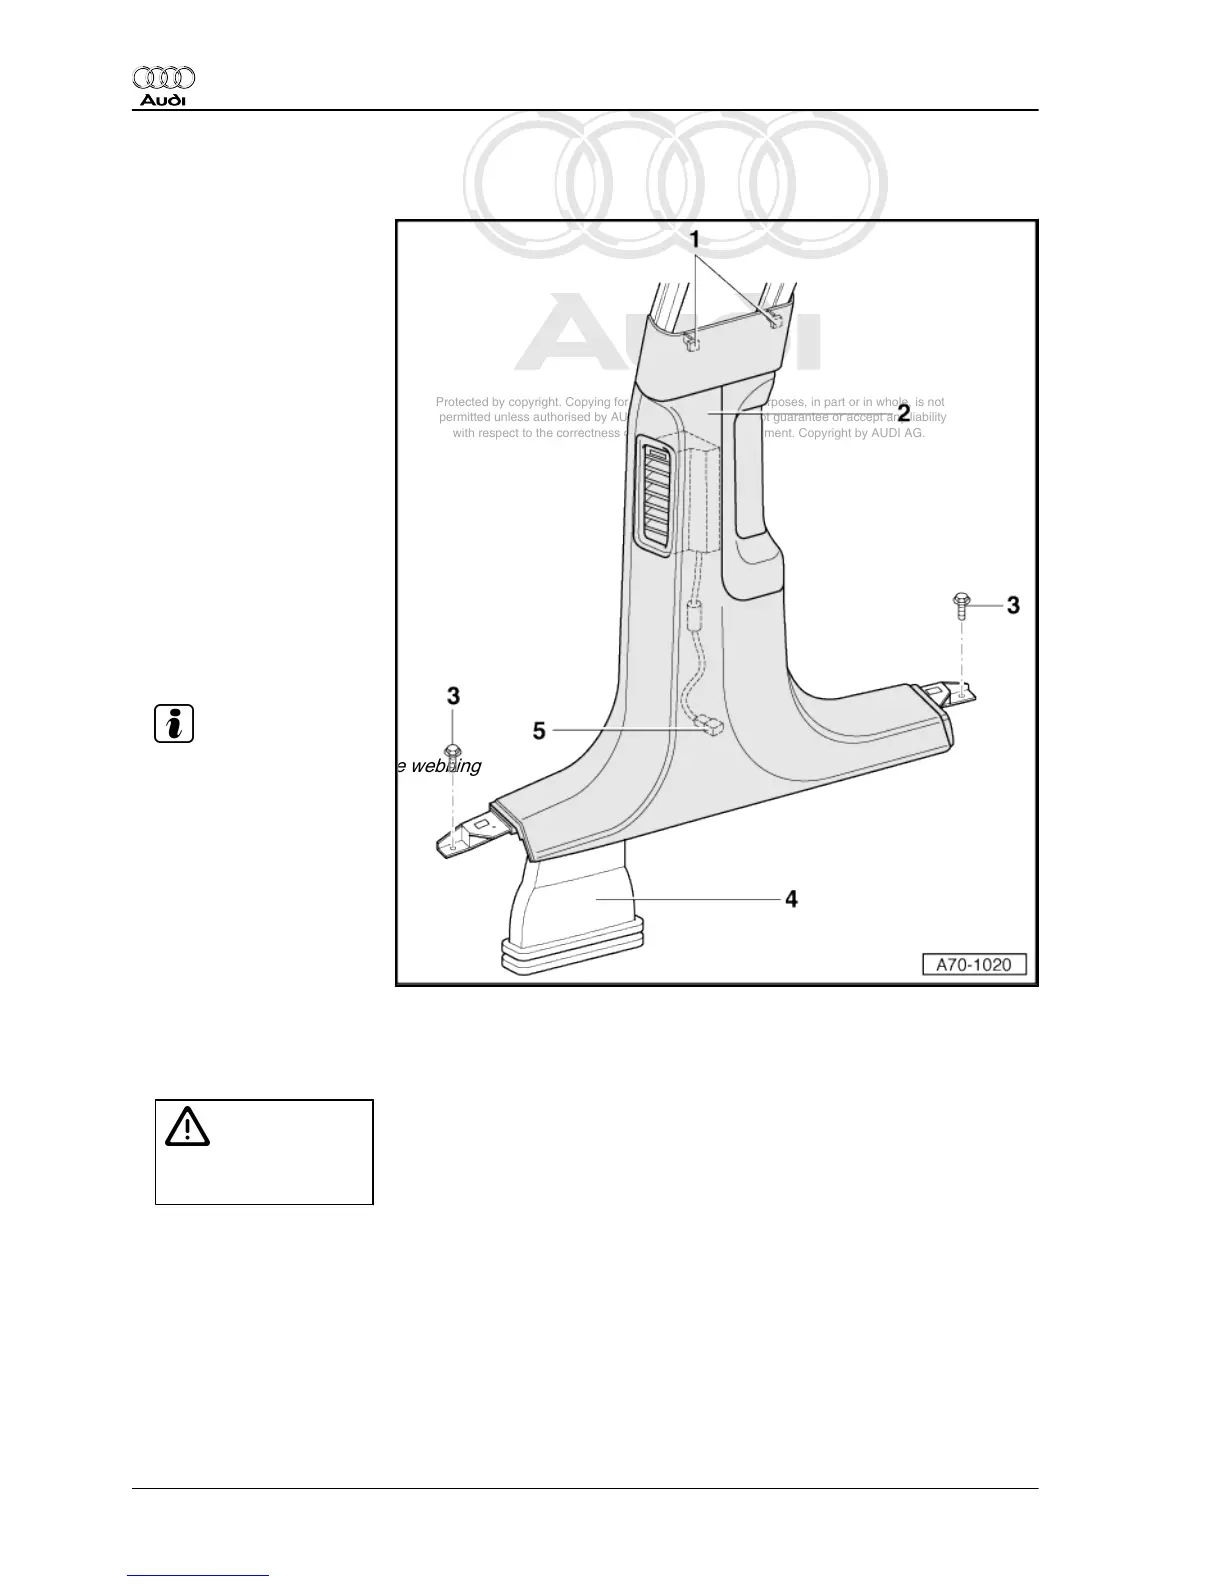
6.7 Removing and installing lower B-pillar trim
1 - Clips (2x)
2 - Lower B-pillar trim
♦ Removing
– Unclip the lower A-pillar
trim in the area of the B-
pillar.
– Unclip the wheel hous‐
ing trim in the area of the
B-pillar.
– Unscrew the bolts -3-
(2x).
– Unfasten the lower B-
pillar trim -2- at the
clips -1- (2x) and pull the
trim forwards.
– Pull the lower B-pillar
trim -2- upwards and in
doing so detach the air
duct -4-.
– Unplug the connector
for the ventilation sys‐
tem light -5-.
♦ Installing
Note
Take care not to trap the webbing
when fitting the trim.
– Plug in the connector for
the ventilation system
light -5-.
– Guide the air duct -4- in‐
to the recess at the sill
panel shell.
– Press on the lower B-pil‐
lar trim -2-.
– Screw in the bolts -3- (2x).
– Clip in the lower A-pillar trim and wheel housing trim.
WARNING
Make sure the trim is a
firm fit.
– Make sure the rubber door seal is properly fitted over the B-pillar trim -2-.
3 - Bolts (2x)
4 - Air duct
5 - Connector for ventilation system light
6.8 Removing and installing C-pillar trim
Special tools and workshop equipment required
Audi A8 2003 ➤
General body repairs, interior - Edition 07.2011
256 Rep. gr.70 - Trim, insulation