Protected by copyright. Copying for private or commercial purposes, in part or in whole, is not
permitted unless authorised by AUDI AG. AUDI AG does not guarantee or accept any liability
with respect to the correctness of information in this document. Copyright by AUDI AG.
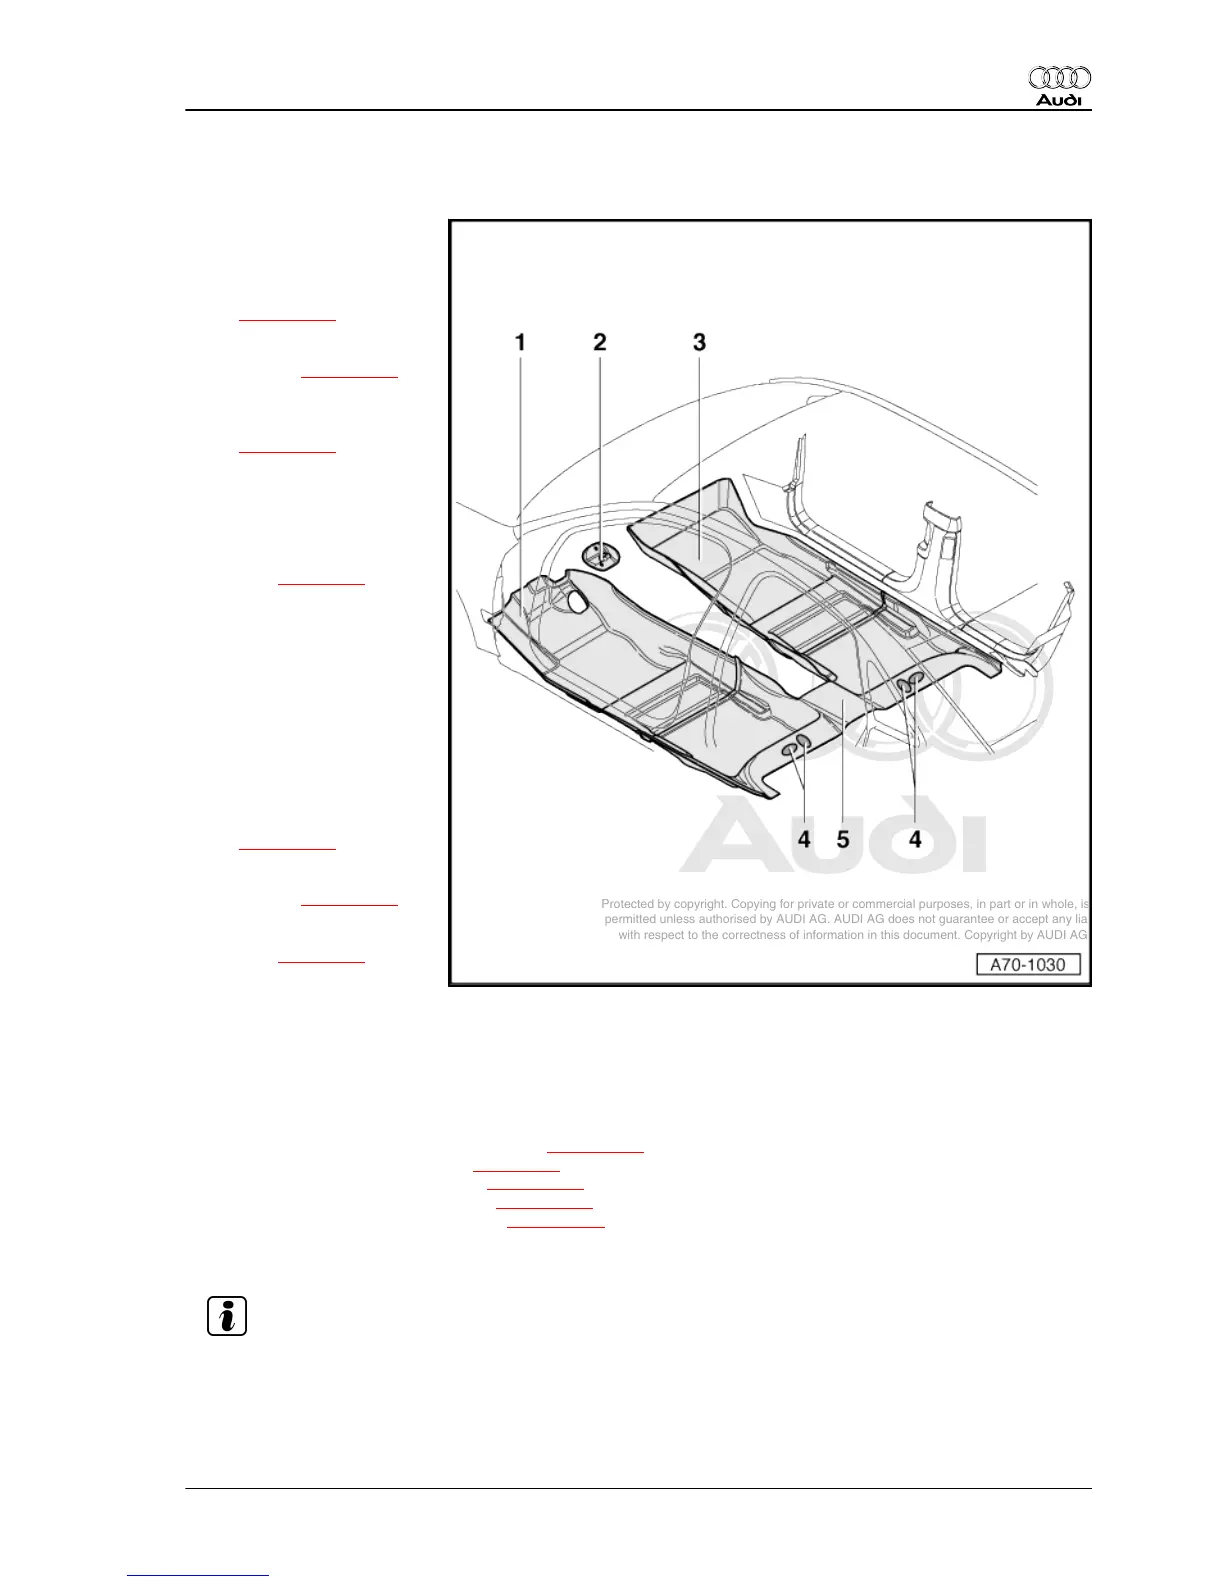
6.17 Removing and installing floor covering
1 - Driver side floor covering
♦ Removing
– Remove the seat
⇒ page 282 .
– Remove the lower A-pil‐
lar trim ⇒ page 253 .
– Remove the foot rest
(driver side)
⇒ page 253 .
– Take out the cover plate
for the accelerator pedal
stop -2-.
– Remove the centre con‐
sole ⇒ page 19 .
– Fold up the floor cover‐
ing lengthways and take
it out of the vehicle.
2 - Cover plate for accelerator
pedal stop
3 - Front passenger side floor
covering
♦ Removing
– Remove the seat
⇒ page 282 .
– Remove the lower A-pil‐
lar trim ⇒ page 253 .
– Remove the centre con‐
sole ⇒ page 19 .
– Fold up the floor cover‐
ing lengthways and take it out of the vehicle.
4 - Plastic sleeves (4x)
5 - Rear floor covering
♦ Removing
– Remove the right and left front seats ⇒ page 282 .
– Remove the centre console ⇒ page 19 .
– Remove the rear seat bench ⇒ page 333 .
– Remove the lower B-pillar trim ⇒ page 256 .
– Remove the wheel housing trim ⇒ page 258 .
– Unclip the plastic sleeves -4- (4x) from the body.
– Fold up the floor covering lengthways and take it out of the vehicle.
♦ Installing
Note
The floor covering is susceptible to
tearing at the cut-outs. Fit the floor
covering in the vehicle carefully.
– Install the floor covering in the reverse order of removal.
Audi A8 2003 ➤
General body repairs, interior - Edition 07.2011
6. Trim panels 267