Protected by copyright. Copying for private or commercial purposes, in part or in whole, is not
permitted unless authorised by AUDI AG. AUDI AG does not guarantee or accept any liability
with respect to the correctness of information in this document. Copyright by AUDI AG.
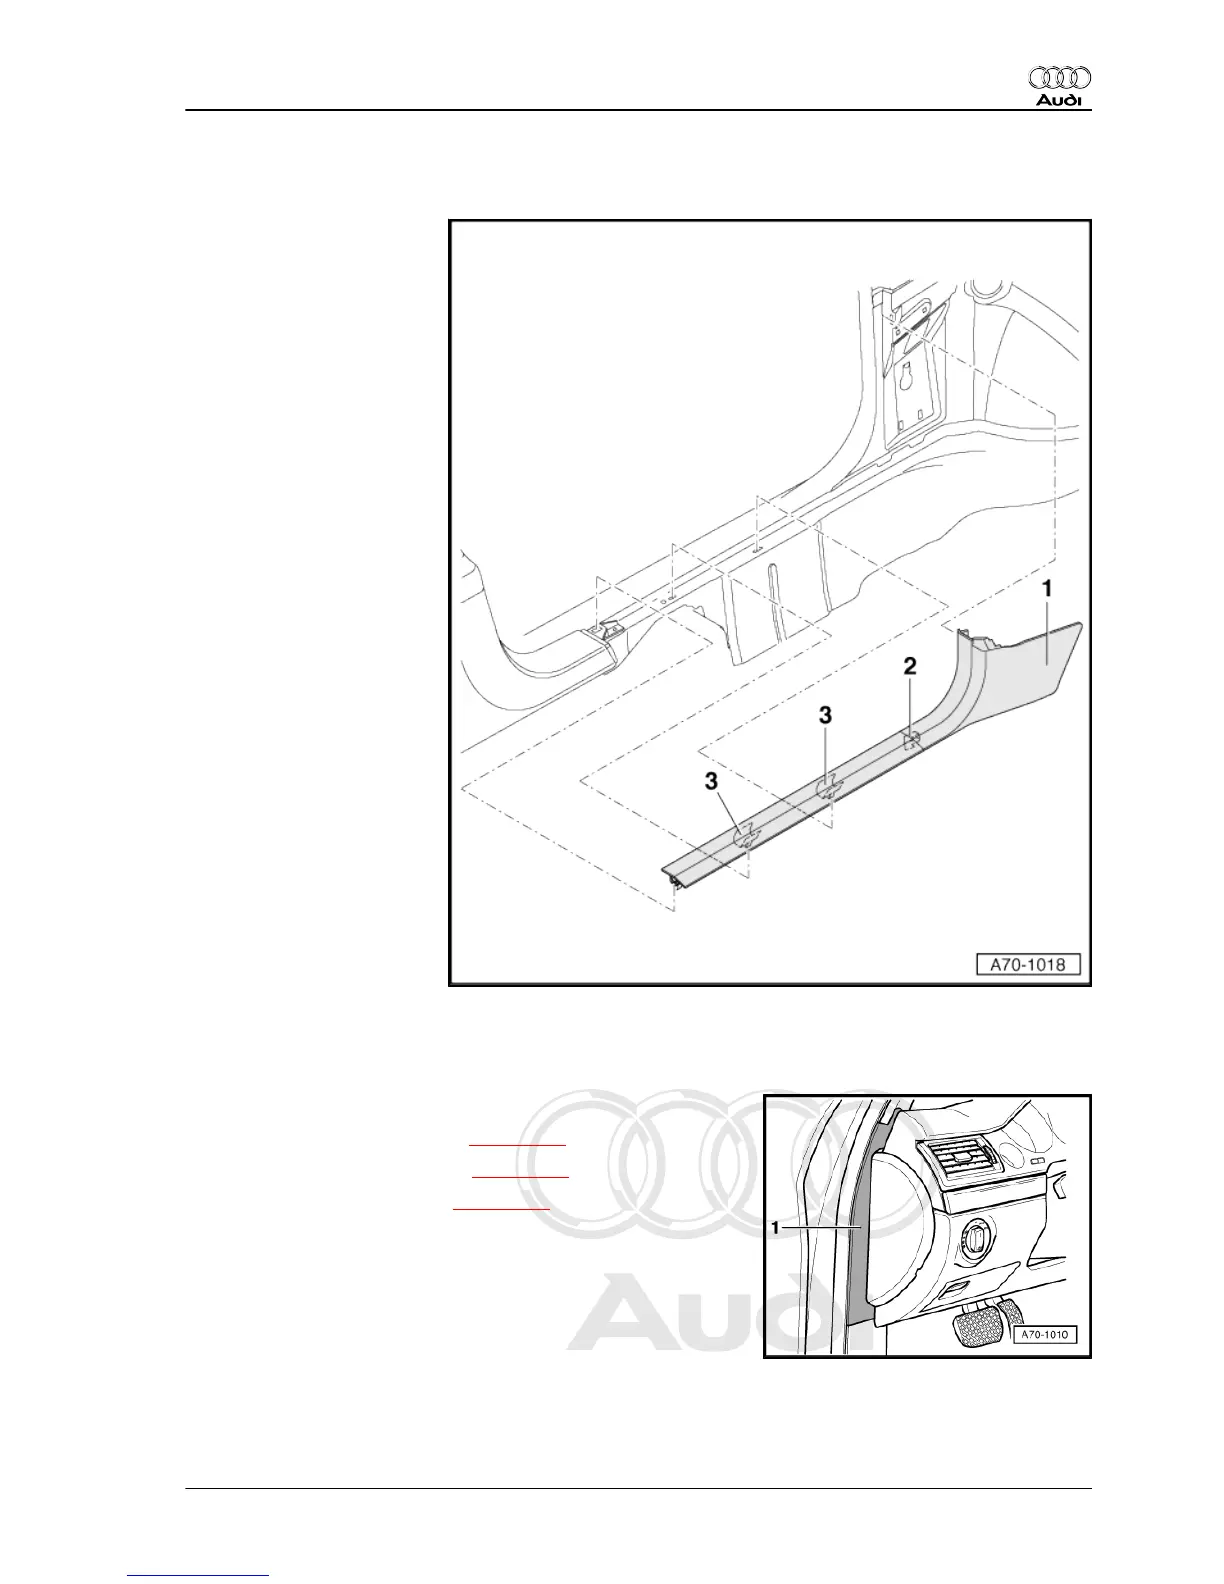
6.3 Removing and installing lower A-pillar trim
1 - Lower A-pillar trim
♦ Removing
– Unfasten the lower A-
pillar trim -1- from the
two clips -3- (2x).
– Pull out the lower A-pil‐
lar trim -1- to the rear.
♦ Installing
– Slide the lower A-pillar
trim -1- at the front into
the foot rest.
– Engage the lower A-pil‐
lar trim -1- in the holder
-2-.
– Secure the lower A-pil‐
lar trim -1- at the two
clips -3- (2x).
– Make sure the rubber
door seal is properly fit‐
ted over the lower A-pil‐
lar trim.
2 - Holder
3 - Clips (2x)
6.4 Removing and installing upper and low‐
er A-pillar intermediate piece
♦ Removing
– Remove the lower A-pillar trim ⇒ page 253 .
– Remove the upper A-pillar trim ⇒ page 250 .
– Remove the dash panel trim ⇒ page 223 .
– Detach the intermediate piece -1-.
♦ Installing
– Install the intermediate piece -1- in the reverse order of re‐
moval.
6.5 Removing and installing foot rest
Special tools and workshop equipment required
Audi A8 2003 ➤
General body repairs, interior - Edition 07.2011
6. Trim panels 253