Protected by copyright. Copying for private or commercial purposes, in part or in whole, is not
permitted unless authorised by AUDI AG. AUDI AG does not guarantee or accept any liability
with respect to the correctness of information in this document. Copyright by AUDI AG.
Removing
– Remove the rear seat bench ⇒ page 333 .
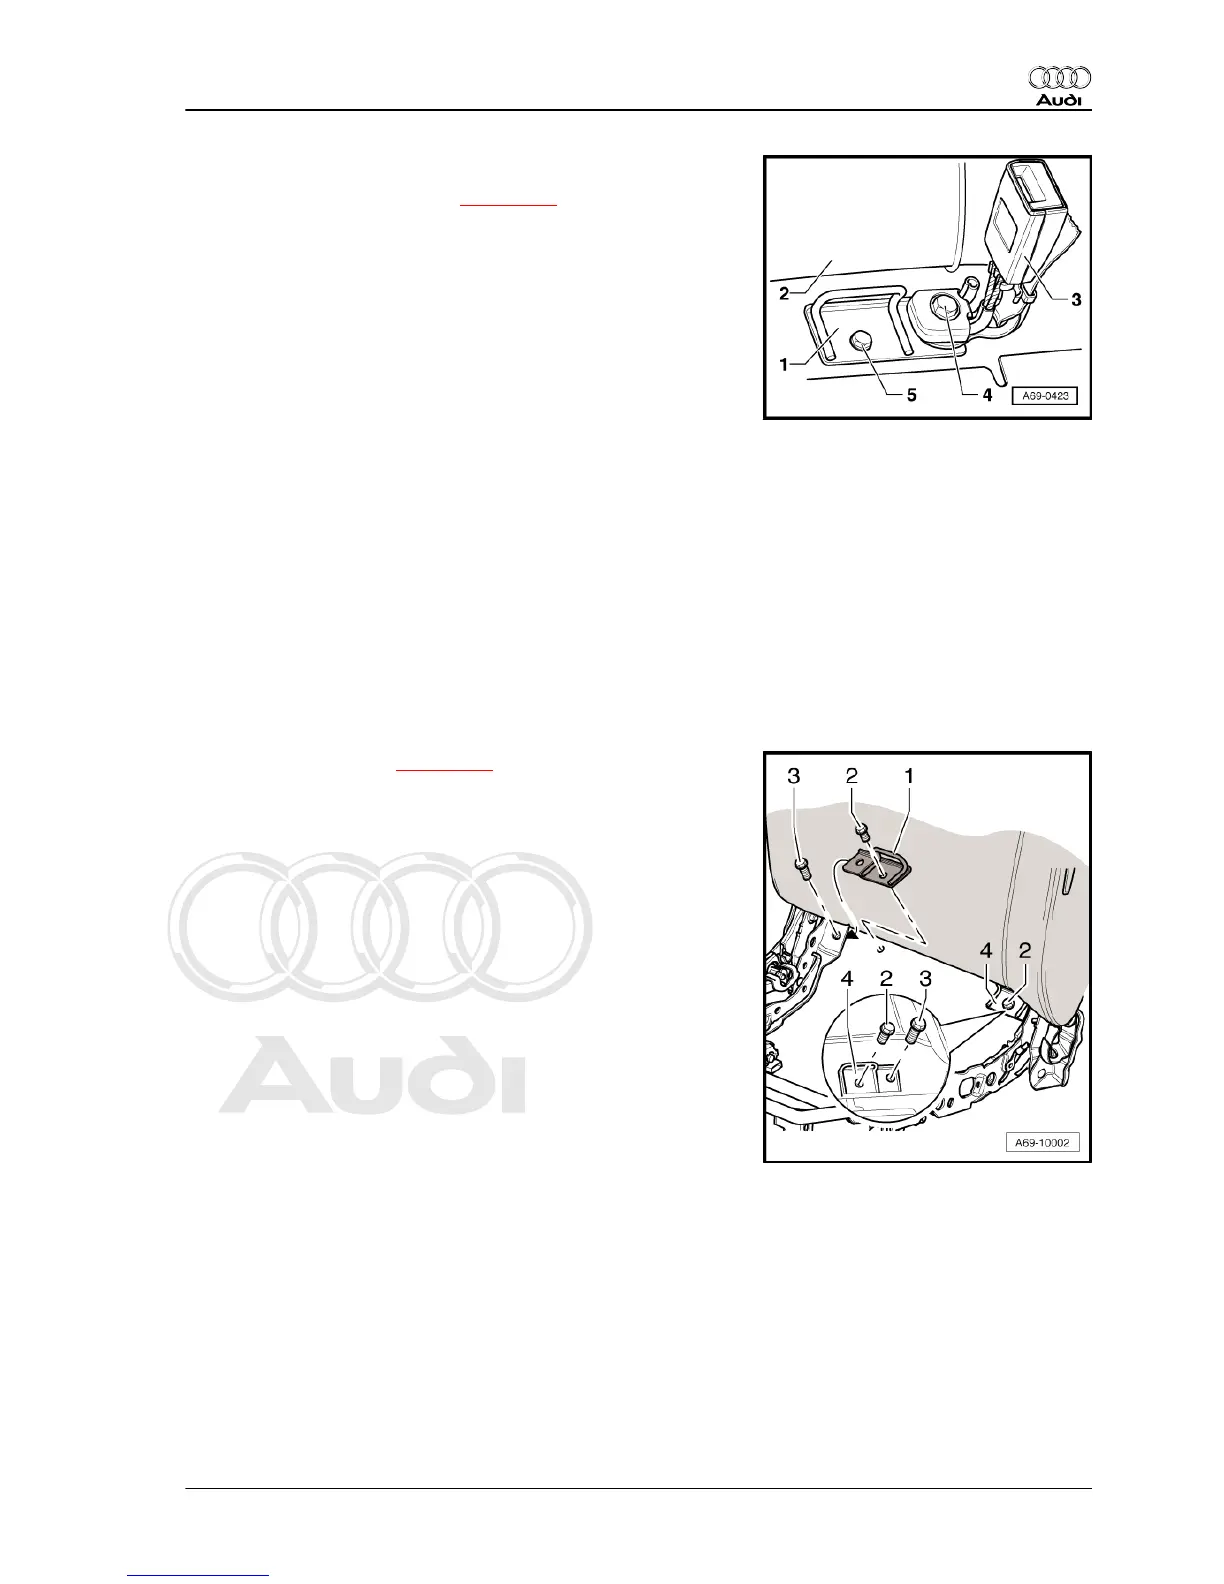
– Screw out the bolt -4-.
– Detach the buckle.
– Screw out the bolt -5-.
– Take out the ISOFIX holder -1-.
2 - Rear seat backrest
Installing
Install in reverse order, paying attention to the following:
– Pay attention to the position of the locating pin on fitting the
buckle.
– Replace the bolts if the ISOFIX holder was removed as part of
servicing work following an accident
Tightening torques
♦ Bolt -4-: 55 Nm
♦ Bolt -5-: 40 Nm
13.2 Removing and installing rear ISOFIX
holder with electrically operated individ‐
ual seats
– Remove the seat pan ⇒ page 342 .
Outer ISOFIX holder -4-
– Unscrew the bolt -2-. 40 Nm.
– Unscrew the bolt -3-. 55 Nm.
– Take out the ISOFIX holder -4-.
Centre ISOFIX holder -1-
– Unscrew the bolt -2-. 40 Nm.
– Unscrew the bolt -3-. 55 Nm.
– Slacken off the front inner bolt of the electrically operated in‐
dividual seats by a few turns.
– Pull out the ISOFIX holder -1- beneath the electrically operat‐
ed individual seat.
– On installation, slide the ISOFIX holder -1- beneath the elec‐
trically operated individual seat.
– The electrically operated individual seat and ISOFIX holder
-1- are screwed together using the bolt -3-.
Audi A8 2003 ➤
General body repairs, interior - Edition 07.2011
13. Removing and installing ISOFIX holder 173