(16) Disconn ect grou nd st rap and tie back t o one
side.
(17) Remove bolts (A) (Fig. 37) on un der side of
transmission . Two bolts (A) on top of tr ansmission
must remain in the housing.
(18) Pla ce h ydraulic tr ansmission jack u nder
transmission a nd r aise sligh tly. Secu re transmission
on hydrau lic jack with a strap or a sk an assista nt t o
hold it.
(19) Remove rea r engine cross member (4) (Fig.
37). F irst r emove th e nuts (5) at the outside en ds of
the engine crossmember. Then r emove th e bolts (1) of
the t ransmission mount.
(20) Remove the la st bolt s (A, B) (F ig. 37) on the
top of th e tra nsmission.
(21) Remove the transmission towa rds the rear
and lower. Ensu re th at th e converter remains in the
transmission housing when the t ransm ission is
removed.
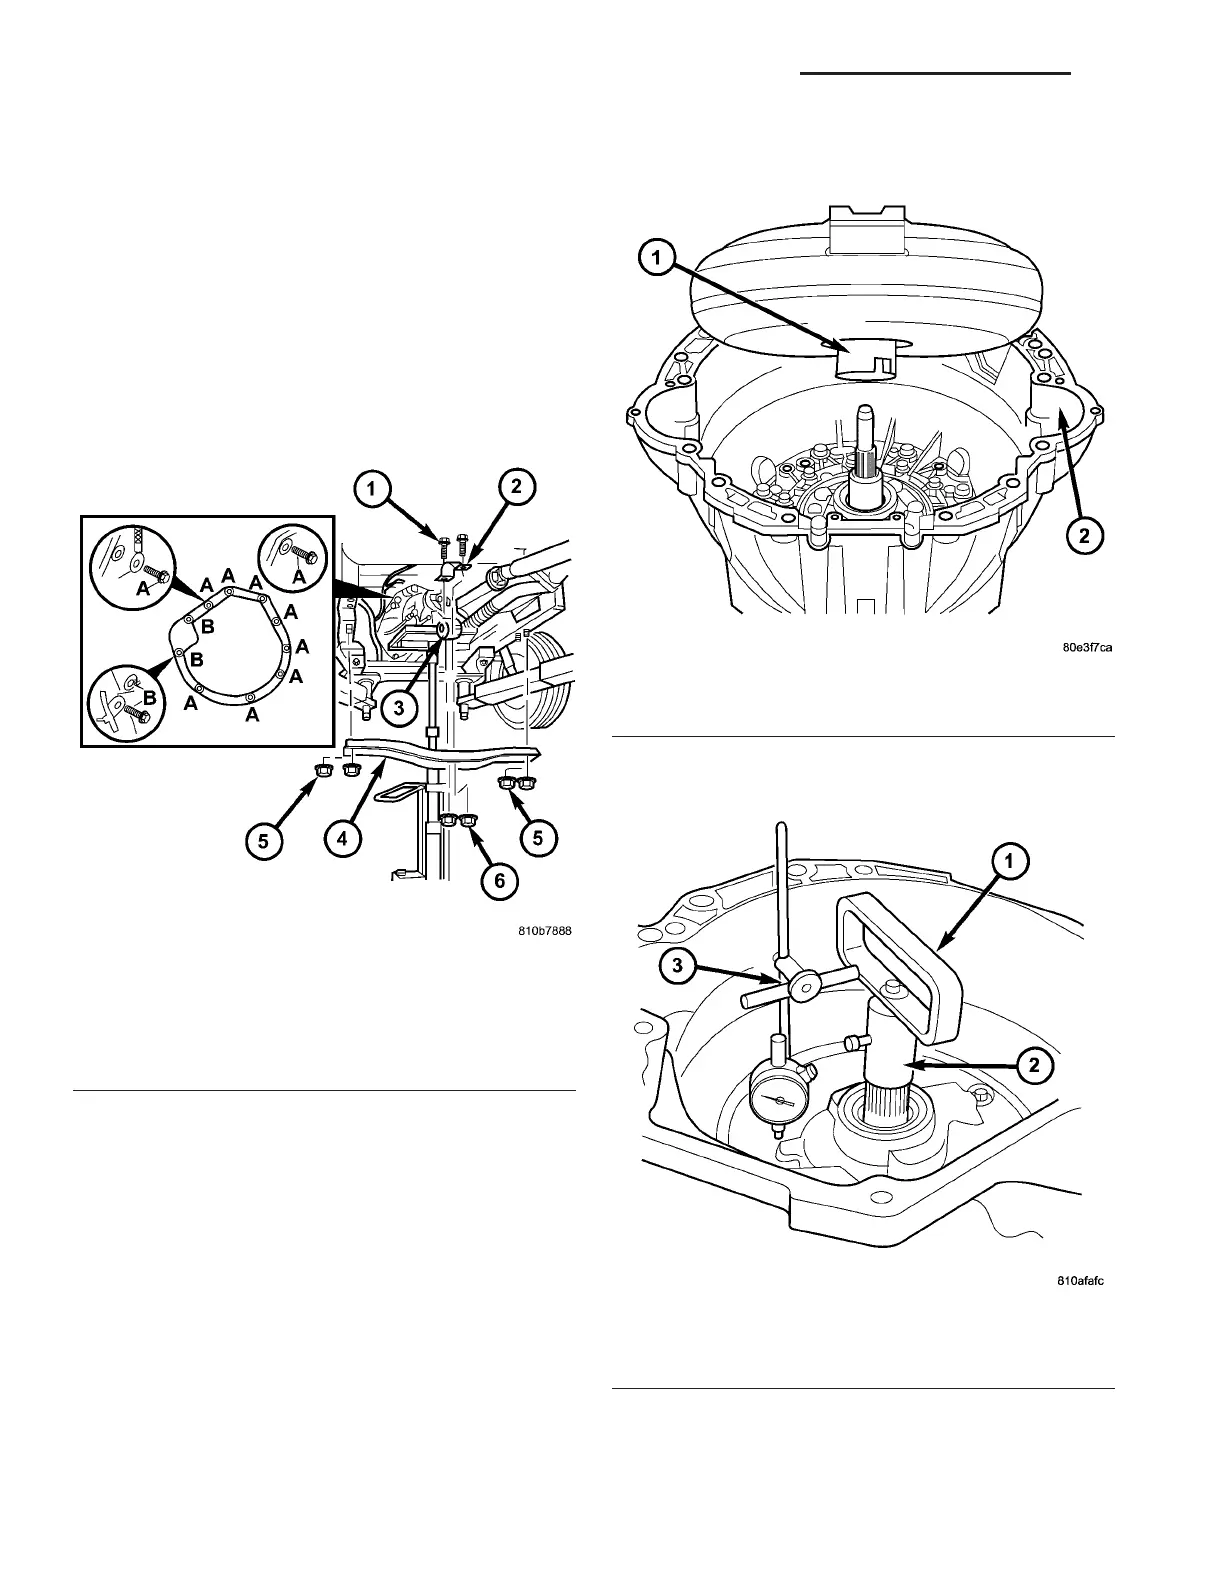
(22) Remove th e torque converter.
DISASSEMBLY
(1) Remove the torqu e converter (1) (Fig. 38).
(2) Pla ce tra nsmission in a ver tica l position.
(3) Measur e input shaft end play as follows: (Fig.
39)
Fig. 37 Support Transmission and Remove Bolts
1 - BOLT, TRANSMISSION MOUNT
2 - UPPER SHELL FOR TRANSMISSION MOUNT
3 - TRANSMISSION MOUNT
4 - CROSSMEMBER
5 - NUT, ENGINE CROSSMEMBER
6 - NUT, TRANSMISSION SUPPORT
Fig. 38 Remove Torque Converter
1 - TORQUE CONVERTER
2 - CONVERTER HOUSING
Fig. 39 Checking Input Shaft End Play
1 - TOOL 8266-8
2 - TOOL 8266-18
3 - TOOL C-3339
21 - 46 AUTOMATIC TRANSMISSION NAG1 - SERVICE INFORMATION VA