(39) Press downwa rd on the staking tool (1) unt il
the staking pin (3) cont acts t he output sha ft nu t
flan ge (2) (F ig. 61).
(40) Strike th e Driver handle C-4171 with a suit-
able h ammer u ntil the output shaft nut is secu rely
st aked to the output sha ft.
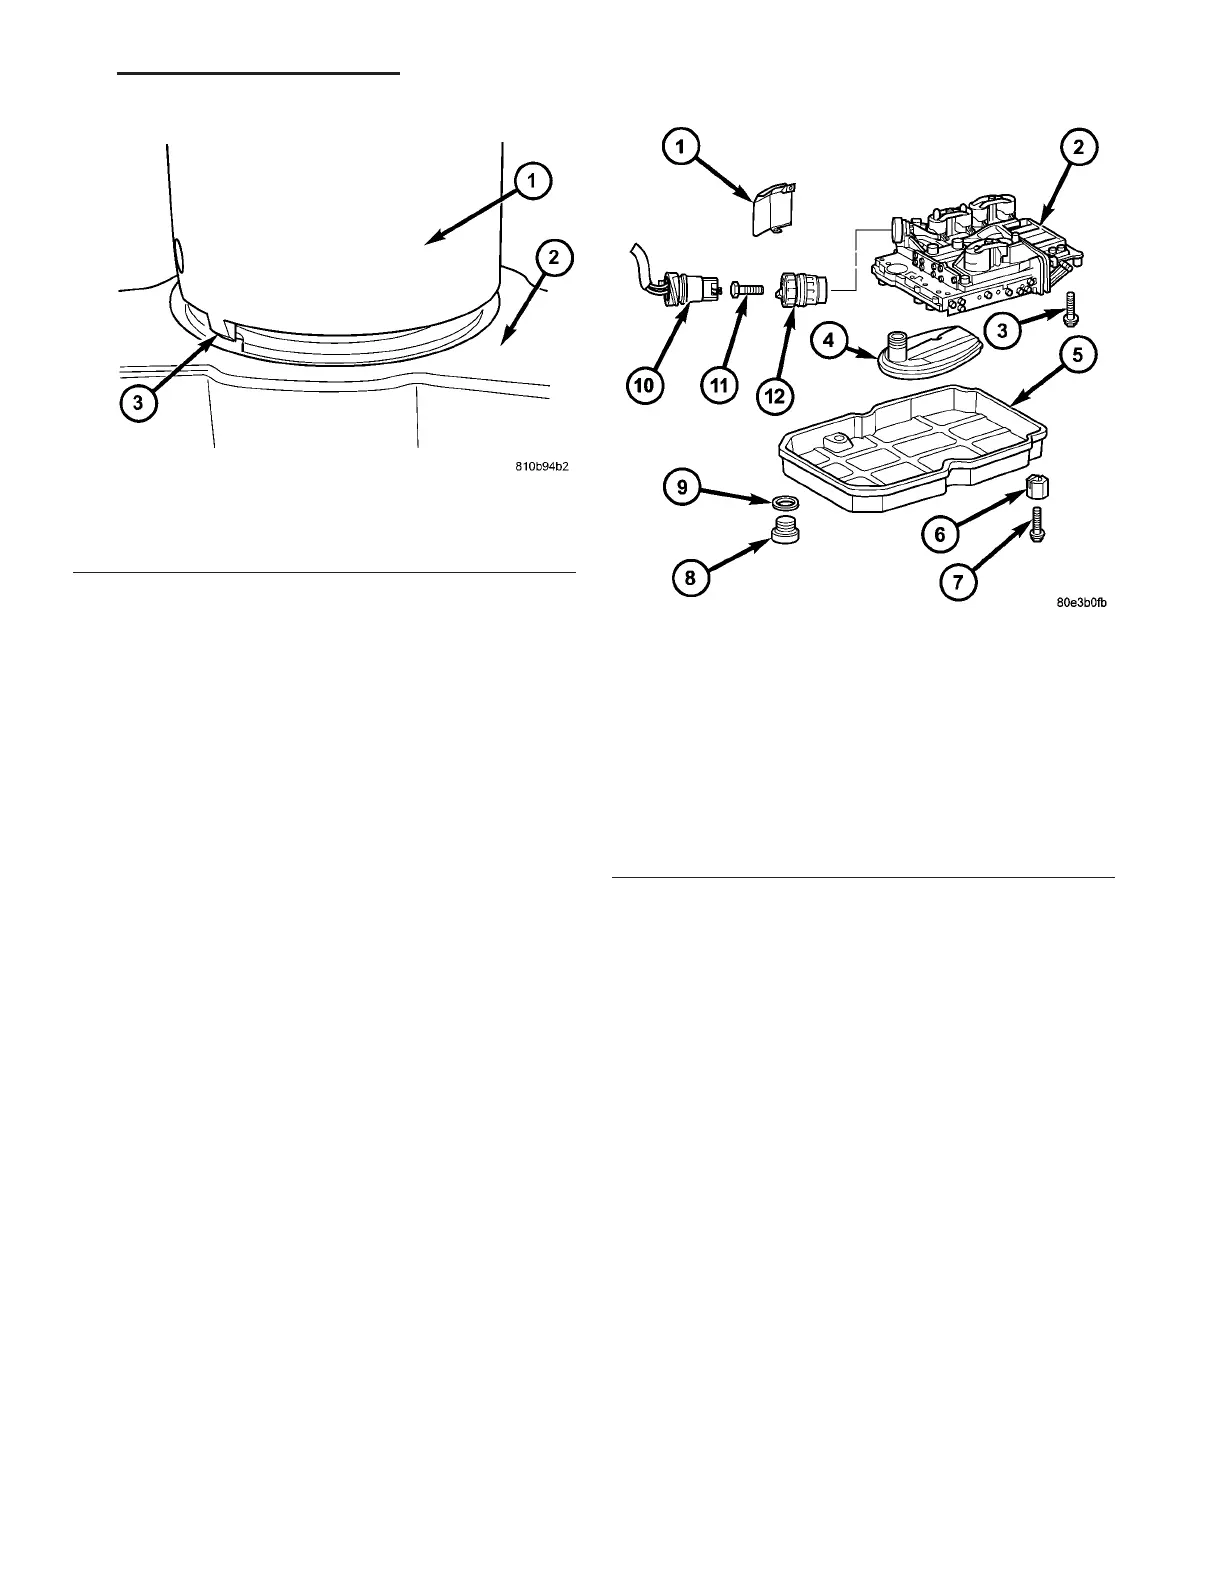
(41) Install electrohydrau lic un it (2). Tigh ten the
bolts t o 8 N·m (71 in .lbs.).
(42) Install oil filter (4) (Fig. 62).
(43) Install oil pan (5) (Fig. 62). Tigh ten the bolts
to 8 N·m (71 in.lbs.).
(44) Install guide bushing (12) (Fig. 62).
Fig. 61 Stake Output Shaft Nut
1 - STAKING TOOL 9078
2 - PROPELLER FLANGE
3 - STAKING PIN
Fig. 62 Install Electrohydraulic Unit
1 - HEAT SHIELD
2 - ELECTROHYDRAULIC UNIT
3 - BOLT
4 - OIL FILTER
5 - OIL PAN
6 - CLAMPING ELEMENT
7 - BOLT
8 - DRAIN PLUG
9 - DRAIN PLUG GASKET
10 - 13-PIN PLUG CONNECTOR
11 - BOLT
12 - GUIDE BUSHING
VA AUTOMATIC TRANSMISSION NAG1 - SERVICE INFORMATION 21 - 59