(8) Slightly pull door tr im upwa rd and swin g awa y
slight ly.
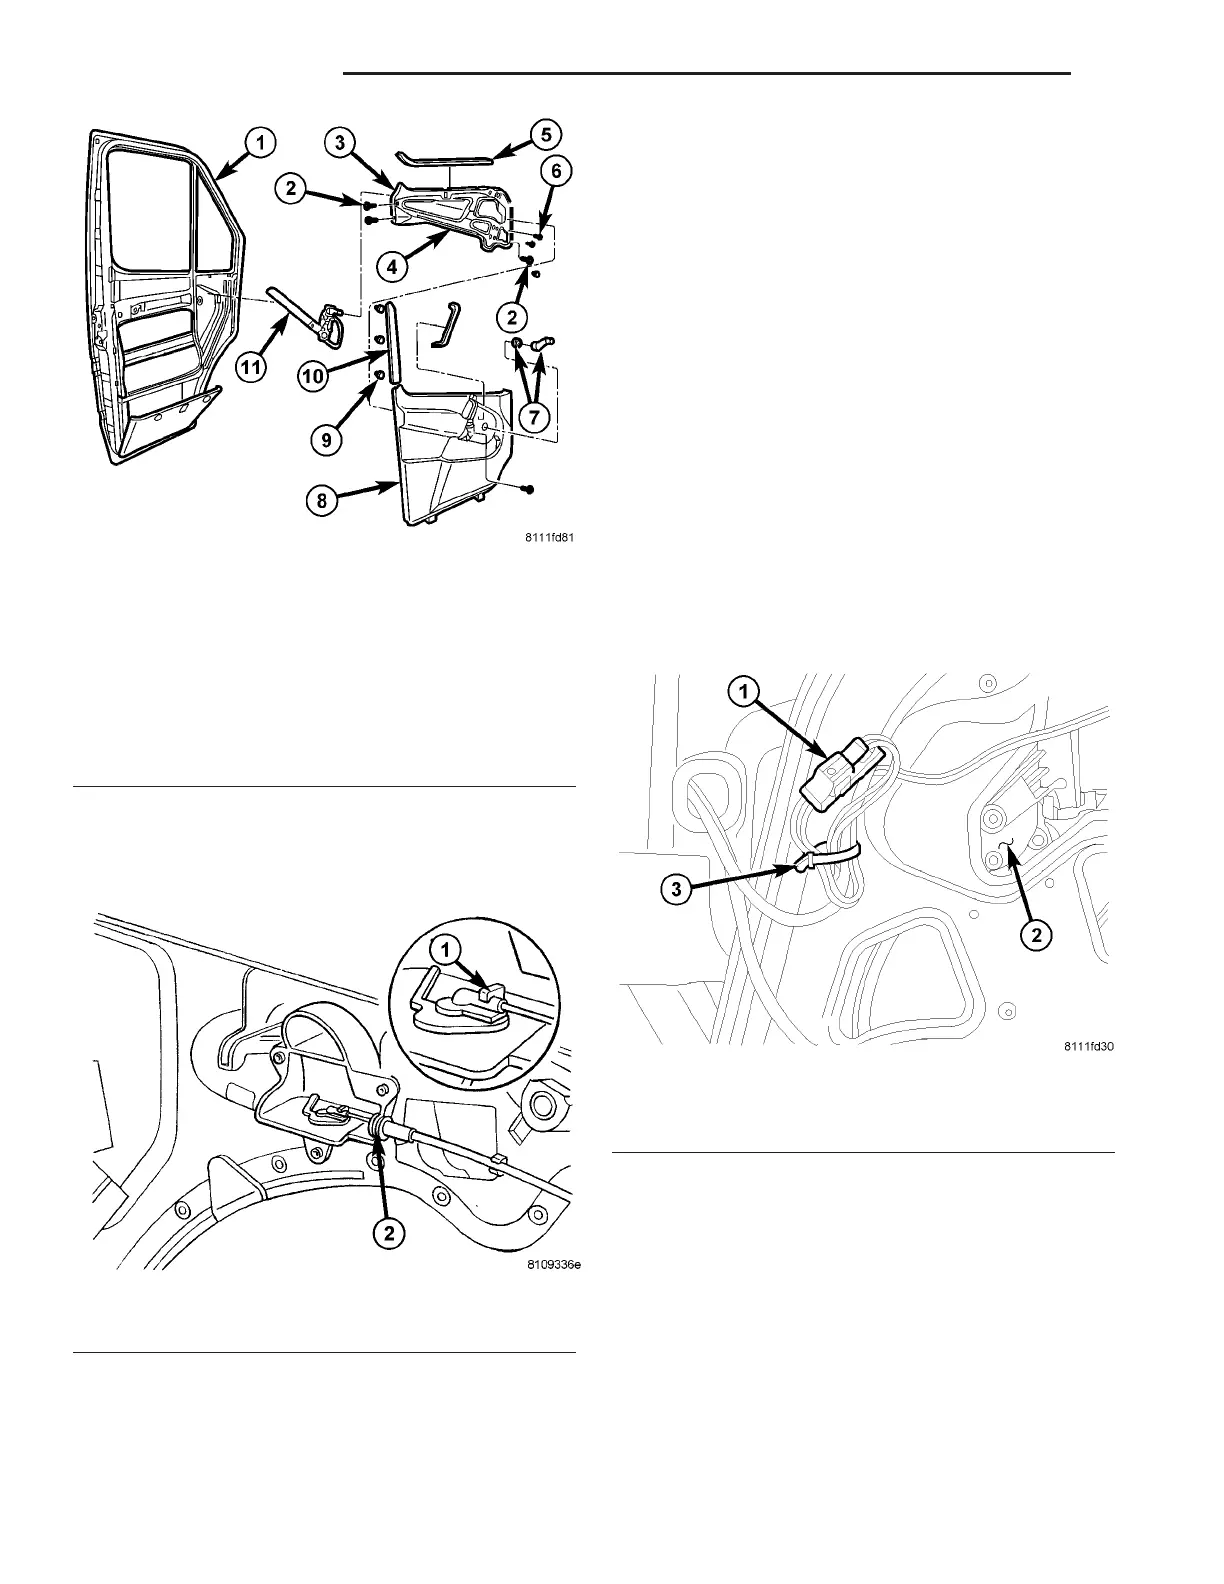
(9) Unlock r etainer clip an d discon nect cont rol
cable. (Fig. 21)
(10) Remove tr im panel.
INSTALLATION
(1) Position trim pa nel and con nect control cable.
(2) In st all trim panel.
(3) Position window fra me m olding an d sea t clips
fully.
(4) Close pocket door.
(5) In st all window cra nk and mou nting r ing, if
equ ipped .
(6) In st all han dle screws.
(7) Connect electrical connectors and insta ll switch
bezel.
(8) In st all han dle cover.
(9) Connect batt ery n egat ive cable.
WI N DOW REGU LAT OR -
POWER
REMOVAL
(1) Lower fron t window a ppr oximately 2 cm (3/4
in.).
(2) Disconn ect and isolate battery negative ca ble.
(3) Remove door trim pa nel. (Refer to 23 - BODY/
DOOR - F RONT/TRIM PANEL - RE MOVAL)
(4) Disconn ect electrical conn ector. (F ig. 22)
(5) Usin g wood wedge, tape or equivalent , secure
gla ss in the up position. (Fig. 23)
Fig. 20 MANUAL REGULATOR ASSEMBLY
1 - DOOR
2 - CARRIER PLATE BOLTS
3 - CARRIER PLATE
4 - REGULATOR ASSEMBLY
5 - SEALING STRIP
6 - REGULATOR RIVETS (4)
7 - WINDOW CRANK/TRIM RING
8 - TRIM PANEL
9 - CLIPS
10 - WINDOW FRAME MOLDING
11 - REGULATOR
Fig. 21 CONTROL CABLE
1 - RETAINER CLIP
2 - CONTROL CABLE MOUNTING
Fig. 22 ELECTRICAL CONNECTOR
1 - ELECTRICAL CONNECTOR
2 - REGULATOR MOTOR
3 - WIRE TIE
23 - 20 D OOR - F R ON T VA