NOTE: Remove any mineral spirits with a clean
cloth after glass installation.
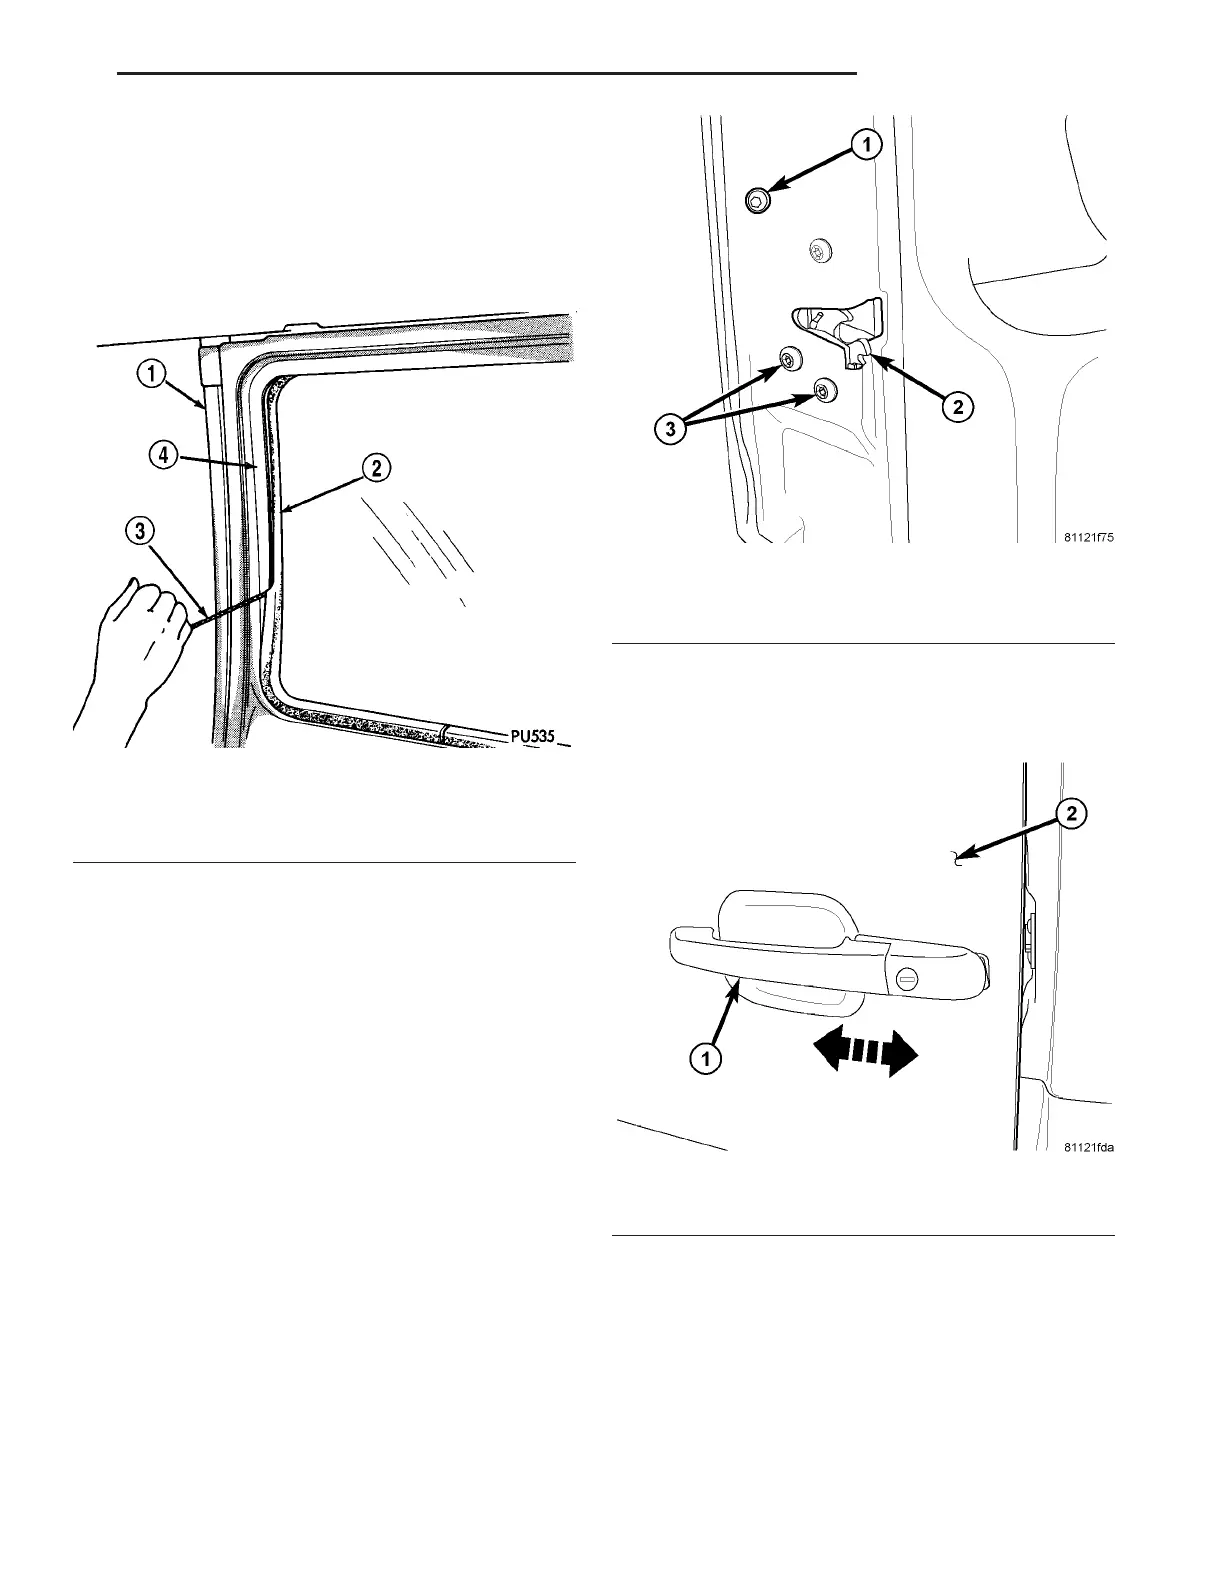
(6) Verify tha t th e sea l is seat ed in the window
openin g (Fig. 12).
(7) Test th e window for wa ter leaks. (Refer to 23 -
BODY - DIAGNOSIS AND TESTING - WATER
LEAKS)
EX T ERI OR H AN DLE
REMOVAL
(1) Remove handle bolt. (F ig. 13)
NOTE: Front door shown, rear door similar.
(2) Slide handle a ssembly towa rds front of door.
(Fig. 14)
NOTE: Front door shown, rear door similar.
(3) Pull rea r of handle out a way fr om door an d dis-
enga ge the la tch levers.
(4) Slide h andle towa rds the rear of door and
remove.
INSTALLATION
(1) Position front of h andle int o fr ont slot in door.
(Fig. 15)
NOTE: Front door shown, rear door similar.
Fig. 12 Glass & Weatherstrip Seal Installation
1 - BODY PANEL
2 - WEATHERSTRIP SEAL
3 - INSTALLATION CORD
4 - WINDOW OPENING
Fig. 13 EXTERIOR HANDLE
1 - EXTERIOR HANDLE BOLT
2 - LATCH
3 - LATCH BOLTS (3)
Fig. 14 LATCH/HANDLE FASTENERS
1 - EXTERIOR HANDLE
2 - DOOR
VA DOORS - REAR 23 - 31