INSTALLATION
(1) With sea t facing forwa rd, insert mounting legs
into the respective m ounting cups.
(2) Slide seat forwards wit h some force as fa r as it
will go, until the release levers are heard t o engage
and all release levers a re par allel to the vehicle floor.
REAR SEAT BACK SH I ELD
REMOVAL
(1) Remove t he scr ews an d rem ove the pa nel. (Fig.
8)
INSTALLATION
(1) In st all the panel an d insta ll t he screws.
SEAT BACK CU SH I ON / COV-
ER - REAR
REMOVAL
(1) Remove seat . (Refer to 23 - BODY/SEATS/
SE AT - REAR - RE MOVAL)
(2) Remove sea t back sh ield. (Refer to 23 - BODY/
SE ATS/REAR SEAT BACK SHIELD - REMOVAL)
(3) Remove sea t belts as necessary to rem ove
cover. (Refer to 8 - ELECTRICAL/RESTRAINTS/
REAR SEAT BELT & RETRACTOR - REMOVAL)
(4) Remove seat belt buckles as n ecessary. (Refer
to 8 - ELECTRICAL/RESTRAINTS/REAR SEAT
BELT BUCKLE - REMOVAL)
(5) Remove t he headrest s. (Refer to 23 - BODY/
SE ATS/HE ADREST - REMOVAL)
(6) Remove the headr est sleeves.
(7) Partially de-trim upper seat ba ck.
(8) Remove the reta ining covers at seat belt
guid e s .
(9) Route belt s t hrough guides.
(10) Separa te j-straps a t seat back cover and
remove cover/cushion.
INSTALLATION
(1) In st all seat ba ck cush ion and cover.
(2) Connect j-str aps.
(3) Route belt s t hrough guides.
(4) In st all retaining cover s a t sea t belt guides.
(5) Position upper sea t back cover back into place.
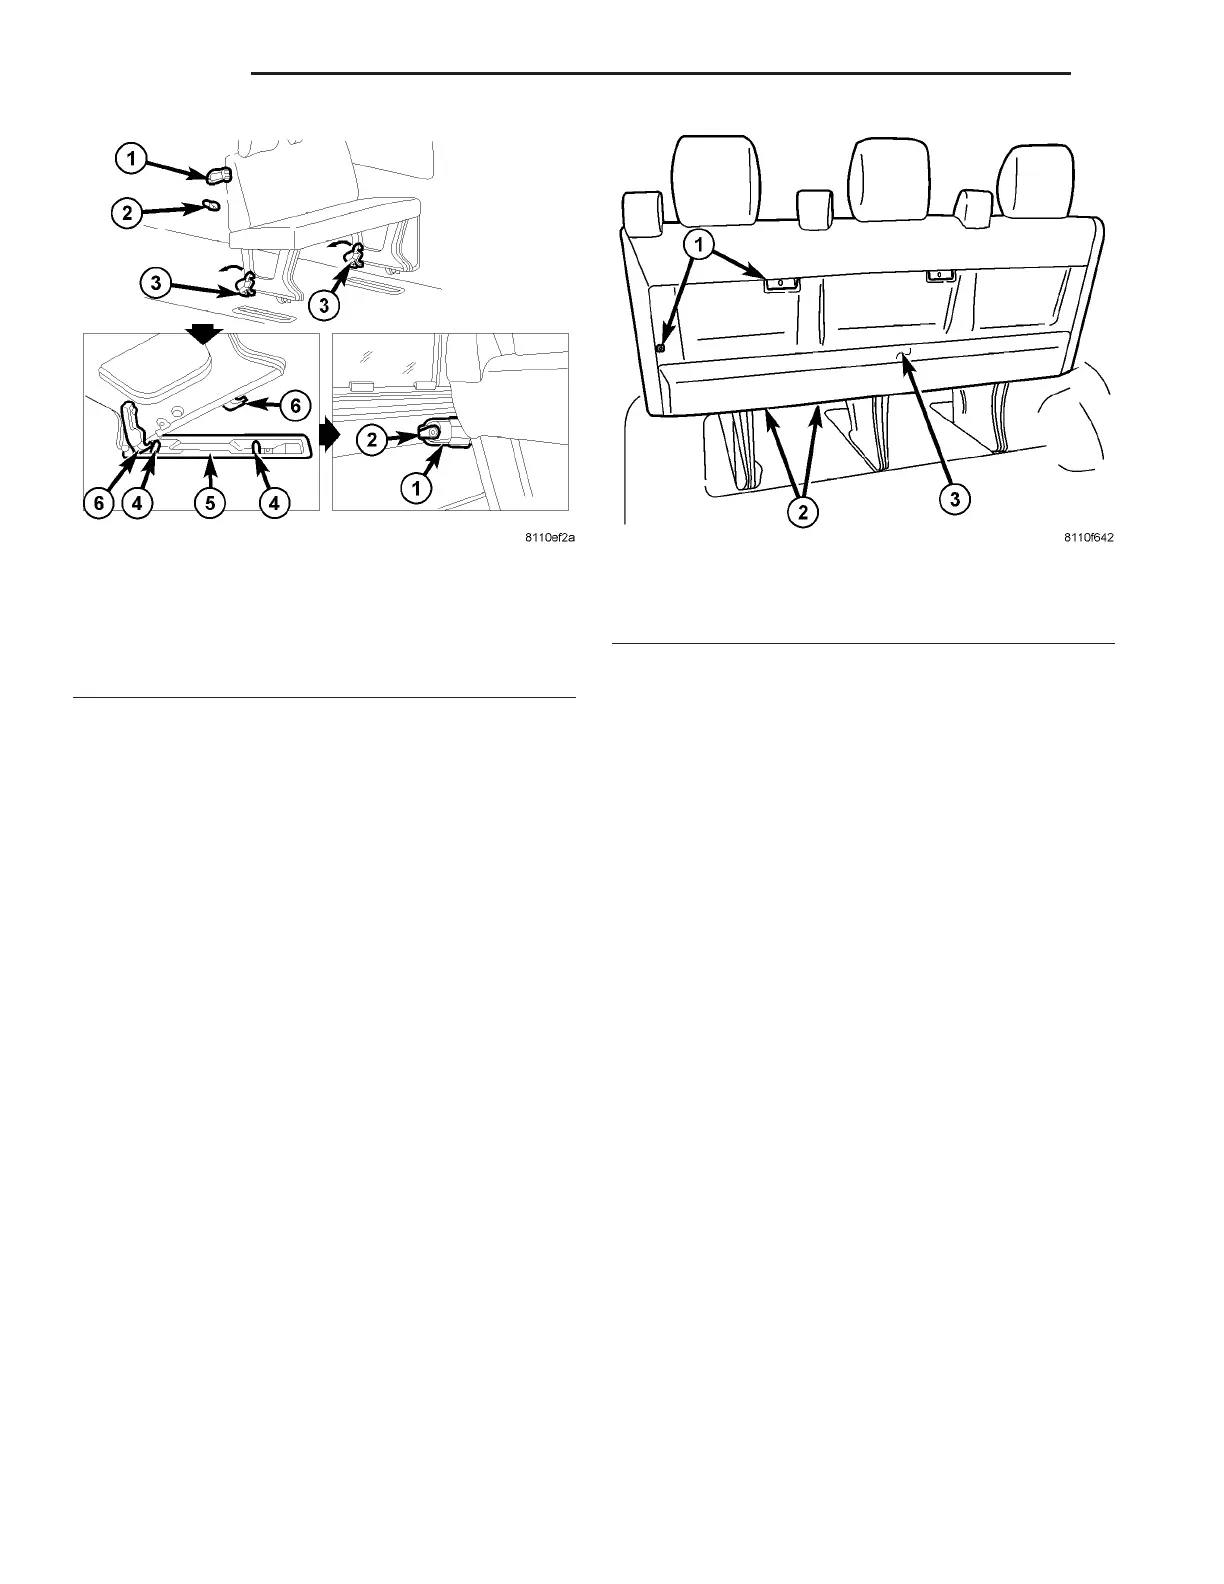
Fig. 7 TWO PASSENGER BENCH
1 - RESTRAINT CABLE
2 - HOOK
3 - RELEASE LEVERS
4 - RETAINING BOLT
5 - MOUNTING CUP
6 - MOUNTING LEGS
Fig. 8 REAR SEAT
1 - SCREWS (4)
2 - SCREWS (6)
3 - PANEL
23 - 82 S EAT S VA