Windshield Preparation - Installing A New Wind-
shield
(1) Clean and check windshield for damage.
(2) Position windshield sea l onto windshield sta rt-
ing at one corn er and qu ickly moving u p and down.
(Fig. 7)
CAUTION: Never moisten windshield seal with lubri-
cants to facilitate installation.
(3) Position windshield in center of windshield
openin g.
(4) Apply a dh esive tape to th e locations sh own t o
aid with final insta lla tion . (Fig. 8)
(5) Verify win dshield gap is par allel to wit h win d-
shield.
(6) Cut tape with a sharp knife and rem ove wind-
shield.
(7) Clean a nd dr y area of glass to be glued wit h a
su itable glass prepara tion solvent and rag.
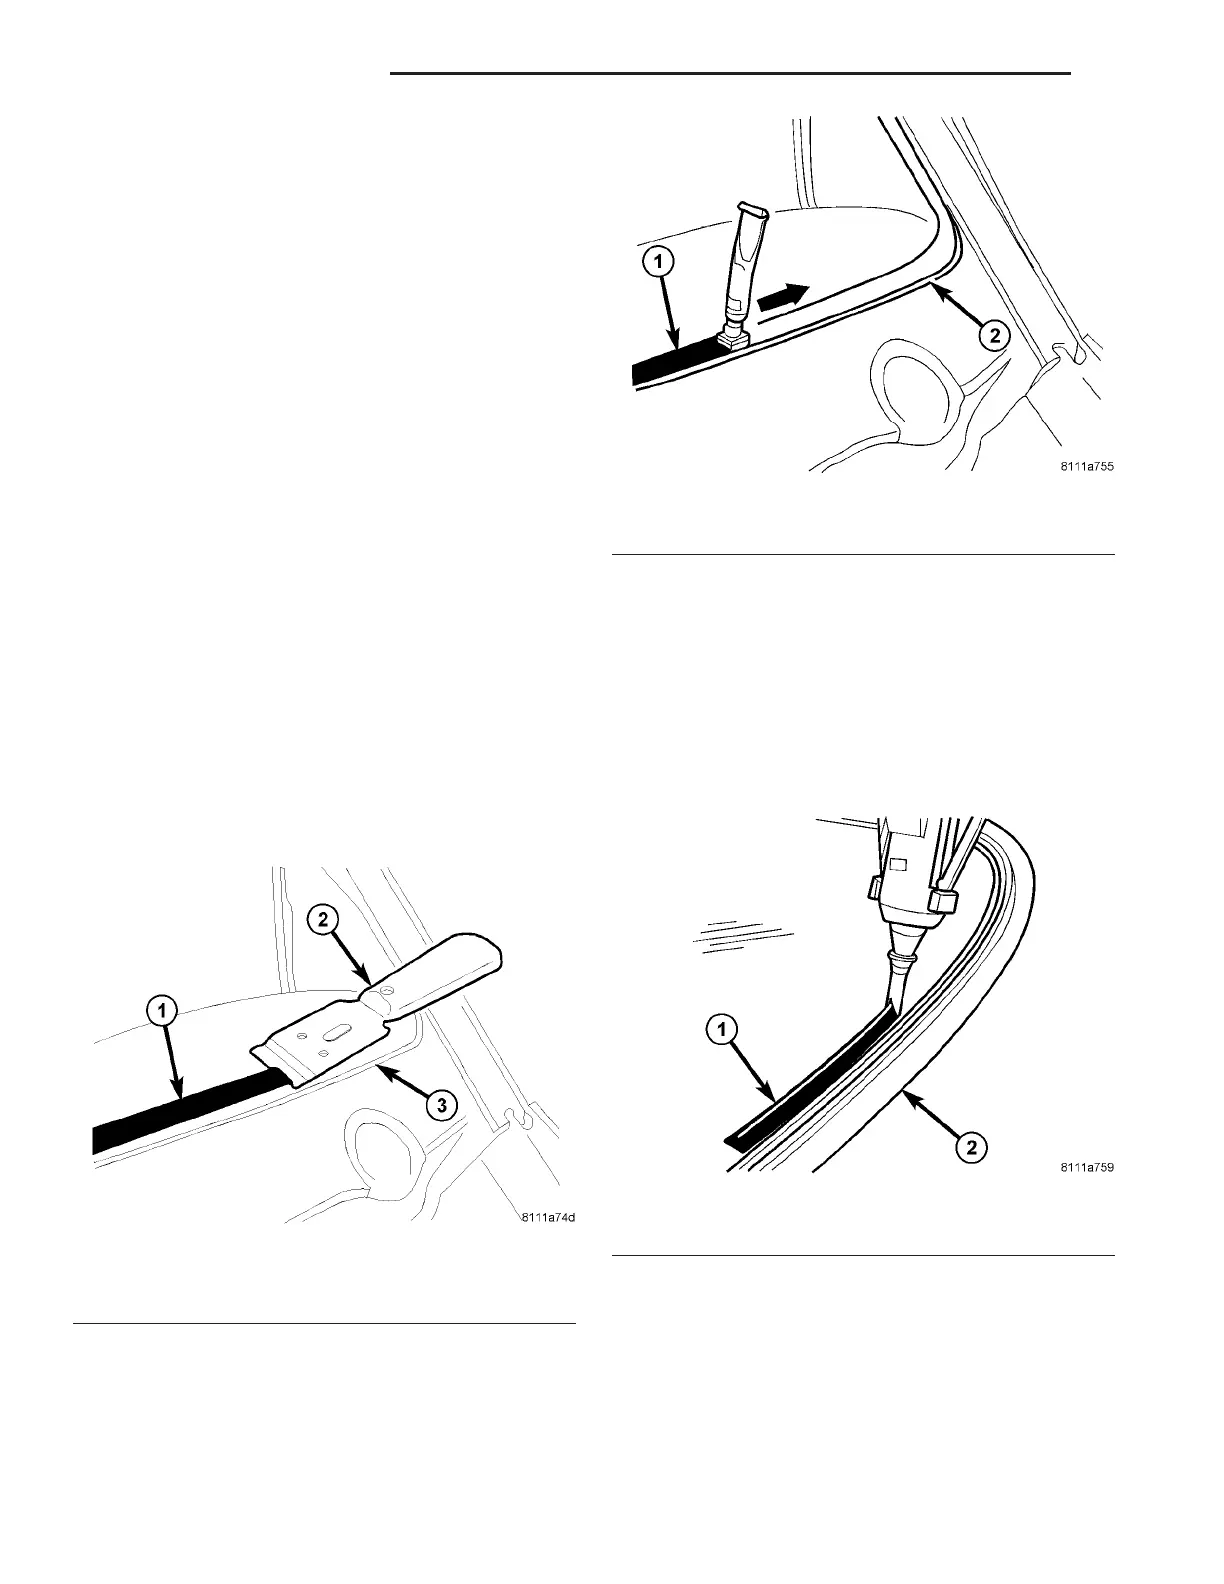
(8) Apply primer to gluing su rface a t windshield
seal. (Fig. 9)
(9) Allow pr imer to air dry for at least 10 minut es.
(10) Using a flash light , verify that gla ss pr imer is
with out dama ge.
Windshield Opening Preparation
(1) Clean and va cuum windshield opening.
(2) Level ol d bead of win dshield open ing a dh esive
to a thickness of approxima tely 1 mm (0.04 in.) and
remove loose adhesive. (F ig. 10)
(3) Clean and dry area of windshield opening to be
re-glued with a suitable glass prepa rat ion solvent
and rag.
(4) Re-prim e any da maged area. If old a dh esive
has been exposed for mor e than 12 hou rs, entire
adhesive a rea needs t o be re-primed. (Fig. 11)
(5) Allow pr imer to air dry for at least 10 minut es.
Windshield Installation
(1) Apply bead of glue with a tr iangula r nozzle
direct ly to t he windshield seal sta rting at bottom in
center of windshield. (F ig. 12)
CAUTION: Always apply bead of adhesive to the
windshield. Always install the windshield within 5
minutes after applying adhesive.
(2) Allow end of adhesive bead to run ou t para llel
to the start of the bea d and smoot h ends flush. (Fig.
13)
Fig. 10 WINDSHIELD OPENING PREPARATION
1 - OLD ADHESIVE
2 - SCRAPER
3 - WINDSHIELD OPENING
Fig. 11 WINDSHIELD OPENING PRIMER
1 - PRIMER
2 - WINDSHIELD OPENING
Fig. 12 WINDSHIELD ADHESIVE APPLICATION
1 - ADHESIVE BEAD
2 - WINDSHIELD SEAL
23 - 88 STATIONARY GLASS VA