The blower motor resistor is accessed for service
with out rem oving any other componen ts.
OPERATION
The blower m otor resist or block ha s mu ltiple resis-
tor wires. Each resist or wire changes the resistance
in the blower motor curr ent path to change th e
blower motor speed. The blower m otor switch dir ects
the cur rent th rough th e correct resist or wire to
obtain the select ed speed.
With the blower motor switch in th e lowest speed
position , voltage for the mot or is applied through all
of th e resistor wires. Each higher speed selected with
the blower mot or switch applies th e blower mot or
curren t pa th thr ough fewer of t he resistor wires,
increasing the blower motor speed. When the blower
motor switch is in the highest speed position, th e
blower mot or resistor is bypassed a nd the blower
motor circuit receives a dir ect pat h to battery volt-
age.
The blower motor r esistor block ca nnot be repaired
and, if fau lty or da maged, it must be replaced.
DI AGN OSI S AN D T EST I N G
BLOWER MOTOR RESISTOR
NOTE: For circuit descriptions and diagrams, refer
to the appropriate wiring information. The wiring
information includes wiring diagrams, proper wire
and connector repair procedures, further details on
wire harness routing and retention, as well as pin-
out and location views for the various wire harness
connectors, splices and grounds.
(1) Disconn ect and isolate the negat ive ba tter y
cable.
(2) Disconn ect the wire ha rness connector from th e
blower m otor resist or.
(3) Check for cont inu ity between ea ch of the
blower mot or switch input t erminals of th e resist or
and the resistor out put t erminal. In each case t here
sh ould be contin uity. If OK, repa ir th e wir e ha rness
circuits between the blower motor switch and th e
blower motor r esistor or blower mot or as requir ed. If
not OK, replace t he faulty blower motor r esistor.
REMOVAL
(1) Disconn ect and isolate the negat ive ba tter y
cable.
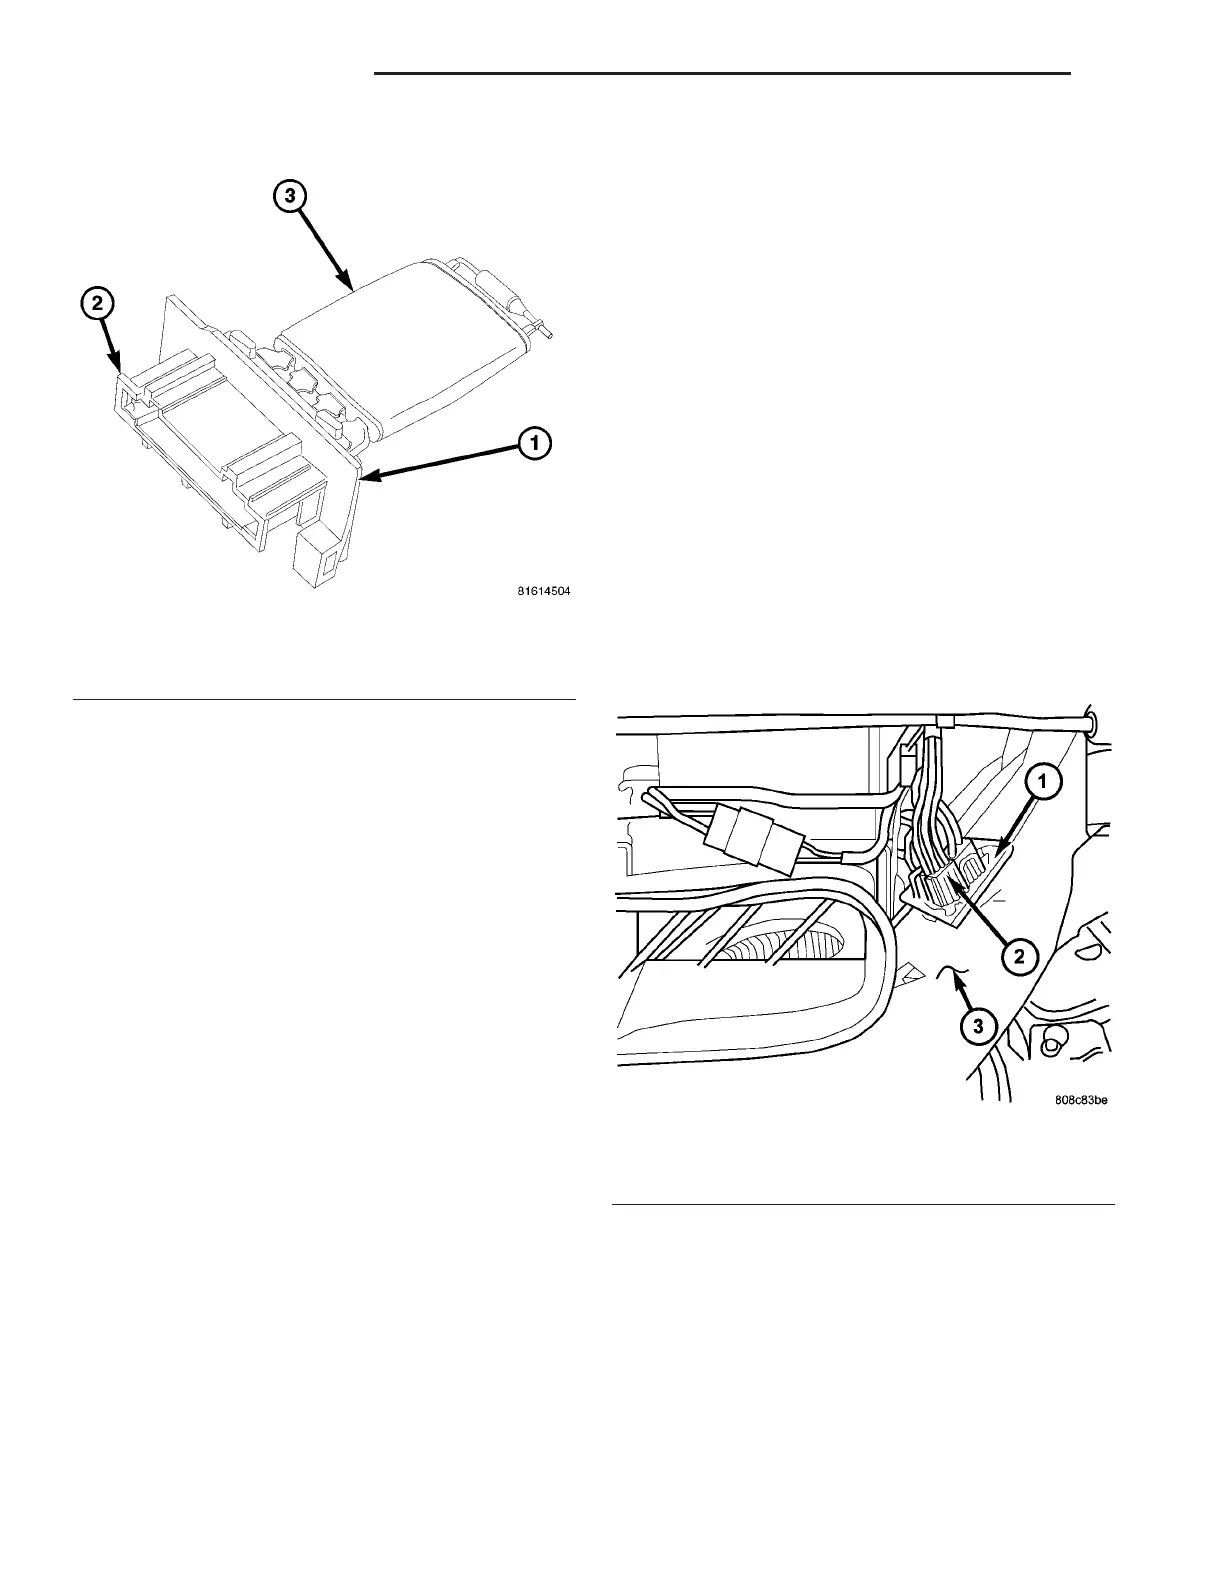
(2) Depress the locking tab and remove the blower
motor resist or from the ven tilation h ousing by sliding
the r esistor inboar d (Fig. 16).
(3) Depress t he two locking tabs and discon nect
the wire harness connector fr om the blower motor
resistor.
(4) Remove t he blower motor resist or from the
engine com pa rtmen t.
INSTALLATION
(1) Connect th e wire harness con nector to the
blower motor resistor and en gage th e two locking
tabs.
(2) In st all th e blower motor resistor into the ven -
tilation hou sing and engage the lockin g tab. The
housin g is indexed to allow m ounting in on ly one
position .
(3) Reconnect t he negat ive batt ery cable.
Fig. 15 Front Blower Motor Resistor
1 - MOUNTING PLATE
2 - WIRE CONNECTOR RECEPTACLE
3 - CERAMIC HEAT SINK
Fig. 16 Blower Motor Resistor Block
1 - BLOWER MOTOR RESISTOR
2 - ELECTRICAL CONNECTOR
3 - VENTILATION HOUSING
24 - 18 CONTROLS-FRONT VA