(1) Disconn ect and isolate the negat ive ba tter y
cable.
(2) Remove th e cover from the rea r A/C evapor ator
housin g (Refer to 24 - H EATING & AIR CONDI-
TIONING/DISTRIBUTION - REAR/A/C EVAPORA-
TOR COVE R-REAR - RE MOVAL).
(3) Recover the refr iger ant from the rear r efriger-
ant system (Refer to 24 - HEATING & AIR CONDI-
TIONING/PLUMBING - STANDARD PROCEDURE -
REFRIGERANT RECOVERY).
(4) Remove the cover from the r ear A/C condenser
housin g (Refer to 24 - H EATING & AIR CONDI-
TIONING/DISTRIBUTION - REAR/A/C CON-
DENSER COVE R - REMOVAL).
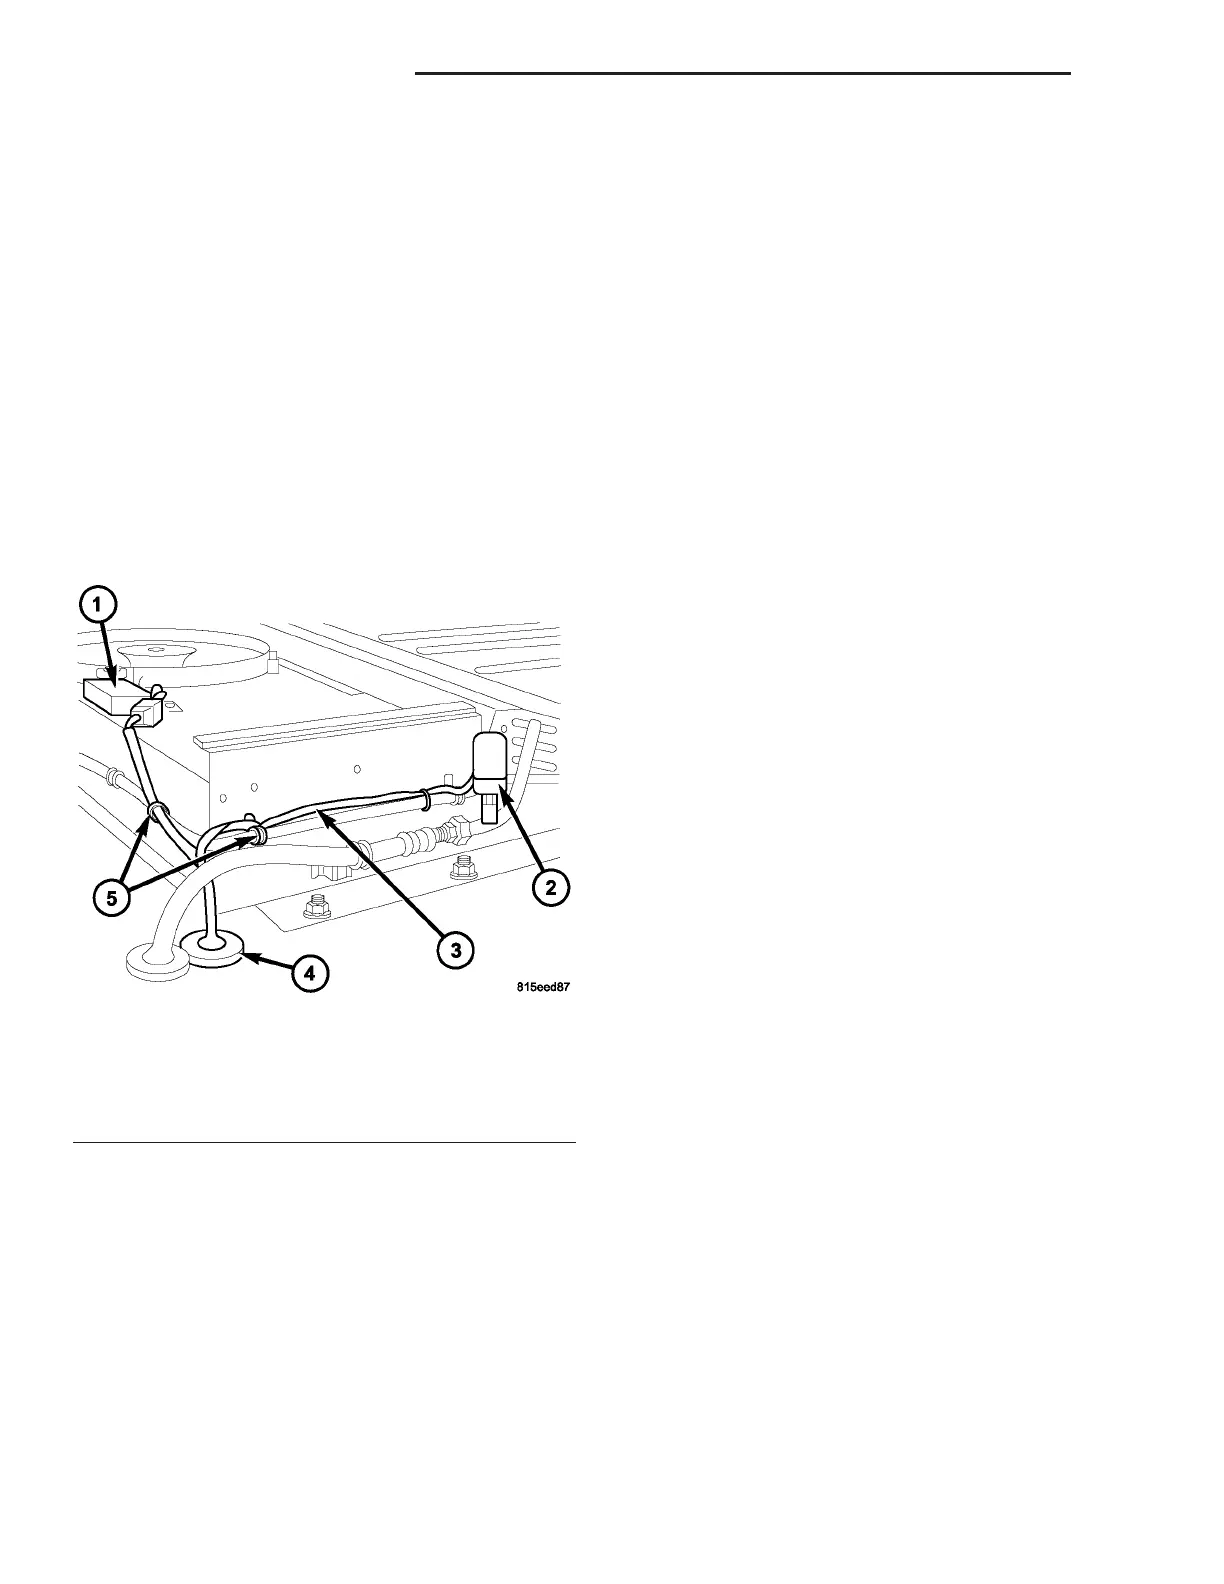
(5) Disconn ect the r ear A/C wire harness from the
rear condenser fan su ppression filter and the rea r
A/C high pr essu re switch and r emove t he retaining
st raps tha t secure t he wir e har ness to the rear liquid
lin e (Fig. 4).
(6) Disengage the rear A/C wire harn ess gromm et
from the roof panel an d pull t he wire h arness down
into the vehicle (Fig. 5).
(7) Disconn ect t he rea r body wir e harness conn ec-
tor from th e rea r A/C wir e harness.
(8) Remove t he r etaining straps th at secu re the
rear dome lamp harness to the rear A/C evaporator
housin g and position t he rear dome lamp ha rness out
of the way.
(9) Remove the n ut th at secur es the positive wire
lead to the rear A/C system terminal block a nd posi-
tion the wir e lea d ou t of the way.
(10) Remove the insulating tape from around the
rear evaporator connections.
(11) Disconn ect the rear liqu id line fr om the rear
A/C expansion valve and remove and discard the
O-rin g seal.
(12) Disconn ect the r ear suction line fr om the rea r
evapor ator outlet tube a nd r emove a nd discard the
O-rin g seal.
(13) Install plugs in to, or ta pe over th e open ed
refriger ant line fittings an d r ear expansion valve a nd
evapor ator tu be ports.
(14) Disconn ect and in st all plugs into the two rear
evapor ator dra in hoses.
(15) Support the rear A/C evaporator housing and
remove th e nin e scr ews, four bolt s a nd wa sh ers and
four damping washer s that secure the rear A/C evap-
orator housing to t he roof pa nel.
(16) With help from an assistant, remove the rea r
A/C eva por ator hou sing from the vehicle.
(17) If requir ed, rem ove t he rear A/C evapora tor
from the r ear A/C evapora tor housing (Refer to 24 -
HEATING & AIR CONDITIONING/PLUMBING/
REAR A/C E VAPORATOR - REMOVAL).
Fig. 4 Rear A/C Wire Harness - Condenser Side
1 - REAR CONDERSER FAN SUPPRESSION FILTER
2 - REAR A/C HIGH PRESSURE SWITCH
3 - REAR A/C WIRE HARNESS
4 - GROMMET
5 - RETAINING STRAPS
24 - 56 DISTRIBUTION - REAR VA