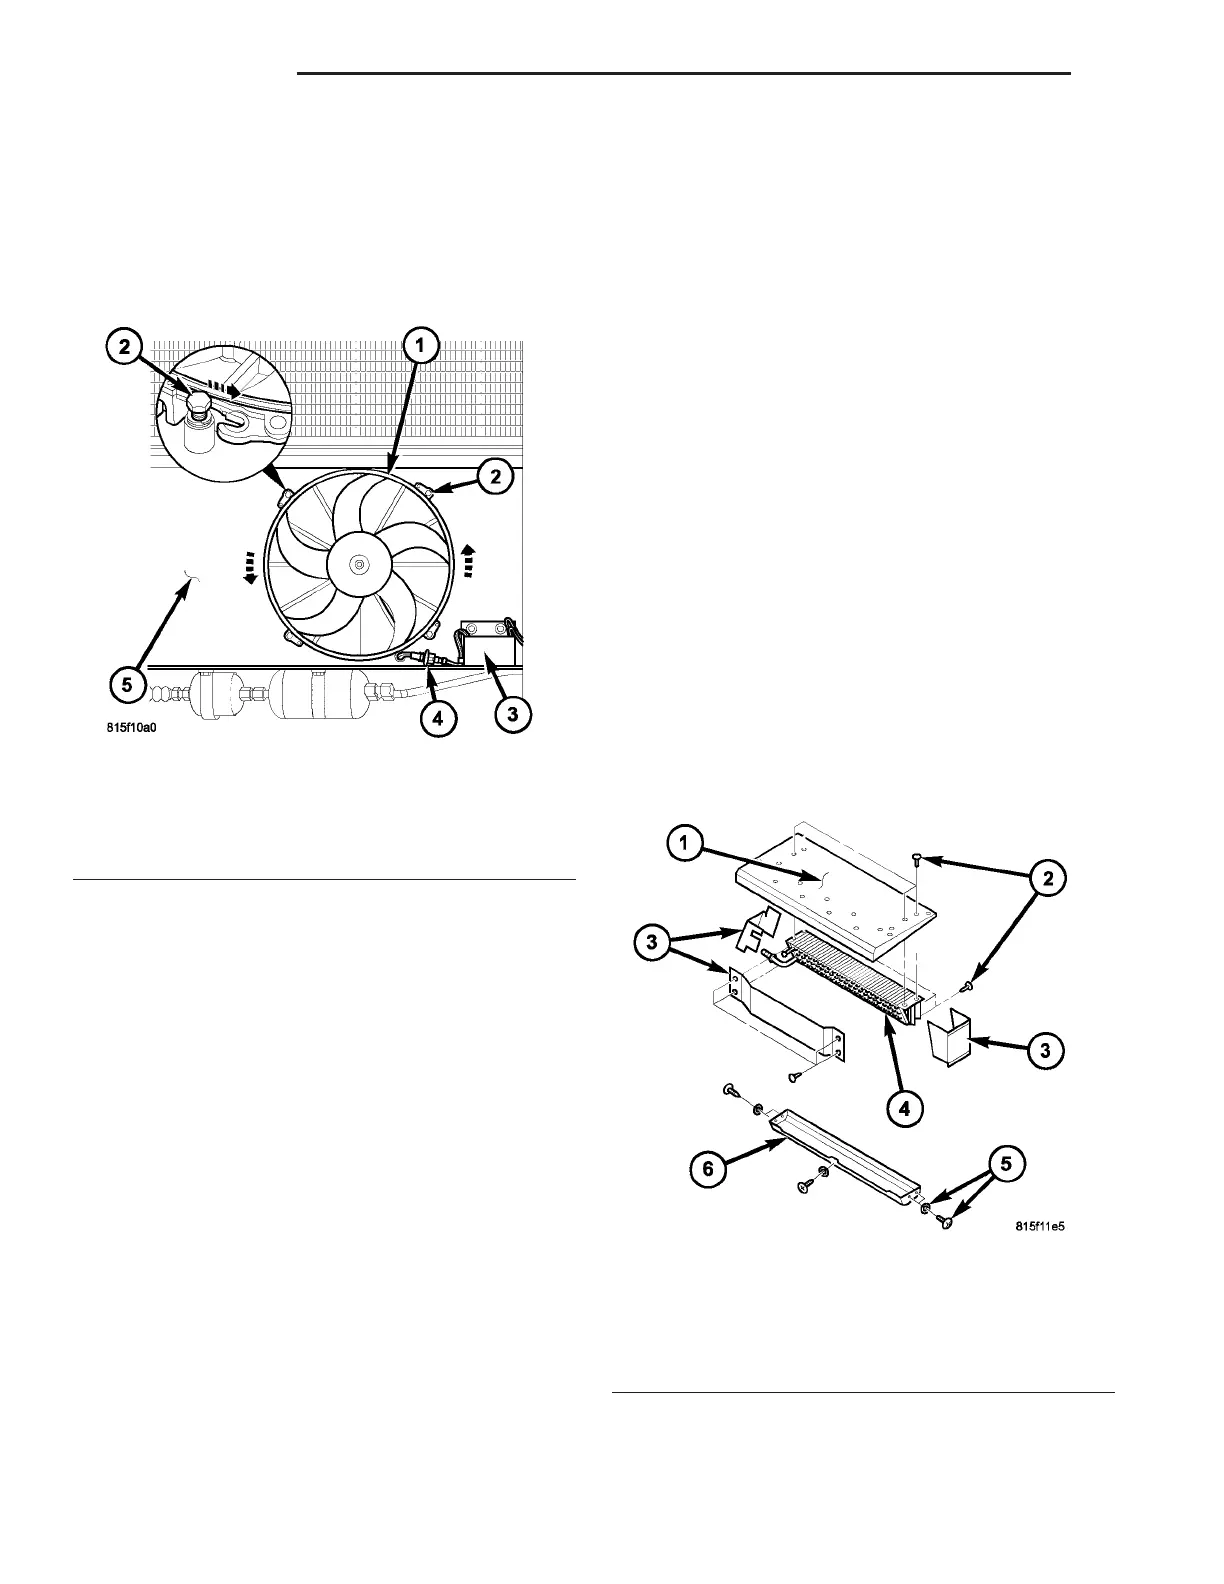
(3) Disconn ect the condenser fan wire harness
from the condenser fan suppression filter (F ig. 22).
(4) Loosen the four bolts tha t secu re th e rea r A/C
condenser fan to t he top of the rear A/C condenser
housin g.
(5) Rotat e t he rear A/C conden ser fan coun ter-
clockwise and rem ove th e fa n from th e t op of the rear
A/C condenser housin g.
INSTALLATION
(1) Position the rear A/C condenser fan to the top
of the rear A/C condenser housing.
(2) Rotat e t he rea r A/C condenser fan clockwise to
enga ge th e fan to the four ret ain ing bolts. Tigh ten
the bolts t o 12 N·m (106 in. lbs.).
(3) Connect the condenser fa n wire har ness to the
rear con den ser fan suppression filter.
(4) Reconnect t he negat ive batt ery cable.
(5) In st all t he cover onto the rea r A/C conden ser
housin g (Refer to 24 - H EATING & AIR CONDI-
TIONING/DISTRIBUTION - REAR/A/C CON-
DENSER COVE R - INSTALLATION).
REAR A / C EVAPORAT OR
REMOVAL
WARNING: Refer to the applicable warnings and
cautions for this system before performing the fol-
lowing operation (Refer to 24 - HEATING & AIR
CONDITIONING/PLUMBING - WARNINGS) and (Refer
to 24 - HEATING & AIR CONDITIONING/PLUMBING -
CAUTIONS). Failure to follow the warnings and cau-
tions could result in possible personal injury or
death.
(1) Remove th e rea r A/C evaporator hou sing an d
place it on a workbench (Refer to 24 - HE ATING &
AIR CONDITIONING/DISTRIBUTION - RE AR/
REAR A/C E VAPORATOR HOUSING - REMOVAL).
(2) Remove t he five screws an d washers that
secure th e con densate dra in pan to the bot tom of t he
rear A/C evapora tor an d remove the dr ain pan (Fig.
23).
(3) Remove the in su lat ing tape from around the
area of the r ear A/C expansion valve an d disconnect
the expa nsion valve from the rear A/C eva por ator
(Refer to 24 - HE ATING & AIR CONDITIONING/
PLUMBING/REAR A/C EXPANSION VALVE -
REMOVAL).
(4) Remove the left blower motor from t he rear
A/C evaporator housing (Refer to 24 - HE ATING &
AIR CONDITIONING/DISTRIBUTION - RE AR/
BLOWE R MOTOR - REMOVAL).
CAUTION: Be careful when drilling out rivets to pre-
vent damage to the rear A/C components.
(5) Remove the rivets th at secure the t hree covers
to th e rea r A/C eva por ator and remove the cover s.
(6) Remove th e four rivets t hat secure the rea r A/C
evapor ator the bot tom of th e r ear A/C evaporator
housin g an d remove th e eva por ator.
Fig. 22 Rear A/C Condenser Fan
1 - REAR A/C CONDENSER FAN
2 - BOLT (4)
3 - REAR CONDENSER FAN SUPPRESSION FILTER
4 - FAN WIRE HARNESS CONNECTOR
5 - REAR A/C CONDENSER HOUSING
Fig. 23 Rear A/C Evaporator
1 - REAR A/C EVAPORATOR HOUSING
2 - RIVET (12)
3 - COVERS
4 - REAR A/;C EVAPORATOR
5 - SCREW AND WASHER (5)
6 - CONDENSATE DRAIN PAN
24 - 84 PLUMBING VA