REAR DI SCH ARGE LI N E
DESCRIPTION
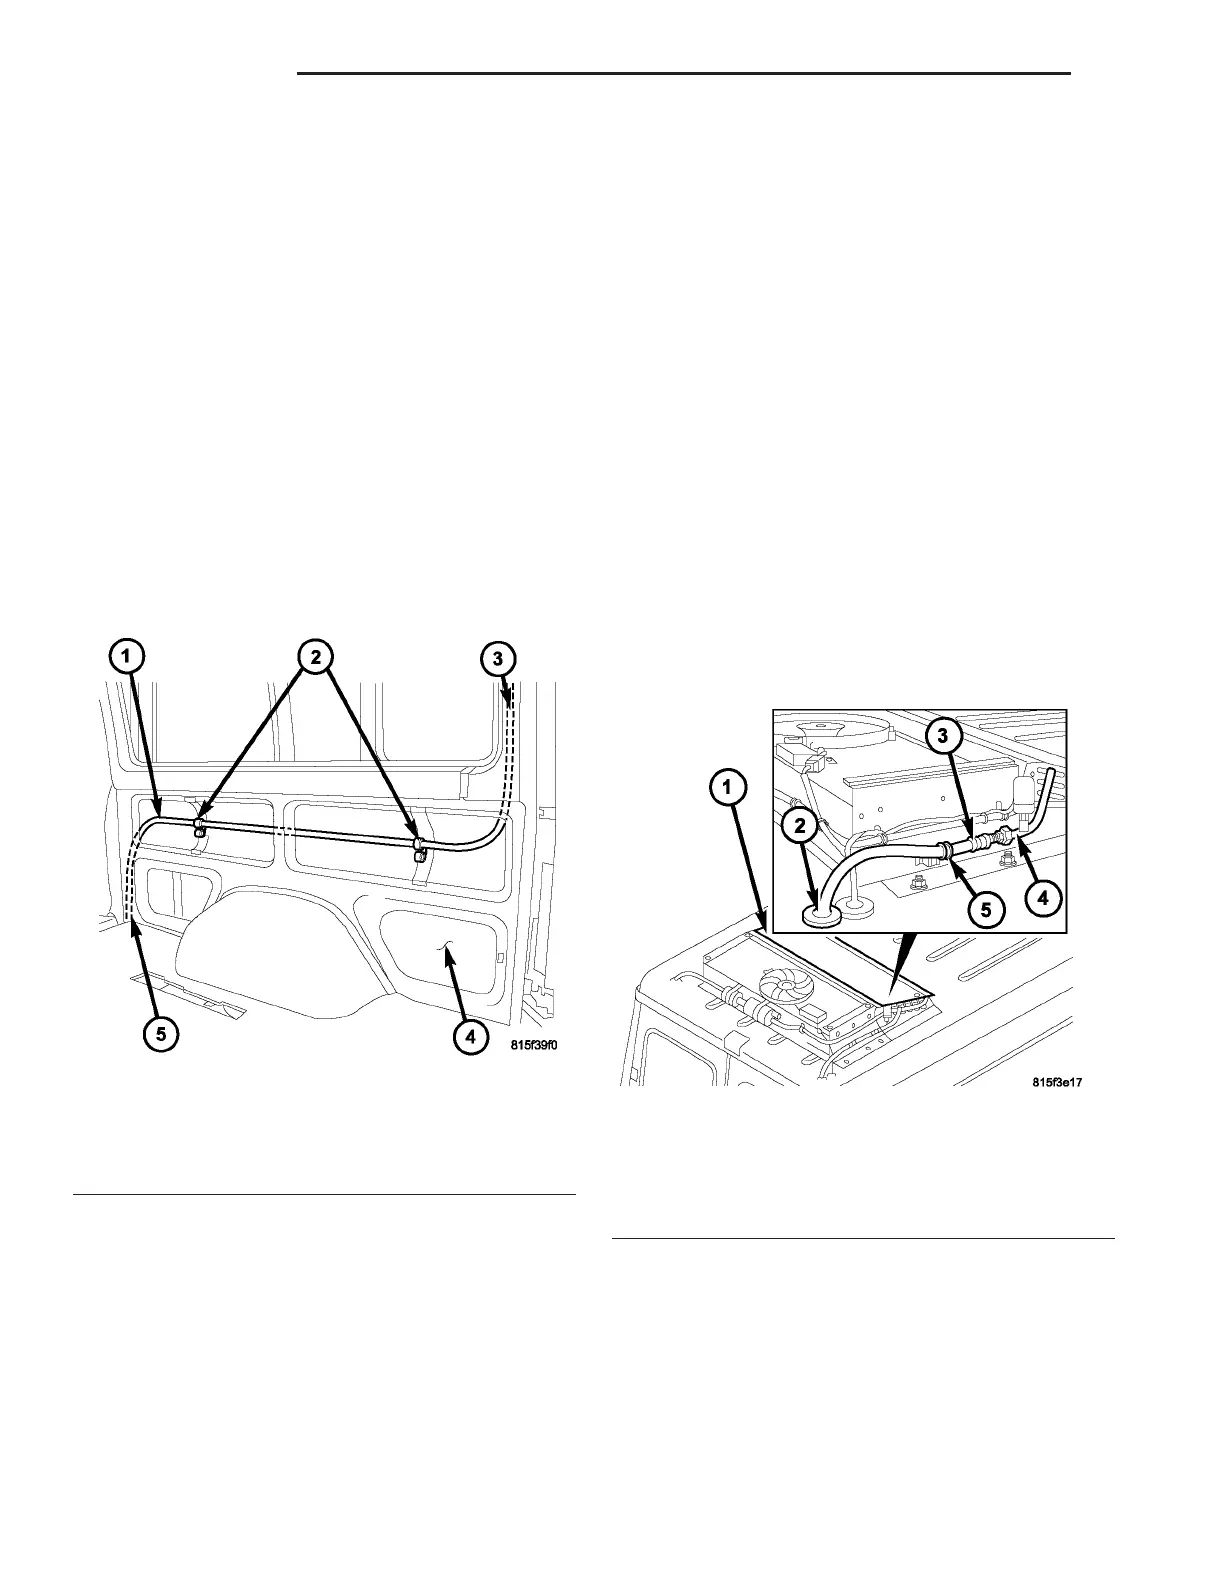
The r ear A/C dischar ge line is th e refrigerant line
that carries refr iger ant fr om the under body discha rge
lin e to the r ear A/C conden ser (Fig. 26). The rear A/C
dischar ge l ine is reta ined to the right qu art er panel
by two plastic retainin g clips.
CAUTION: Use only seals specified for the vehicle.
Failure to use the correct seals will cause the refrig-
erant system connections to leak.
The rear A/C discharge lin e h as no serviceable
pa rts except for th e O-ring seals. The O-ring seals
used on the connect ions are made from a special type
of rubber not affected by R-134a refrigera nt an d
must be repla ced wh enever t he rear disch arge lin e is
removed an d insta lled.
If the rear A/C discharge line is foun d to be lea king
or da maged, it mu st be replaced.
REMOVAL
WARNING: Refer to the applicable warnings and
cautions for this system before performing the fol-
lowing operation (Refer to 24 - HEATING & AIR
CONDITIONING/PLUMBING - WARNINGS) and (Refer
to 24 - HEATING & AIR CONDITIONING/PLUMBING -
CAUTIONS). Failure to follow the warnings and cau-
tions could result in possible personal injury or
death.
(1) Disconn ect and isolate the negat ive ba tter y
cable.
(2) Remove th e cover from the rea r A/C evapor ator
housin g (Refer to 24 - H EATING & AIR CONDI-
TIONING/DISTRIBUTION - REAR/A/C EVAPORA-
TOR COVE R-REAR - RE MOVAL).
(3) Recover the refr iger ant from the rear r efriger-
ant system (Refer to 24 - HEATING & AIR CONDI-
TIONING/PLUMBING - STANDARD PROCEDURE -
REFRIGERANT RECOVERY).
(4) Remove the cover from the r ear A/C condenser
housin g (Refer to 24 - H EATING & AIR CONDI-
TIONING/DISTRIBUTION - REAR/A/C CON-
DENSER COVE R - REMOVAL).
(5) Remove th e screw and br acket th at secu res the
rear A/C disch arge line to the right side of th e r ear
A/C condenser housin g (Fig. 27).
(6) Disconn ect the rear A/C disch arge line from th e
rear A/C condenser and r emove an d discar d the
O-rin g seal.
(7) Disengage the dischar ge line grommet fr om the
roof panel and pu sh t he gromm et down int o the
cargo compartmen t.
(8) Remove the r igh t quar ter trim pan el (Refer to
23 - BODY/INTERIOR/QUARTER TRIM PANEL -
REMOVAL).
(9) Remove t he r etaining strap th at secures the
rear A/C wir e har ness to th e rea r A/C discharge line
at the ceiling and position the wire h arness out of
the way (Fig. 28).
Fig. 26 Rear A/C Discharge Line
1 - REAR A/C DISCHARGE LINE
2 - RETAINING CLIPS
3 - TO REAR A/C CONDENSER
4 - RIGHT INNER QUARTER PANEL
5 - TO UNDERBODY DISCHARGE LINE
Fig. 27 Rear A/C Discharge Line to Rear Condenser
1 - REAR A/C CONDENSER
2 - GROMMET
3 - REAR A/C DISCHARGE LINE
4 - CONDENSER INLET TUBE
5 - SCREW AND BRACKET
24 - 88 PLUMBING VA