REAR LI QU I D LI N E
DESCRIPTION
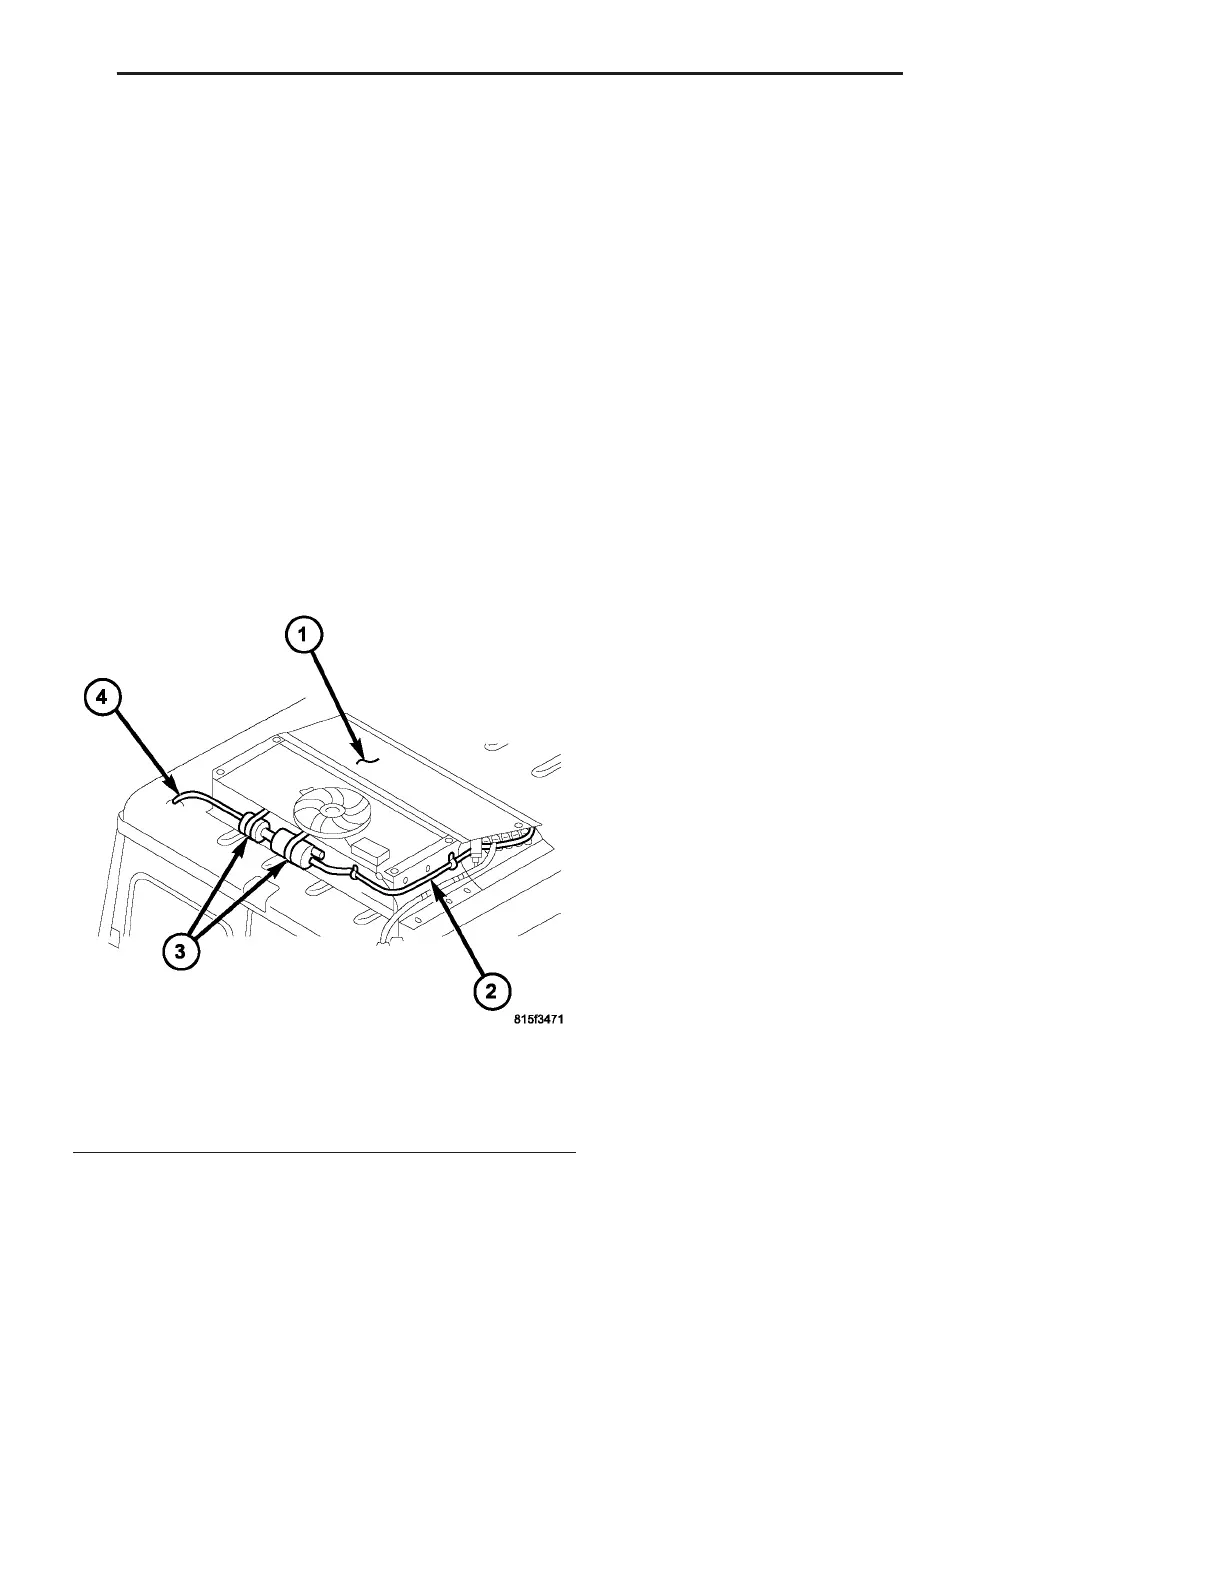
The r ear liquid lin e is th e refr iger ant lin e tha t car-
ries refrigera nt from the rear conden ser to the rea r
A/C expansion valve. The rea r A/C liquid line on this
vehicle is serviced in two sect ions (Fig. 30).
CAUTION: Use only seals specified for the vehicle.
Failure to use the correct seals will cause the refrig-
erant system connections to leak.
The rea r A/C liqu id lin es have no servicea ble parts
except for the O-ring seals. The O-rin g sea ls used on
the conn ection s are ma de from a special t ype of ru b-
ber not affected by R-134a refrigerant and must be
repla ced whenever th e rear liqu id lin e is removed
and installed.
If eit her of the rear liquid lines is found to be lea k-
ing or dama ged, it m ust be replaced.
REMOVAL
WARNING: Refer to the applicable warnings and
cautions for this system before performing the fol-
lowing operation (Refer to 24 - HEATING & AIR
CONDITIONING/PLUMBING - WARNINGS) and (Refer
to 24 - HEATING & AIR CONDITIONING/PLUMBING -
CAUTIONS). Failure to follow the warnings and cau-
tions could result in possible personal injury or
death.
CONDENSER TO RECEIVER / DRIER
(1) Disconn ect and isolate the negat ive ba tter y
cable.
(2) Remove th e air filter from the rea r A/C evapo-
rator hou sing (Refer t o 24 - H EATING & AIR CON-
DITIONING/DISTRIBUTION - REAR/AIR F ILTER -
REMOVAL).
(3) Recover the refr iger ant from the rear r efriger-
ant system (Refer to 24 - HEATING & AIR CONDI-
TIONING/PLUMBING - STANDARD PROCEDURE -
REFRIGERANT RECOVERY).
(4) Remove the cover from the r ear A/C condenser
housin g (Refer to 24 - H EATING & AIR CONDI-
TIONING/DISTRIBUTION - REAR/A/C CON-
DENSER COVE R - REMOVAL).
(5) Disconn ect th e r ear liqu id lin e from the rear
receiver/drier a nd rem ove and discard t he O-rin g seal
(Fig. 31).
(6) Disconn ect th e r ear liqu id lin e from the rear
condenser and remove an d discard the O-ring seal.
(7) Remove t he r etaining straps th at secu re the
rear A/C wire har ness to t he rea r liqu id line an d
remove th e liquid lin e.
(8) In st all plugs into, or t ape over th e opened rear
liquid line fittings and receiver /dr ier and condenser
por ts.
Fig. 30 Rear A/C Liquid Lines
1 - REAR A/C CONDENSER
2 - REAR LIQUID LINE (FROM CONDENSER)
3 - REAR RECIEVER/DRIER AND RESERVOIR
4 - REAR LIQUID LINE (TO EXPANSION VALVE)
VA PLUMBING 24 - 91