RESERVOIR TO EXPANSION VALVE
(1) Disconn ect and isolate the negat ive ba tter y
cable.
(2) Remove th e cover from the rea r A/C evapor ator
housin g (Refer to 24 - H EATING & AIR CONDI-
TIONING/DISTRIBUTION - REAR/A/C EVAPORA-
TOR COVE R-REAR - RE MOVAL).
(3) Recover the refr iger ant from the rear r efriger-
ant system (Refer to 24 - HEATING & AIR CONDI-
TIONING/PLUMBING - STANDARD PROCEDURE -
REFRIGERANT RECOVERY).
(4) Remove the cover from the r ear A/C condenser
housin g (Refer to 24 - H EATING & AIR CONDI-
TIONING/DISTRIBUTION - REAR/A/C CON-
DENSER COVE R - REMOVAL).
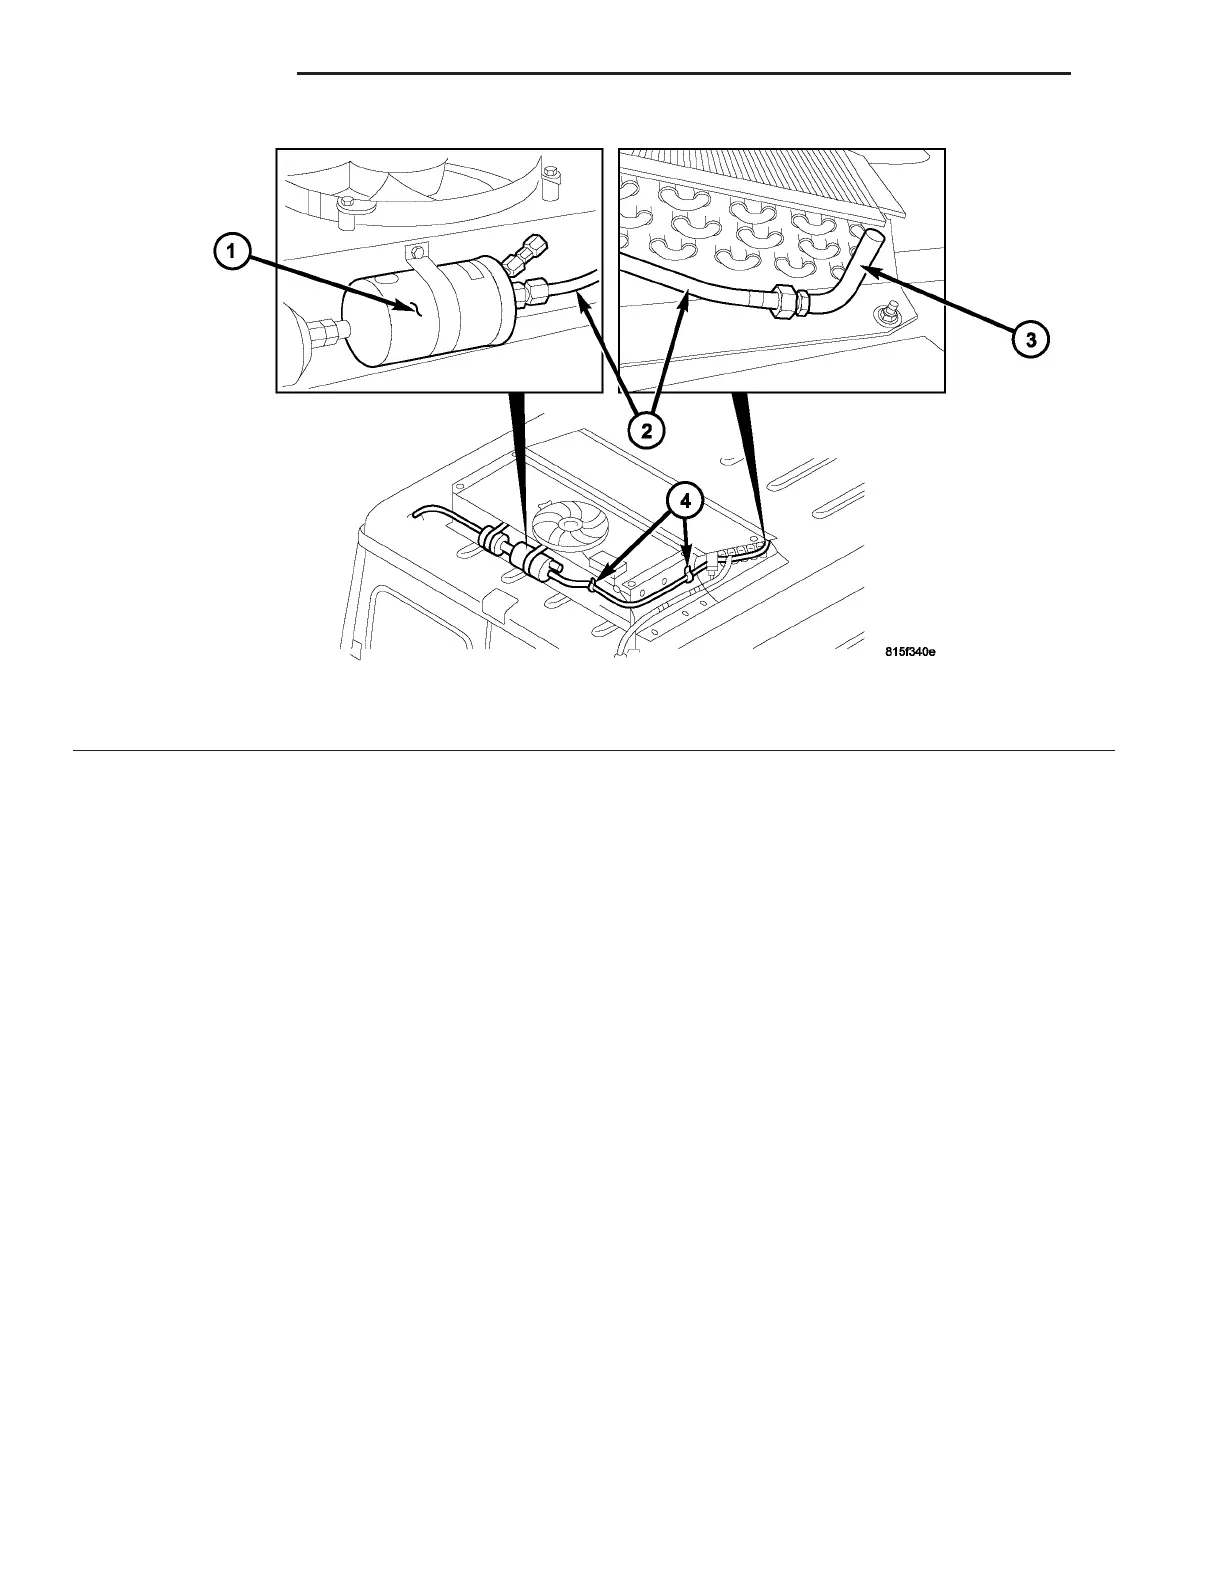
(5) Disconn ect the rear liqu id line from the reser-
voir and remove and discard the O-ring seal (Fig.
32).
(6) Disconn ect th e r ear liqu id lin e from the rear
expan sion valve a nd remove an d discard th e O-ring
seal.
(7) Disengage the liquid line gromm et from the
roof pan el an d remove th e liquid lin e.
(8) In st all plugs into, or t ape over th e opened rear
liquid line fit tin gs a nd reservoir and expansion valve
por ts.
Fig. 31 Rear Liquid Line - Condenser to Receiver/drier
1 - REAR RECEIVER/DRIER
2 - LIQUID LINE (FROM CONDENSER)
3 - REAR A/C CONDENSER
4 - RETAINING STRAPS
24 - 92 PLUMBING VA