INSTALLATION
(1) Pack space bet ween dust lip and sealing lip on
seal r ing wit h mult i-purpose grea se.
(2) On sea ls wit hout rubberized ext erna l sur face,
coat outer circum ference with sea lan t.
CAUTION: Do not coat partially rubberized seals
with sealant.
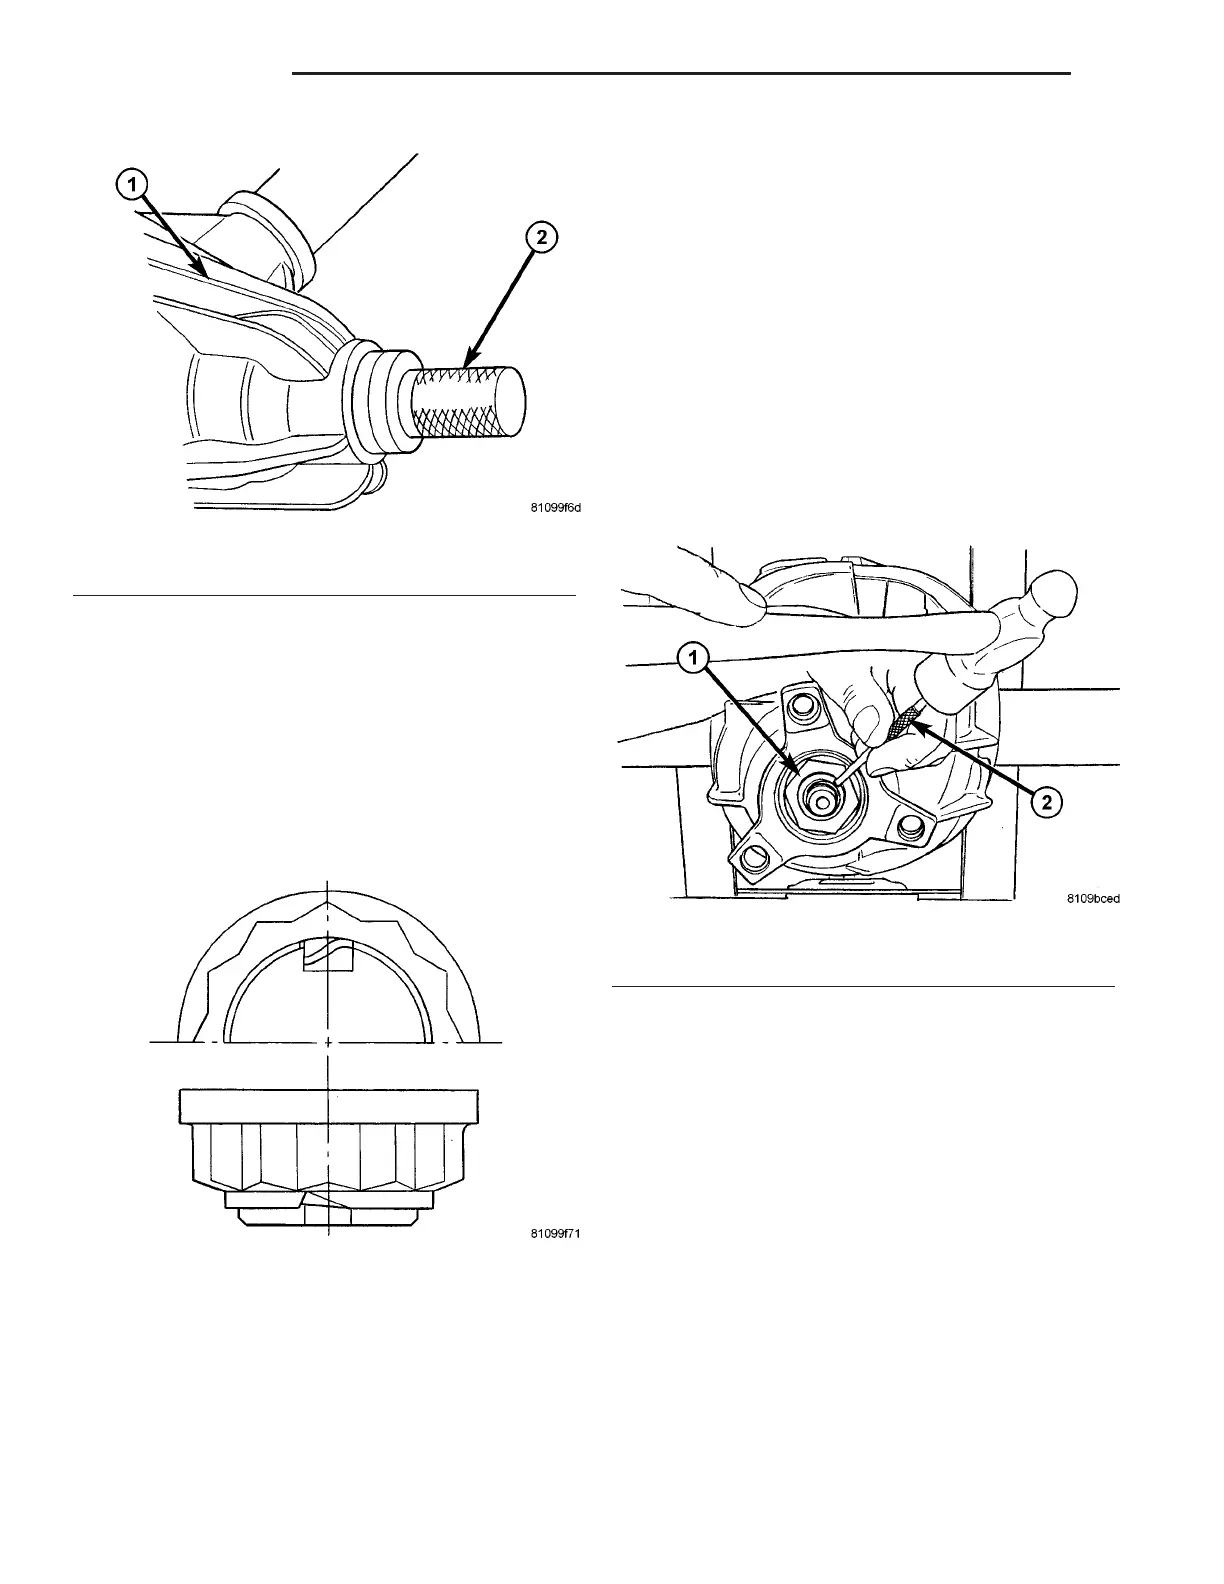
(3) Drive new pinion sea l/seals into rear axle
housin g as far as the stop using Inst aller 9276 (2)
(Fig. 60).
(4) Fit coupling fla nge on drive pinion shaft.
NOTE: The groove in the drive pinion and the
groove in the joint flange must be in alignment.
(5) Hold pinion fla nge wit h Flange Wrench C-3281.
(6) Tighten collar nut to 100 N·m. (74 ft. lbs.).
(7) Usin g a dial indica tor check free play at pin ion
flan ge.
NOTE: Should bearing not be free of play, tighten in
increases of 10 N·m. (88 in. lbs.) to maximun of 130
N·m. (95 ft. lbs.). If bearing is not free from play at
130 N·m. (95 ft. lbs.) collapsible spacer must be
replaced.
(8) Iden tify the position of the pinion to t he nut
twevle points and mar k pin ion and n ut.
(9) Turn nut pinion n ut 30° (one twelve point).
Them rot ate pinion thirty times.
(10) Measure torqu e to rotat e. The torque t o r otat e
must be 0.1-0.2 N·m (0.9-1.7 in. lbs.) higher t hen
recorded t orque.
NOTE: If value is below or above collapsible spacer
must be replaced.
(11) Cut th e colla r of the colla red nu t (Fig. 61).
(12) Bend collar nut (1) so it touch es t he wall of
the slot in th e pinion shaft (Fig. 62).
Fig. 60 PINION SEAL INSTALLER
1 - AXLE
2 - INSTALLER
Fig. 61 COLLARED NUT
Fig. 62 BEND COLLAR OF NUT
1 - COLLARED NUT
2 - DRIFT
3-40 REARAXLE VA